I made a size 2T skirt, so thats the size I'm writing this tutorial for, you will have to adjust the length and width according to the size you're making.
Here's the list of materials:
First body of the skirt. Lets take two co-ordinating fabrics for that.
Piece 1: Length ( cut on the grain) - 11 inches, width ( across the grain) - full width ( 36 inches)
Piece 2: Length ( cut on the grain) - 8 inches, width ( across the grain) - full width ( 36 inches)
Belt loops:
Length ( cut on the grain) - 3.5 inches, width ( across the grain) - full width ( 36 inches)
Belt:
1 inch wide grosgrain ribbon: Approximately 40 inches
Hems:
Bias Tape ( optional )
So lets get started:
Sew the lengths with right sides together to create two tubes as shown above. Since we have taken
the whole width, we needn't worry about finishing the seams. Selvedge doesn't fray.
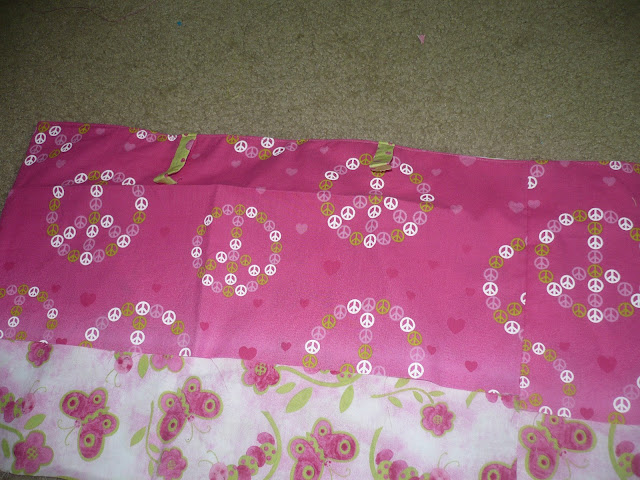
Now insert the smaller tube over bigger tube such that wrong side of bigger tube is with right side of the smaller tube. Set aside. Now lets work on belt loops.
cut a 3.5 inch wide piece across the width. Sew it into a tube along the width ( longer side together, right sides together). Turn. Bring the seam in the center of the tube. Iron it into a flat strip. Cut into 5 equal pieces.
Shown below.
Now pin each of these pieces in the skirt body such the it is sandwiched between the bigger and smaller tubes of skirt body. Also be careful to keep the seam facing the smaller tube. We don't want the belt loops
showing their seam on the front of the skirt. I think the following two pics illustrate this step better.
Now sew across the top of this tube pinned with belt loops. Making sure the you're catching both the skirt pieces as well as belt loops.
Now turn, iron and topstitch and you will get something like this:
Now fold the top down about 1.5" and iron to make a crease. Now fold the free ends of belt loops to match this crease and secure these ends to the skirt by topstitching them.
Now sew a line over this crease to create a place to put an elastic. Make sure you leave about 2 inches of opening to insert elastic.
Now insert your elastic from the opening between both layers of the skirt. Secure it with a pin and test it the
width of the skirt looks good. Adjust according to your desire width.
Sew the elastic closed using a zigzag stitch:
Be careful here, the elastic should be straight within the skirt waisband.
Sew the elastic opening shut.
Finish the hems with a bias tape, or just turning and topstitching them.
Insert a wide co-ordinating grosgrain Ribbon through the belt loops. Tie a bow.
Step back and marvel at the Layered Spring Skirt. Here's mine:
This was my first attempt at a a tutorial. Hopefully some of it made sense. Let me know if you have any questions. I'll try my best to clarify them.


This looks so cute!!
ReplyDeleteThis skirt is ADORABLE!! I love the combinations of fabrics you put together! Top it off with a cute big bow and what could be sweeter! LOVE IT!
ReplyDeleteBeautiful! I love the bow - nice touch!
ReplyDeleteAndrea
www.addicted2tutes.blogspot.com
What a pretty skirt! I love the bow - and your combination of fabrics are so pretty!
ReplyDeleteI would love if you came over and linked this project to my weekly Round Tuit party at:
http://jembellish.blogspot.com/
Have a great week!
Jill @ Creating my way to Success
Hey Jill,
ReplyDeleteThanks for stopping by. I linked to your party. Thanks for inviting me.
How fun! I am having a little girl here in 9 weeks. I love this. Thanks for sharing over at Tuesday Tell All.
ReplyDeleteMelissa
MyCraftieLife.Blogspot.com
that is adorable!!
ReplyDeleteSooo cute! I love the fabrics you used. Thanks for sharing.
ReplyDeletePaige
www.ribbonsandricrac.blogspot.com
That is so cute. I love all those fabrics and how they look so good together. Great job!
ReplyDeleteThanks for linking up to the Sunburnt Cow link party. :)
Cheers,
Tracy
OMG! Too cute--I want one for me! Thanks for linking up to Sew Woodsy!
ReplyDeleteThis skirt is Darling!!! With a capital D! ;)
ReplyDeleteSuper cute, my girls want me to make them dresses.
ReplyDeleteThanks for linking up to Make & Share. Good News! I found a thumbnail linky and updated it with your blog post.
Hi, my first time here. I LOVE your skirt! I am wanting to learn to sew and I think I'll give this a try sometime in the near future. Hopefully before my 2 year old grandbaby goes to high-school ha ha. :)
ReplyDeleteThank you for sharing you did a great job!
Happy Mother's Day!
Laura
Thanks! I think I will have this on my list of must do's! I have 4 girls and every one of them is a "girly" girl. So this will be fun to have them all match. Age 10 years - 20 months is a hard spread to buy for, so if I want them to match I have to make stuff. Thanks for the great tutorial!
ReplyDeleteHow cute is this skirt!!! LOVE the peace sign fabric!!! We featured this on Truly Lovely today from the Fancy This Fridays link up! Hope you'll check it out and grab a button! :) http://trulylovelywiththelaneysisters.blogspot.com/2011/05/fancy-this-features-edition-23.html
ReplyDeleteThank you for linking up to Sew Woodsy. Just wanted to let you know that I featured your skirt this week. Please make sure you grab a featured button and display it proudly on your blog.
ReplyDeleteGreat idea! Thanks so much for the tutorial!
ReplyDelete