Today's tutorial is a guest post from Remona of
The Stitching Scientist.
It rarely happens that something comes out of nowhere and leaves you wowed! When Remona asked me for guest post explaining that she is a new blogger I reluctantly clicked on her blog thinking that it might be just a roughly put together blog with a couple of posts ( yeah! something like the way mine looked..and still looks) but oh my! was I in for a shock! Her blog is so professionally put together, starting from social media icons, down to the well clicked shots, everything is polished to perfection. And don't even get me started on her tutorials. I had such a hard time picking a couple to highlight here. Once you look at them you will know why:
Take for instance this
Bow clutch:
Swoon..sigh! I would love to carry this baby to a party.
Or this
Gypsy Doll Face Pillow. My daughter would bug me until I make her one if she sees this.
I could go on and on about sewing freebies she has on her blog but lets talk about this Pleated Peekaboo Skirt that she has brought us today. You can check her
complete sewing tutorials here.
Take it away Remona...
I would really like to thank Anshu for giving me the opportunity to
guest post on her blog. I am fan of her work and she is truly an
inspiration.

I decided on this pleated peekaboo skirt because I
think pleats are a true classic for back to school styles. I found this
alphabet fabric at my local fabric store and fell in love with it. What
better than a pretty little skirt for my pretty little girl. I think
this will look great for fall with a cute yellow or white top or in the
winter with a cute pair of tights and cardigan.
The skirt has box pleats all the way around and is wrapped with a curved upper fabric. It is then tucked in on the side with a big button. It has an elastic waist which makes it easy for little girls to put on and take off by themselves.
Skill Level:Beginner
Time:
1 hour
Supplies (2T):
1/2 yard of bright colored cotton
1/4 yard of coordinating upper fabric
1" wide Elastic 20" long
Liquid Starch
Pattern:
Self drafted - Drafting instructions included
Seam Allowance:
1/2"
Techniques Used:
Box Pleats
Construction:
For the main fabric, measure the waist of your child and multiply it by 3. My daughter's waist is 20" so I cut my main fabric 60" long. To get the width, measure from the waist to just on the top of the knee. My main fabric ended up being 60"x10".
For the coordinating top fabric, measure the waist of your child and multiply it by 2. To get the length, cut 2" shorter than your main fabric. My measurements for the upper fabric ended up being 40"x 8".
For the elastic, take the waist measurement plus 1". Mine was 21".
To make the upper part of the skirt:
Fold the upper fabric in half. Put a mark on the bottom of where the fold is. Put another mark about 3" from the top of the other end. Connect your two marks making a curve. Serge or zig-zag all your edges.
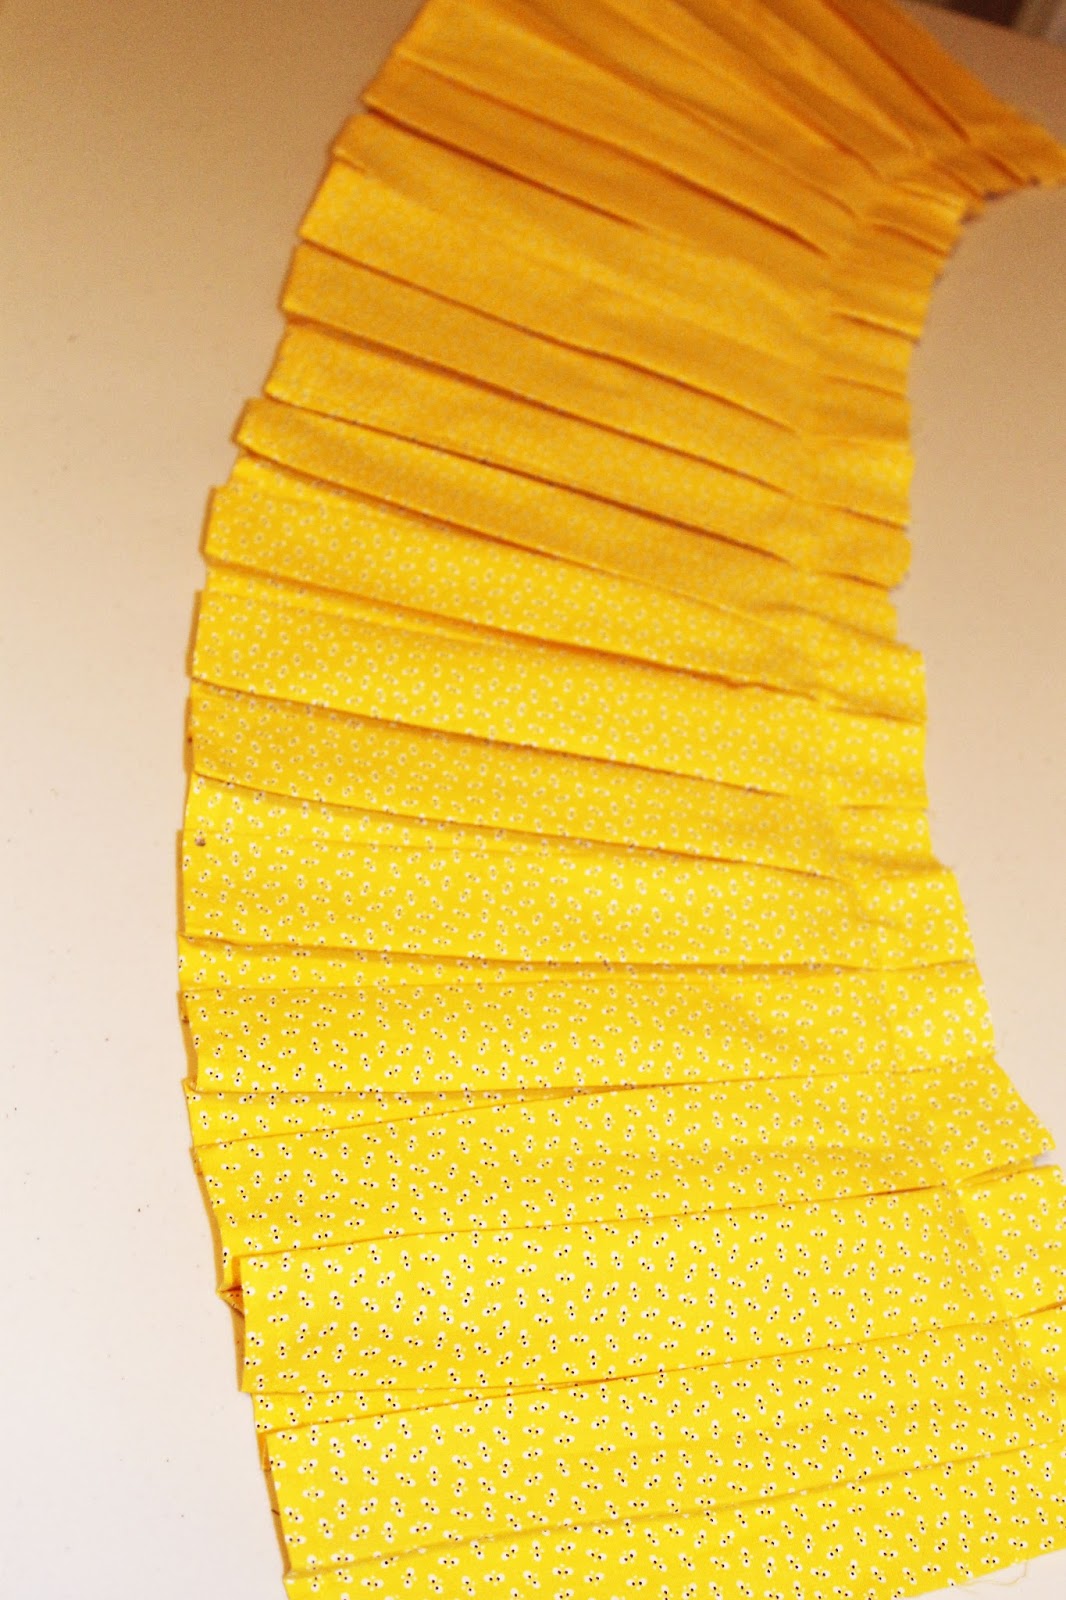
To make the main part of the skirt:
Hem the bottom of your fabric by folding 1/4" in and then another 1/4". Serge or zig zag the top and the sides of the fabric. Take your fabric to the ironing board and make 11/2" box pleats. This is done by folding 1/2" of the fabric in and then another 1/2" over (hard to explain). Here is a
video to help. The key to pleats in my opinion is good starch! Something that will hold down the pleats. I use
Mary Ellen Best Press Ironing Starch. The stuff is amazing. It holds pleats together even after washing.
Make box pleats with the entire fabric, starching and ironing as you do each one.
Once you have all the pleats done, sew a basting stitch about 1" from the top to hold the pleats in place.
Putting the two pieces of fabric together:
Take your upper fabric wrong side down and lay it on the top of your main fabric right side up. Sew the two together 1/12" from the top. If your fabric doesn't line up because of the pleats not being equally spaced, simply cut out a few pleats to make the bottom main fabric line up to the top.
Fold both pieces inwards and sew the ends close all the way down the side using 1/2" seam allowance.
Fold the top down and sew all the way around leaving 3" to thread the elastic through. Once the elastic is in, sew close your 3" opening.
To add the button, scrunch up the front piece of the upper fabric and hand sew the button.
That's it! Enjoy your little girl in her Pleated Peekaboo Skirt. I am sure all eyes will be on her as she models this creation to school!
Thanks Remona for stopping by. It was great to have you here at Blooms And Bugs.
Readers, if you liked the tutorial please visit
The Stitching Scientist and let her know or better yet subscribe to her blog so you don't miss the sewing awesomeness that she is going to share.