Showing posts with label free sewing pattern. Show all posts

Monday, November 18, 2013

Fort Firefly Shift Dress Free Pattern and Tutorial

Boatneck Shift Dress Free Sewing Pattern


I am having a real bad case of writer's block. I never thought it was even possible to have this happen to me. I'm a crafter/seamstress after all, writing is just a necessary evil to reach out to my readers. Was I ever wrong? I got the nasty block. Would you believe, that I have posts sitting all written in my composer just waiting for me to press 'publish' but I'm avoiding doing that...and I have no idea why.


I made this Fort Firefly Shift Dress Pattern and Tutorial for Birch Fabrics blog a while ago, but never got a chance to share it on my blog. So here it is - Fort Firefly Dress made with Fort Firefly Fabric Collection by Tegan White for Birch Fabrics.


The dress is full of cute details like this butterfly at the back, exposed decorative zipper and square pockets that go from front to back. It also has a yoke accentuating the boat neck. I'm sure you will like at least some of these details and I hope you will be inspired to try them in your own sewing.


Pin It

Friday, September 6, 2013

Free Sewing Pattern: Baby Kimono Top

Free Sewing Pattern: Baby Kimono Top
free sewing pattern kimono top

Here is my latest free sewing pattern and tutorial for Baby Kimono Top on Cutting Corners College ( Riley Blake Fabrics).

Kimono Top free pattern

This cute top features a yoke in the back and velcro closures. Makes a great baby shower gift and great "Sewing for baby" project.
The fabric I have used is Boy Crazy by Dani Mogstad for My Mind's Eye.


Pin It

Thursday, August 22, 2013

Free Sewing Pattern: Tahiti Halter Neck Top Sewing Tutorial

Tahiti Halter Neck Free Sewing Pattern
tahiti halter neck top pattern


I first found out about Modern Yardage from this Shirred Summer dress tutorial on Make It and Love It. "What a cool concept!" I remember thinking. Basically Modern Yardage has fabrics in a lot of prints and designs and you could order whichever fabric you like and they will print on demand. Yes! you can pick however much you like in whichever print you like and also you can pick the scale you want the print in ( they have three options) and they will print it and ship it to you. So you can rest assured that your favorite print will never go out of stock. What a novel idea!

So I read about them on Make It and Love It and asked them if they would like to sponsor fabric for a halter neck top I wanted to sew. They said yes and soon I had on my hands fabric from this beautiful Earth To Sky collection from Katie Schrader. The thing that struck me most about this collection was its earthiness, the colors reminded me of pottery and bricks being made of dirt. Very different from florals or paisley I typically like but beautiful nonetheless. I whipped up this halterneck the first chance I got.

Here is how I went about it ( and you can too)

Skill Level:
Intermediate

Time:
1  hour

Supplies:
3 fat quarters
1 button
For embellishment:
Decorative Buttons
Pellon Wonder Under

Pattern: 
Download the four-page Tahiti Halter Neck Pattern ( size 3T-5T). Print it on A4 (8.5 X 11 inches) paper with margins set to 0 and Portrait Orientation
Please note that this pattern has a lot of flexibility in terms of sizing. You could make it wider by adding more of shirred portion in the back. So the same pattern will work from 3 to 5 years size.

Seam Allowance:
1/4 inch unless otherwise stated.

Techniques Used:
Sewing buttonholes, Shirring, Appliques, Making and sewing Bias Tapes

Construction:

halterneck top sewing tutorial
1. Cut a rectangle 13 inch ( length) X 15 inch( width) from the fat quarter picked for the back. Fold it in half on 13 inch side.

Free halter neck pattern
2. Fill bobbin with elastic thread and sew 4 to 5 rows of shirring about 3/8 inch apart. Don't worry if doesn't seem to gather much. Once you are done sewing steam iron the piece well. this will help it gather well. Here is a great tutorial on shirring from Make It and Love It.
Depending on how much the piece gets shirred we may need to use the whole piece or a part of it. To determine this either measure the child's chest and subtract the front bodice width from it. The measurement you are left with + 1 inch is the required width of shirred piece.
However, if you can its best to not cut it just yet and measure it on the child once its partially sewn. That is the best way to check and adjust the fit. You need to have the child nearby in order to do this though. I will show you how to do it in step 6.

cut out the pattern pieces
3. Cut out the front pieces using the pattern. Cut one from the main fabric and one from lining.

sew with right sides together
4. Place the main fabric and lining right sides together. Sew along the armholes and keep going over the shoulder straps, neckline all the way to the end of another armhole. Leave the sides and bottom raw.
Snip notches all along the curves  to get a crisp finish along the edges when you turn it out.

sandwich the back between the front pieces
5. Open the front piece on the sides and slide the shirred piece in between such that right side of shirred piece is together with main fabric of bodice. Cover with lining fabric and sew along the sides. Note that the front pieces are curved along the sides, so while sewing the back pieces just follow the curve of the front, we will cut out any excess fabric later on.

sew along the sides
6. Stretch the other end of the shirred fabric to line up with the other side and sandwich the shirred piece the same way as we did in Step 5. Keep the back piece width to whatever measurement you arrived at in Step 2.
The rest of the piece will be hanging out on one side and that is fine, we will take care of it later once we have tried the top on the child.

Sewing tutorial - halter neck top
7. Turn the top out and iron. Its looking like the halter neck now. Now try this on the child and see if the back is a snug fit. Ideally it should be snug without being uncomfortable. If it is a good fit then go ahead and cut off the excess shirred piece that was hanging on one side, if not then unpick the side seam of step 6 and adjust the back width as needed.

making wide bias tape
8. Cut out a 3.5 inch wide fabric strip from the back fabric and fold it like a bias tape, only in this case the raw edges don't get folded all the way to the center. I kept mine at 1/4 inch on one side and 3/8 inch on the other. Basically what we need is a wide bias tape without sacrificing a lot of fabric. So the precise width of the fold doesn't matter, just fold a little bit so you can sew it. Here is a detailed tutorial on making and sewing bias tapes from MADE.

sewing the bias tape
9. Sew the bias tape from Step 8, all along the bottom of the top ( including the back).

sew button and buttonhole
 10. Sew a cute button and a buttonhole on the shoulder straps for closure. Buttonhole and Button sewing tutorial on MADE.

I was almost done with the top at this point...but then I noticed this on the fabric

applique tutorial
The fabric I had received had this swatch of the collection in all colorways. So cute, it was just begging to be added into the top. I obliged.
Here is a detailed applique tutorial from my earlier posts.

appliquing with wonder-under
11. I cut out a rectangle of Pellon's Wonder Under and ironed it on the back of swatch piece.

How to sew appliques
12. Then I cut out these triangles from the swatch and peeled off the backings. I ironed them in place along the bias tape slightly off center to the right.

applique tutorial

13. I set stitch length to smallest, set the machine speed to lowest and sew a seam along all the triangles with black thread.
I also added a couple of cute buttons near the neck.


And...woohoo! Who is ready for last bit of summer fun..in a cute halter neck?


Pin It

Wednesday, July 31, 2013

Easy Knit Dress Pattern and Tutorial - Pocket Full of butterflies

Free Sewing Pattern for Knit Dress: Pocket full of Butterflies


One of the biggest perks of sewing at home is customization. I have complete control on the design and embellishment of the clothes I sew, I could make them as blah or as whimsical as I want. It comes in handy when you have a rather opinionated toddler, who knows exactly what she wants and is very happy to let me know about it.


pocket full of butterflies dress pattern

Freezer paper stenciling was a technique I wanted to try for a long time. Little one's obsession with butterflies gave me the perfect opportunity to do it. I am totally in love with this dress, often what I envision in the beginning of a project is somewhat different from what I end up making, but this dress turned out just what I thought.
Do you have a little girl who would like a pocket full of butterflies? Well then, read on!

Skill Level:
Intermediate

Time:
3 hours

Supplies:
For Dress Base:
- Knit Fabrics Charcoal grey, 27 inches or 1 XXL size t-shirt
For Trims and pocket:
- yellow, 15 inches
For butterfly prints
- yellow Fabric Paint
- OR: Yellow Acrylic Paint + Fabric Paint Medium
-Freezer Paper
- Butterfly punches

Pattern: 
Download the four-page Knit Dress Pattern ( size 3T). Print it on A4 (8.5 X 11 inches) paper with margins set to 0.

For size 5T:

Download the four-page Stars + Stripes Knit Dress Pattern here (size 5T). Print it on A4 (8.5 X 11 inches) paper with margins set to 0.

Seam Allowance:
3/8 inch unless otherwise stated.

Techniques Used:
Sewing with Knits,  Binding the Neck/Sewing Bias Tape, Freezer paper stencils

Construction:

knit dress pattern pieces

Cut out the pattern pieces. Note that front and back pieces are the same in this style of dresses.

how to sew a knit dress

Sew a seam along the neckline with thread tails on both ends. Pull the bobbin thread slightly to gather the neckline, the neckline after gathers is about three inches.

Binding the necklines:
Cut out a yellow strip 2.5 inches X40 inches.
Fold the strip in half along the length and iron


binding the neckline

Align the raw edges of binding piece with raw edge of gathered neckline ( with the binding on the wrong side and sew a seam.

how to bind a neckline
neckline binding sewing tutorial
Fold the binding over to the right side and sew a seam on it as close to the edge as possible. Go slow and steady here to get a nice evenly spaced seam because this will be highly visible in the finished dress.

freezer paper stenciling
Sew the side seams ( right sides together)
how to freezer paper stencil

Cut out the stencil piece from freezer paper, just eye-ball an area from 5 inch above the hem-line in the right which gets wider as it goes to the left, there is no right or wrong pattern here. Punch the butterflies on the paper. Keep at it until its almost full. Keep the shapes random. If your punch can't reach in the center, fold the freezer paper in half and punch near the fold, to punch two butterflies at once.

freezer paper stencil tutorial

Place the freezer paper on the dress ( shiny side down). Iron without steam. In about a minute it should stick to the dress.

using punch for freezer paper stencil
Before you start paining insert a sturdy paper or card-stock inside the dress so the paint doesn't bleed to the back of the dress. Now paint over the butterflies with fabric paint and a wide brush.

how to stencil with punches
Let the dress dry for about an hour. Carefully peel off the freezer paper once the paint is dry to touch.

Cut out the pocket pieces

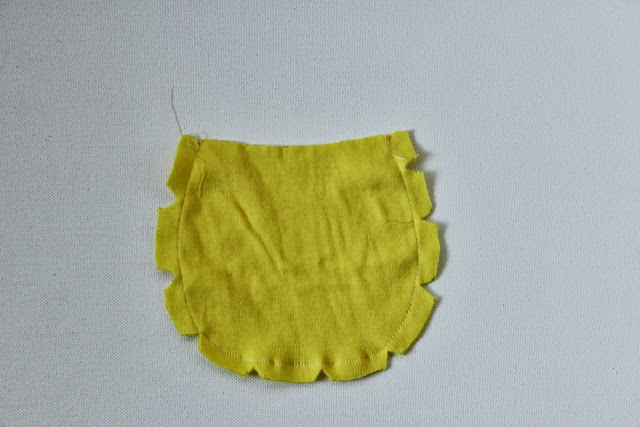
Sew along the sides ( right sides together). Clip notches along the curve for better finish.

Turn out. Sew seams along the raw edge. Pull bobbin thread to gather.

Cut a three inch wide strip of the pocket fabric. Make sure the length is equal to the length of the pocket top + 1 inch.
Fold it half inch onto itself on both ends. Now fold the strip in half along the width.

Place the pocket at the end of butterfly cluster and sew on the all the sides except the top.

To finish the armholes and shoulder straps:
Fold the binding in half and align raw with the raw edges of armhole ( on the wrong side of dress), leave 2 inches of binding tail on one side and sew along the raw edge.

Once you have reached the other end of armhole, leave another 2 inches of binding and sew the ends together ( right sides together). Make sure there is no twist in the binding when you sew them together.

Fold the binding to the right side, sew close to the edge of binding. Once you reach the end of the armhole, keep following the fold of the binding and continue sewing a seam near the edge until you come back to the starting point.
This finishes the armholes and shoulder straps together.

Repeat for the other armhole.

Sew on a cute, slightly mismatched button on the pocket. And voila! a pocket full of butterflies!

pocket full of butterflies dress tutorial


Pin It