Hope you all had a good long weekend, mine was mixed. With a birthday, a picnic, a trip to hospital, a circus and some good company we had quite a weekend. I have decided to just remember it as a happy one.
Here's a curved bodice dress that had been on my mind a lot lately. It went together very easily and I think the curve at the bodice works very well for little tummies. Here's the pattern ( 12 - 18 months size) and tutorial if you want to make one yourself.
Supplies:
Half yard knit fabric - fabric1
15 inches coordinating knit fabric - fabric 2
Iron on applique
Sewing margin - 3/8 inch
Sewing pattern:
Download the 4 page
pdf pattern for Tea Roses Dress (12 - 18 months size). Tape the pages together according to the instructions on the pattern.
Estimated Sewing Time: 2 Hours
Construction:
First cut the three pieces for the body of the dress ( as shown above)
Sew the front bodice to the skirt piece along the curve( right sides together). For better finish, start from the center of the bodice and go right and then start from the center again and go left. at this point you may find the bodice slightly wavy because of the curves. Steam iron it to smooth out the waves.
Align the front and back at the shoulders and sew a seam at the shoulders ( right sides together)
Now align the front and back along the sides and sew side seams ( right sides together). The body of the dress is ready.
Cut out the sleeve pieces from the pattern. Sew the sides of sleeves ( right sides together)
Now sew the sleeves to the dress. For a better finish, start at the shoulder seam and go up to the side seam from front. Then start at the shoulder seam again and go up to the side seam from the back. Iron.
For the neckband, cut a rectangle 3 inch X (2/3 of the neckline length).
Sew the shorter ends of the neckband ( 3 inch sides, right sides together)
Fold this tube in half on to itself.
Using the seam as one point make a mark at the half of the neckband, and then mark the quarter.
Now pin the neckband at each quarter of the dress neckline such that the seam falls at the center of the back of neck.
Now sew a zigzag seam along the neckline. Since the band length is lesser than the neckline length, you will need to stretch the band slightly as you sew. This will ensure a snug fit and prevent gaping necklines.
Embellishing the dress
I just kept the things simple with embellishing by just using a simple iron on.
I cut out the motif I wanted to use.
Placed it face down at the center of the bodice. Turned off the steam function of iron and cranked up the temperature to the hottest. Then I ironed on the applique for about a minute by putting the iron down on it and lifting occasionally ( instead of sliding on the applique)
Then I let it cool for about 15 minutes. Once it was only mildly warm to touch I peeled off the backing to reveal the applique.
Here's how it looked like once I was done. This is just like fabric now, you could do pretty much anything you would do with fabric ( eg. wash, iron and wear of course)
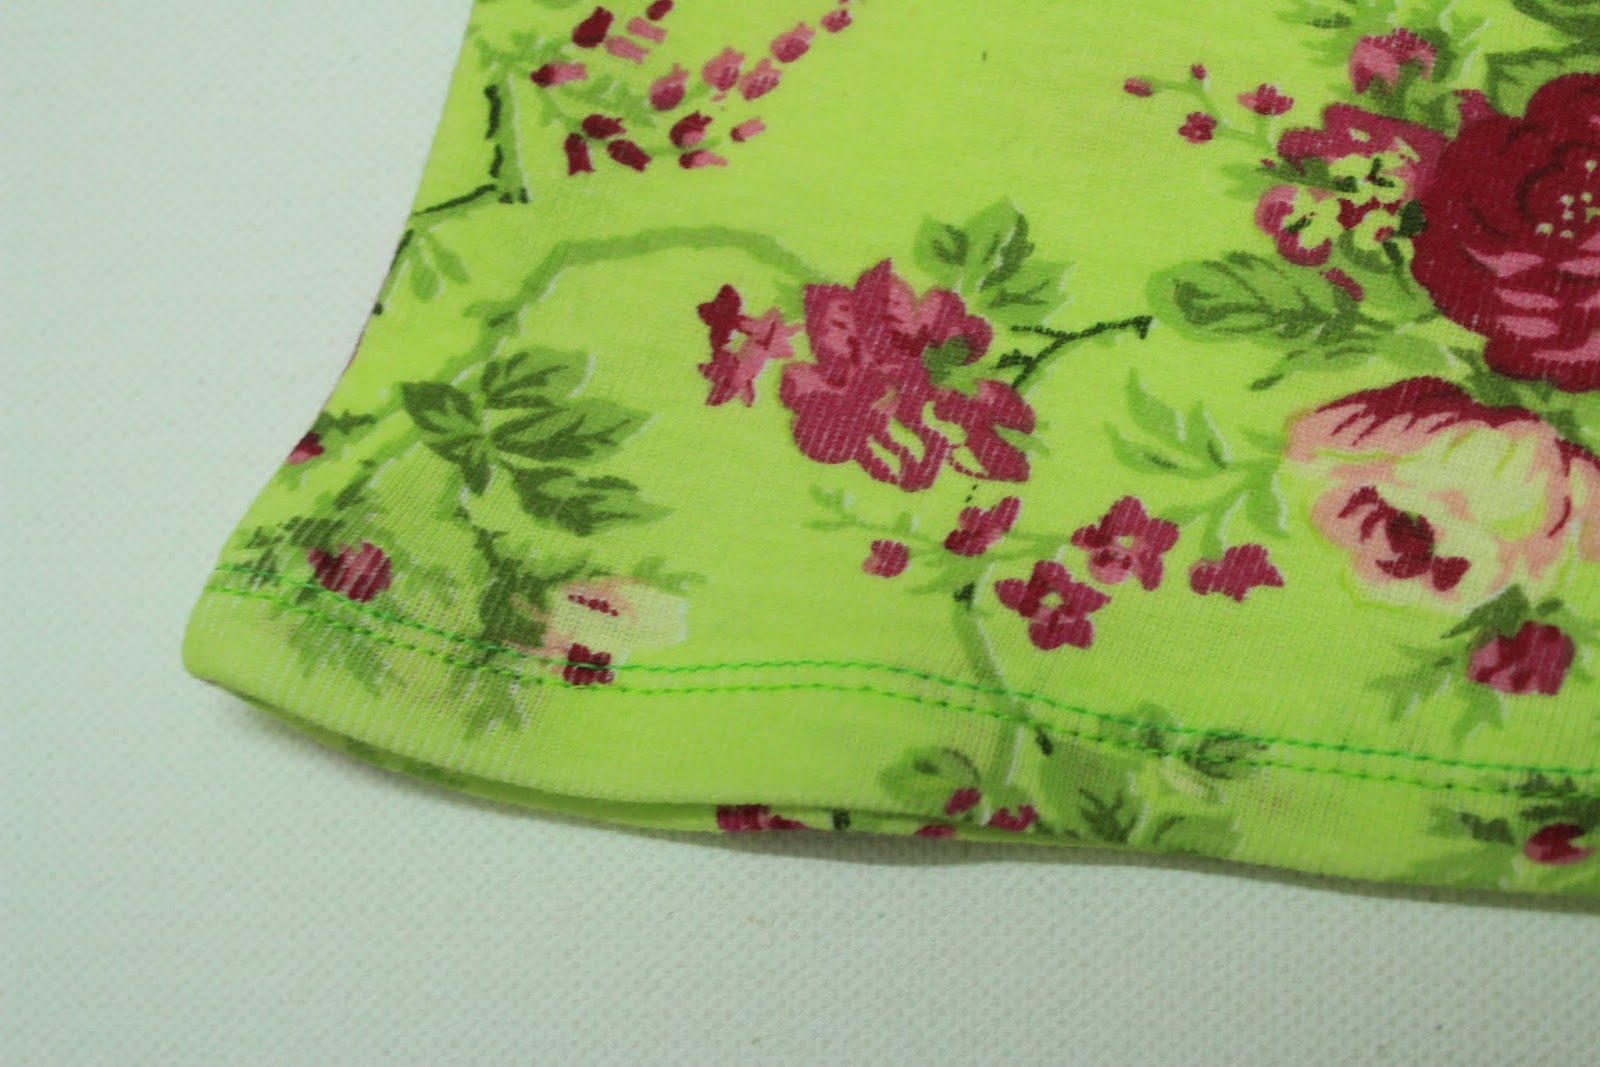
I finished the hem by using twin needles to sew a neat double-stitching at the hem. Since my fabric was medium weight interlock, there was hardly any lettuce edge. And whatever waves there were, half a minute of steam iron took care of them.
Tea Roses Dress is ready for the baby.


The curved bodice is very effective, Anshu.
ReplyDeleteHospitals are no fun! I hope everything is ok.
ReplyDeleteThis is adorable, and just my little girls size! I've always been afraid of iron ons but might have to give it a shot now. :)
Hello Anshu.. Visiting from fab folds challenge.. Yours is such a colorful blog with so many tutes for cute girls !! This is a lovely tutorial.
ReplyDeleteThanks! This is adorable! Hugs and blessings, Cindy
ReplyDeleteThis is such a sweet dress, and your tutorial is well written. This is on my to-do list of things to make for my daughter now! I hope you'll share it at Mar's Linky Party where I'm co-hosting this week. It'll fit right in with all the children-focused posts:
ReplyDeletehttp://thedomesticatedprincess.blogspot.com/2012/09/momma-mars-activity-corner-linky-party.html
Thanks,
Bonny
Looks really comfortable! Very Sweet.
ReplyDeletesuch a sweet silhouette - the fabric is great too! ~ Suzanne (http://winterwonderingswanderingswhatnot.blogspot.com)
ReplyDeleteslot online deposit pulsa
ReplyDeletesitus judi slot resmi
game slot terbaik
website judi online
agen judi online