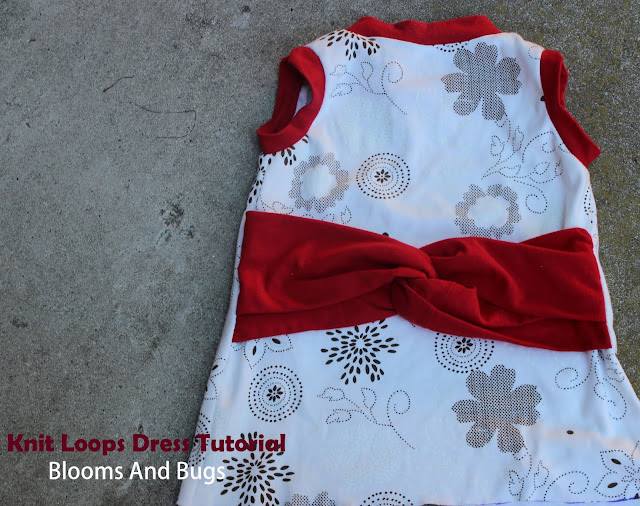
A couple of weeks ago I shared the Free Sewing Pattern for Knit A-Line Dress here. The dress I made turned out so comfy that my daughter chose to wear if often. So I used the pattern to make a different version of the same pattern.
This version was inspired by the T-Shirt Loop Dress that I saw a couple of years back on Me Sew Crazy. I loved how novel and stylish this design element was. Particularly, in knit dresses these loops eliminate the waist belts ( that keep coming undone ever so often) and still lend some degree of fit. I had been wanting to try this in one of my projects and finally did.
I love how this dress turned out.
Here is how I did it.
Knit Loops Dress
Level: Confident Beginner
Time: 2 Hours
Pattern:
Download the A-line Knit Dress Pattern in 3 years size here. Print on 8x11.5 inch paper.
Set the margins to 0. Print both pages on 8.5X11 inch paper and join with tape at the overlap area on page 1.
Print 2 copies of each page and tape page 1 and 2 together on both of them. Cut the upper neckline on the first one. This will become the back of the dress. Cut the lower neckline on the second set. This will become the front of the dress.
Seam Allowance: 3/8 inch unless otherwise specified
Material: Half yard base fabric, half yard coordinating fabric
Construction:
Refer the Knit A-line dress for the initial construction. Cut the pieces according to the pattern and join the front and back at shoulders. Here I will just highlight where this dress is made differently from the knit A-line Dress
Instead of sewing the whole length along the sides, just sew about two inches below the armholes to join the front and back.
Binding the neck:
In this dress I reverted to the easier way of just sewing a doubled strip knit fabric at the neckline and armholes to bind them, but I added a little twist to make it interesting. Here is how I did it:
Measure the length of armhole/neckline that needs to be bound. Cut a strip of about 3/4 of this length X 4 inches wide. Fold it width-wise and sew diagonally near both ends as shown in the pic above. Cut along the diagonal seam and turn out.
Overlap this binding about 1 inch at the ends and pin. Now pin at every quarter.
Now pin the overlapped portion at front center of the neckline and match the quarter length pins to line up at every quarter of the neckline. Since the binding is smaller than the neckline, there would be some gap.It is normal and required to get a good shape of the neck/armholes.
Now sew a seam along the neckline. Gently pull the binding to stretch it such that it becomes equal to the neckline as you sew. Once you are done, you will be left with a small 'V' or notch at the otherwise round neckline.
Repeat the same process for the armholes - pin the overlapped ends at the top, right along the shoulder seam and sew same as the neckline.
Making the loops at the back
Cut out a strip of 12 inch X 30 inch. fold in half and sew along the 30 inch edge ( right sides together). Turn out to get a wide tube.
Cut the tube into two 15 inches long pieces.
I forgot to take pics of the next steps, but they are very simple really. just places the tubes such that they look like to inter-looped 'U'. Pin them on the right side of the back piece such that they are about 2 inches below the armholes. Cover with the wrong side of the front piece and sew along the sides. Make sure to catch the ends of the loops in the seams.
Note: You can also refer to the original tutorial on Me Sew Crazy if you are not sure on how to sew and attach these knit loops.


slot online terbaik
ReplyDeleteagen slot dan togel
situs togel dan slot
togel singapore
slot online terpercaya