Showing posts with label dress sewing pattern. Show all posts

Monday, December 3, 2012

Dainty Floral Dress Pattern and Tutorial

dainty dress sewing pattern


I have always had this idea of a dainty little dress with very girly design elements like gathered shoulder straps ( sleeves), a cinched belt in the front and layered skirt. Often when I think of design, I have a clear picture of how it will all go together, but for this dress I didn't have everything chalked out. I just thought this beautiful floral print ( Suzette by Sue Zipkin for Clothworks) was perfect for putting my ideas to reality and everything just fell into place. I'm so pleased with how it all came together. My little miss wore it the other day and it just looked so good on her...I hope you would like it too and make it for your little bella.

Supplies:

3 half yard coordinating prints from Suzette
1 quarter yd print from Suzette
I used wandering vines in Red

Elastic thread - white
Coordinating Ribbon scrap - 5 inches
Coordinating Ric-rac - 1.25 yards


Pattern:
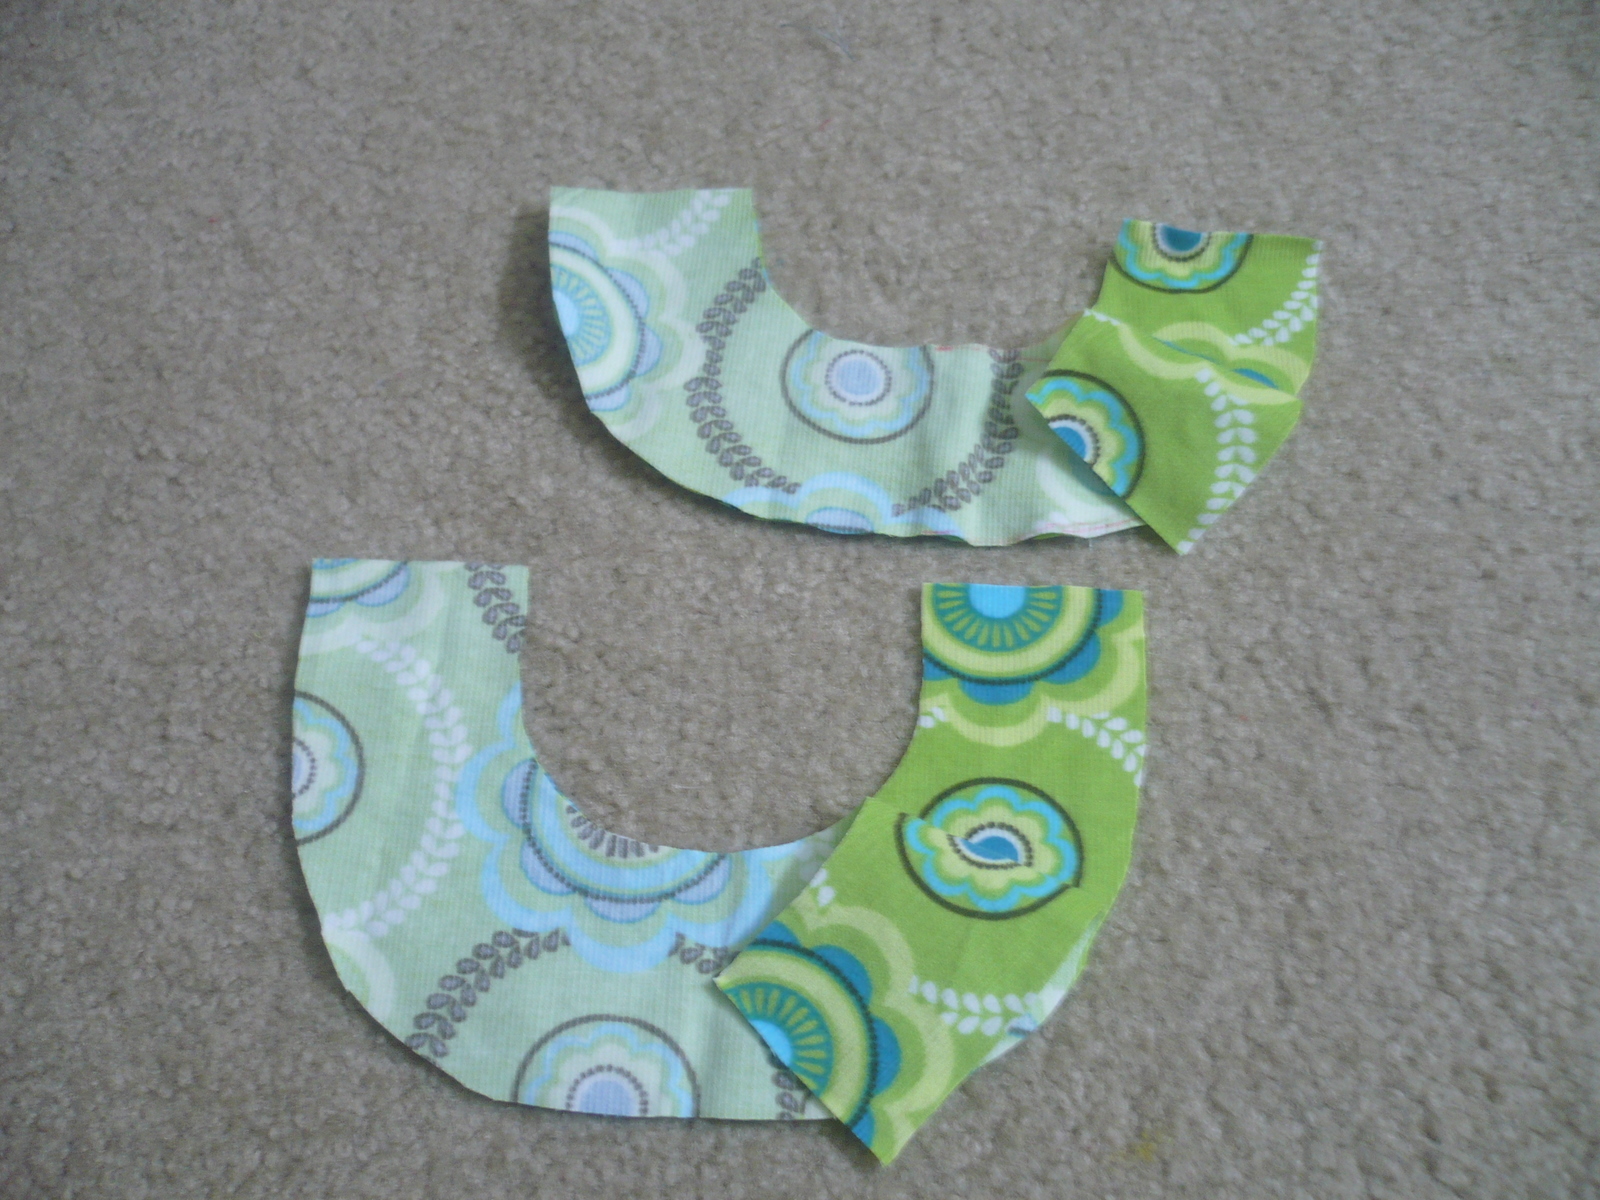
Download the pdf for bodice front here ( size 2T -3T)

Construction:
cut the pattern pieces

Using the bodice pattern, cut two pieces ( both on fold) one from the main fabric, one from lining. I used the same fabric for both, but you could use different fabrics for the outer layer and lining.

For the back of bodice cut a rectangle 8 inches X 22 inches. Fold it in half along the 8 inches and shir the doubled piece by sewing along the 22 inches edge. Starting at quarter inch below the fold. Sew 6 to 7 rows. Since you're shirring a double layered fabric, its possible that it doesn't ruffles much after shirring. Don't worry about that, Set your iron on high setting and turn steam function on. Iron on the shirred piece for a minute or so. You should see the piece shrink considerably by this.


Here's a great tutorial on shirring.

For the belt in front, cut a piece 4 inch X 11 inches. Fold in half along the 4 inch side and iron.

gathered sleeves pattern
For the sleeves, cut two pieces, 10 inches X 5 inches.
folding sleeve edges

Fold quarter inch along the 10 inch sides and sew a seam along both sides.
fold the long edges of both sleeve pieces

Fold quarter inch again along the 10 inch sides and sew a seam.
sew sleeve to the bodice

Set the stitch length to the longest and sew a seam along one 5 inch side on both the sleeve pieces. Pull on the bobbin thread to gather the pieces. Once they are gathered to two inches each. Sew them to the curved part of the bodice piece ( right sides together). Place them 3 inches apart at the center.

place the belt on the bodice

Also place the belt piece at the straight edge of the bodice. Sew along the raw edges at the bottom. Insert a scrap of ribbon at the center. The right side of the ribbon should be together with the right side of bodice fabric.
Place the shirred back bodice piece over the bodice front and sleeves. Back bodice right side should be together with front bodice right side. Align the sides.


Cover with the inner layer of the bodice front
Now cover the whole thing with the inner piece of the bodice, wrong side up.
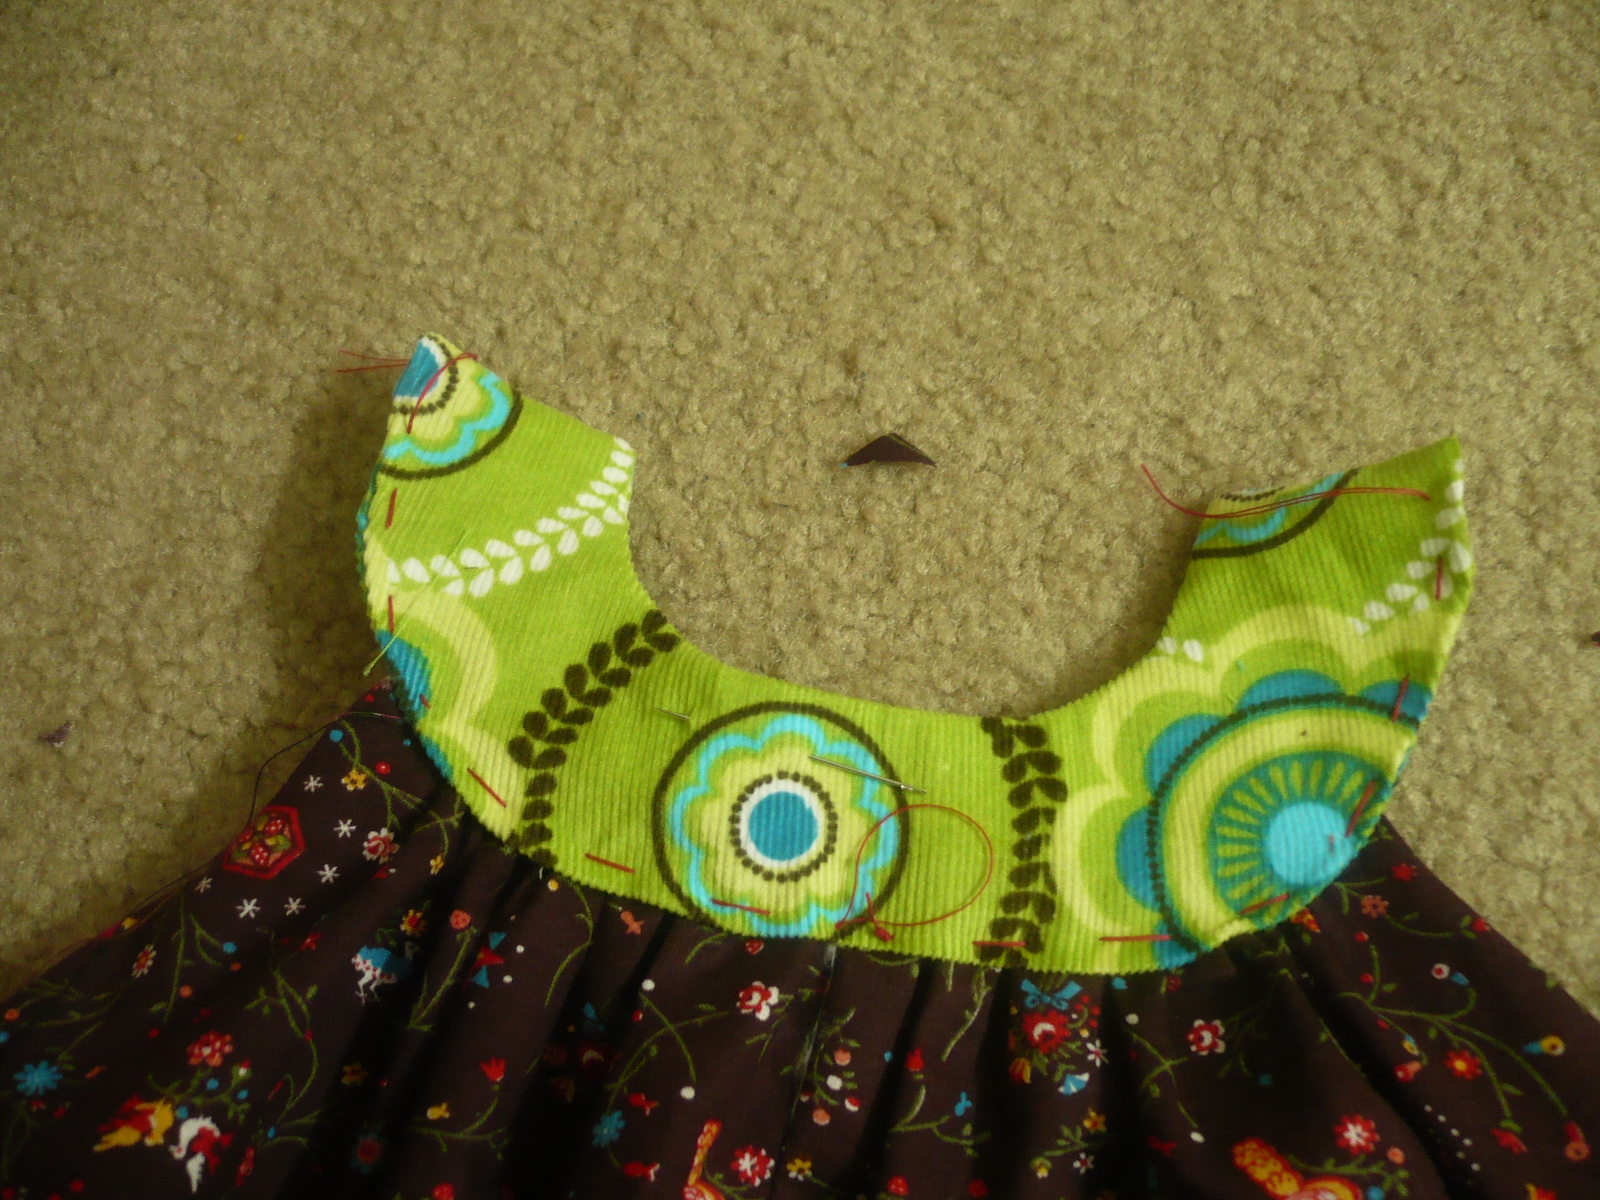
Sew a seam along the three sides ( except bottom edge) of the bodice. Make sure you're sewing through all the layers.
snip corners and cut notches along the curve
Snip the corners and cut out some notches along the curve ( only up to the seam, take care of not cutting into the seam).

sew down the ribbon in the center


Turn out. Poke the corners out with a sharp object like a pencil. Iron the bodice. Cinch the belt in front with the ribbon scrap you had sewn in the center. Sew the other end of ribbon down by hand sewing or machine sewing.


turn out the bodice

The bodice is ready. Lets work on the skirt next.

For the layered skirt I took two fabrics

Inner Layer 17 inch X 45 inch rectangle
Outer Layer 13 inch X 45 inch rectangle

Now these measurements may not work for all because my daughter is  really skinny and tall and I also wanted the skirt to hit below knees because she grows only vertically. So the easiest way to determine the length of skirts would be to measure the bodice against a dress which fits well. Whatever remains after bodice is length you need + 1.5 inch( for hemming and sewing margins).
Once you determine the length of inner layer, the outer layer would be 2 - 3 inches shorter than that. Mine is 4 inch shorter but that's because I have folded the inner layer about 1.5 inches, whereas outer layer has been folded less than one inch.
The width, on the other hand would work for a lot of ages ( at least 2 - 5) with the only difference being in the fullness of skirt. If you're making it for an average built 6 years or older girl then you may need to increase the width.

cut rectabngle fabric for skirt


Fold the skirt fabrics in half along the width ( right sides together) and sew along the raw short edges ( 17 inch and 13 inch respectively) This will turn the skirt fabrics into cylinders.


insert outer layer over the inner layer

Turn right side out and slip the smaller cylinder onto the bigger one. Align the raw edges at one end.

gather the top edge of the skirt

Sew two parallel seams along the aligned raw edge and pull on the bobbin thread to gather the skirts. Adjust the gathers by hand. Here, you have to make sure that the gathers are more concentrated in the front of the skirt ( the part opposite to the seams). We have to do it because the shirred part in the back will be automatically gathering the skirt fabric. I kept the front heavily gathered while the back almost flat. Adjust the gathers until the width of the skirt becomes roughly equal to the width of the bodice.

sewing the bodice to the skirt

Now slip the bodice over the skirt ( right sides together). Line up the raw edges of all the layers. Make sure the skirts seam is at the center of back bodice piece. Sew along the raw edge. Here shirred piece of bodice may need to be stretched as you need to sew along the flat fabric below the shirred part. That is the reason why we didn't gather the skirt much in the back.
turn out the bodice and skirt joint


Here's how it will look after you turn it out. The skirt was almost flat in the back before I joined it to the bodice. Now it seems fairly gathered. That's because shirring is causing it to gather.

hemming the inner layer


To finish the hem of inner skirt. Fold it twice onto itself ( quarter inch first and one and half inch next time). Sew along the fold.

fold the outer layer


To finish the outer layer hemline with a Ric-rac trim, first fold the hem quarter inch on the inside. Iron it to make a crisp edge.

sewing ric-rac on the hem


Now sew Ric-rac along the right side with the seam centered in the middle of Ric-rac.

sewing the ric-rac on hem
Now fold it on the inside and as close to the edge as possible. This will have half of the Ric-rac scallops peeking from the wrong side of the fabric.

gathering sleeves on the other end

To finish the other end of the sleeves ( shoulder straps). Gather their raw ends by sewing a seam and pulling on the bobbin thread.
sew the sleeves to the back

Place them inside the back bodice, about 1-2 inches apart in the center. At this point it will be helpful to try the dress on the child and estimate where you need to sew the ends of straps. I sewed them down about 2 inches below the upper edge of bodice. Sew 2-3 seams for strength as these will be carrying some weight when the dress is worn. Also don't forget to back-stitch these seams.

dainty floral dress sewing tutorial

Et Voila! Floral dress.


Sunday, January 29, 2012

Top 10 free dress sewing patterns and tutorials

Top Ten Free Dress Patterns

Photo credit: Sew Much Ado

The blogosphere is such a happening place, how ever many blogs I read I can never keep up with all the goodies that are being shared every minute somewhere on some or the other blog. I think many of you must be facing the same dilemma. So I have compiled a list of baby dress sewing patterns that I have always loved. I have tried some, some are the ones I have written and some are high up there on my list to try. Check it out over here.

Think I have missed some awesome tutorials?...leave a comment with the link on this post or the list page and I will include it in my next list.

Pin It

Monday, August 29, 2011

Sew Easy - Part 8 - The Java Beans Dress

Easy Sewing Tutorial: Round yoke dress pattern
Java Beans Dress Sewing Tutorial

You can read the story behind this series and the first part here. Click here to read the secondthirdfourth, fifth (Strawberry Vanilla Dress Pattern), sixth and seventh( Carnival Dress) edition of this series.


This Baby Cord has been sitting in my stash for a few months now. Looking at how much I loved this print in the first place, that was very very unusual, I had to do something about it. So I first made a pair of pants from these. But I still had some more of it. So I created this round yoke dress.
I have an amazing stash of brown/chocolate color quilting cottons, this print seemed to go so well with green brown print, I couldn't help pair these two.


Supplies: For making the dress for a two year old.
2 Fabrics in contrasting colors -
Fabric #1 - quarter yd. - Make sure this fabric has a little body - something like corduroy, denim would work better than quilting cottons.
Fabric #2 - half yd. any lightweight cotton fabric will do.

Buttons - two buttons coordinated with fabric


Measurements:

Measure the child at the shoulders to determine how wide should be the neck of the dress. Lets call this distance NW. It came out to be 4 inches for me.
Measure again starting from the point where neck and shoulder meet to how deep you want the neck to be.
Lets call it ND. It was 3 inches in my case.

Also measure how deep you want the neck to be in the back...lets call it BND.


Construction:

First lets cut out the neck/yoke of the dress:
1.
drafting the yoke of the dress


Fold fabric 1 into 2 along the width, now fold it again about 8 inches from one end Draw the lines as follows. Mark point A at ND inch from corner of the fold. Mark point E at ND+5 inches.
Mark point B at NW/2 inch from corner along the width. Mark point F at NW/2+5 inches.
Draw straight lines from A and B which meet at C.

Draw straight lines from E and F which meet at G.
You get two rectangles, one inside the other.

Note - If my pics look out of proportion, that's because I just took NW+3, and ND+3 for the outer rectangle...However, after finishing the dress I realized that a little wider yoke would work much better. So that's why I'm going with 5 inches, instead of 3.

2.

drafting the yoke of the dress


Now using those rectangles as guide, mark neckline at the inner rectangle and  yoke at the outer rectangle.

3.

cut out yoke

Cut Along the curve, and unfold once. If the fabric is joined at the shoulders, cut it apart.


4.
Repeat the same for back neck and yoke, just replace ND by BND.


5.


Here are both the neck pieces and their linings.


6.
 Now sew along the shoulders and neck line ( inner semi circle).

7.
Snip notches along the curve. Take care of not cutting into the seam

8.
Turn out, Iron.

9.
Do the same for back neck piece.

Now lets work on the skirt.


10.

Sew along the length to make a tube.


11.


Turn out and fold along the length, such that the seam falls on the fold. In the pic above, the seam is towards the left hand side. Now cut out a curve of about 2 inches radius from the other end ( that is, not on fold)
This is the cut for the armholes.

Note: This will become only part of the armholes, not the complete armhole because part of it will come from the yoke, where it doesn't get attached to the skirt. To further understand read on a few more steps.

12.
unfold. Here's what it looks like.

13.
Now turn the tube inside out once again, so that wrong side is outside. Now take a piece of fabric 2 and place it beneath the armhole such that right sides are together. Now sew along the curve.

14.


Cut out the extra part from the binding fabric.


15.

Cut the extra fabric along the curve such that you're left with a 1.5 inch wide strip parallel to the curve. Snip the seam allowance along the curve. This helps in turning the fabric easily along the curve.


16.
Turn the extra fabric inside.

17.

preparing the armholes

Fold the strip inside and sew. I chose to sew it inside by hand hemming...just because I sometimes feel like hand-sewing. You could either hand-sew the binding at armhole, or you could just use machine sewing.
Repeat the same for the other armhole.

18.
Now sew two parallel seams along the edge of the fabric starting from one end of armhole to another on. Pull the bobbin thread to gather the fabric.
 Repeat with the other side of the fabric from one armhole to another.

If it has the seam in the middle then its the back of the skirt, if it doesn't then its the front.

19.

sewing the yoke to the dress


Now adjust the gathers such that they cover the yoke except for 2-2.5 inches on either side.
Now sandwich the gathered skirt between the two layers of the yoke, make sure it is fitting evenly between the two ends. Now fold in the edges of the yoke from both layers and sew some running stitches to hold it in place. See picture, there are running stitches done in red on the outer edge of yoke.

Note: You can always use some pins to hold all the three layers together, but I have a certain phobia of pins. I avoid them as much as I can, especially on baby clothes. Its my worst nightmare that I would leave a pin in the finished garment and it will poke a little one...ouch! So you could use the pins but I'm more comfortable with big running stitches.

Note: The 2-2.5 inch that you leave on the sides will become the armholes that I had been referring to in step 11. 

20.
sewing the yoke to the dress


Now sew on along those running stitches as close to the edge as you can. You can't really see my seam here because its been done with a green thread. Just know that there's a seam along those red stitches. OK?
Pull out the running stitches.


button closures on the yoke

Now sew two coordinating buttons on the front shoulders and make two buttonholes on the back shoulders. You can use any other closures like, hook-eye, Velcro tabs or snaps here. I just love the button look that's why I went with buttons.
Hem the dress by folding once and sewing and then folding again and sewing. And you're done!
To be honest, I'm not completely satisfied with the proportions of the dress. I think I should have made the yoke wider so that the bodice wouldn't get overwhelmed by the skirt. Oh well! However, I did include the measurements for a wider bodice in the instructions, so yours will look better than mine.


round yoke dress sewing pattern


Somehow an elephant stumbled upon my Java Beans dress before my toddler could...

java beans dress sewing tutorial


java beans dress sewing tutorial


I know, I know, I need better props...but he's so cute!