

 |
| Front Bodice |
 |
| Back Bodice |
Materials:
- Half yard each of two coordinating wovens for the dress
- quarter yard of another coordinating woven for shoulder straps and elastic casing
- 1 inch wide elastic - 10 inches
- buttons - 2
Measurements:
- Measure all around the waist + 5 inches - Lets call it W
- Divide W by 6 = lets call it SW
- Measure the desired length from waist + 1 inch - lets call it L2
- Measure the desired hieght of yoke from waist - lets call it L1
- Measure the length of shoulder straps from back waist to front yoke = SL
Construction:
1.

Cut 6 strips of width = SW and length = L2 from each of the bigger fabrics. That will give you a total of 12 strips. Now join these strips along their longer (L2) sides in alternating manner. (Right sides together). When you join the last strip sew it back to the raw side of first one, creating a wide tube
2. Sewing the box pleat


3.

Repeat the process with all the black strips making 6 box pleats in total.
4. Sewing the front yoke:

I forgot to take many pics while attaching the yoke to the skirt so I'll try to explain it verbally and with some diagrams.
Measure the skirt waist after all the pleating. This is the final waist of the dress before we add elastic to it. The front of the yoke will cover about two-thirds of this length and the back will cover the remaining
First cut 1 piece of front yoke from each of the coordinating fabrics from the skirt. Sew along the top edges (right sides together). Cut notches along the seam, take care not to cut into the seams.

Turn out. Smooth the edges. Iron.
5. Sewing the shoulder straps:

Cut two strips 4 inch X 10 inch each from the third fabric. Fold them in half along the longer side and sew a seam with right sides together.
6. Sewing the back band:
Cut two strips of length = 2.5 inch X width= Remaining width of the skirt after the front yoke+1inch. Place them one over the other ( right sides together). Sandwich the shoulder straps between the two strips such that the raw ends of shoulder straps line up with the raw edges of back band
You could place the shoulder straps close together or about 2-3 inches apart.Sew a seam along the width of the back band.
7. Open the front yoke and align the ends of back band with the ends of front yoke and sew at the sides with right sides together.
8. Line up the front of jumper bodice (raw sides) with the center front of pleated skirt we had made earlier ( Right sides together). Sew along the periphery of skirt. The bodice is now attached to the skirt.
9. Fold the raw ends of inner layer about half inch on itself and iron.
10. Sew a seam right next to the bodice, making sure you're catching the inner fabric that you folded in step 9. Leave two gaps on either side of the front bodice to insert elastic.
11.
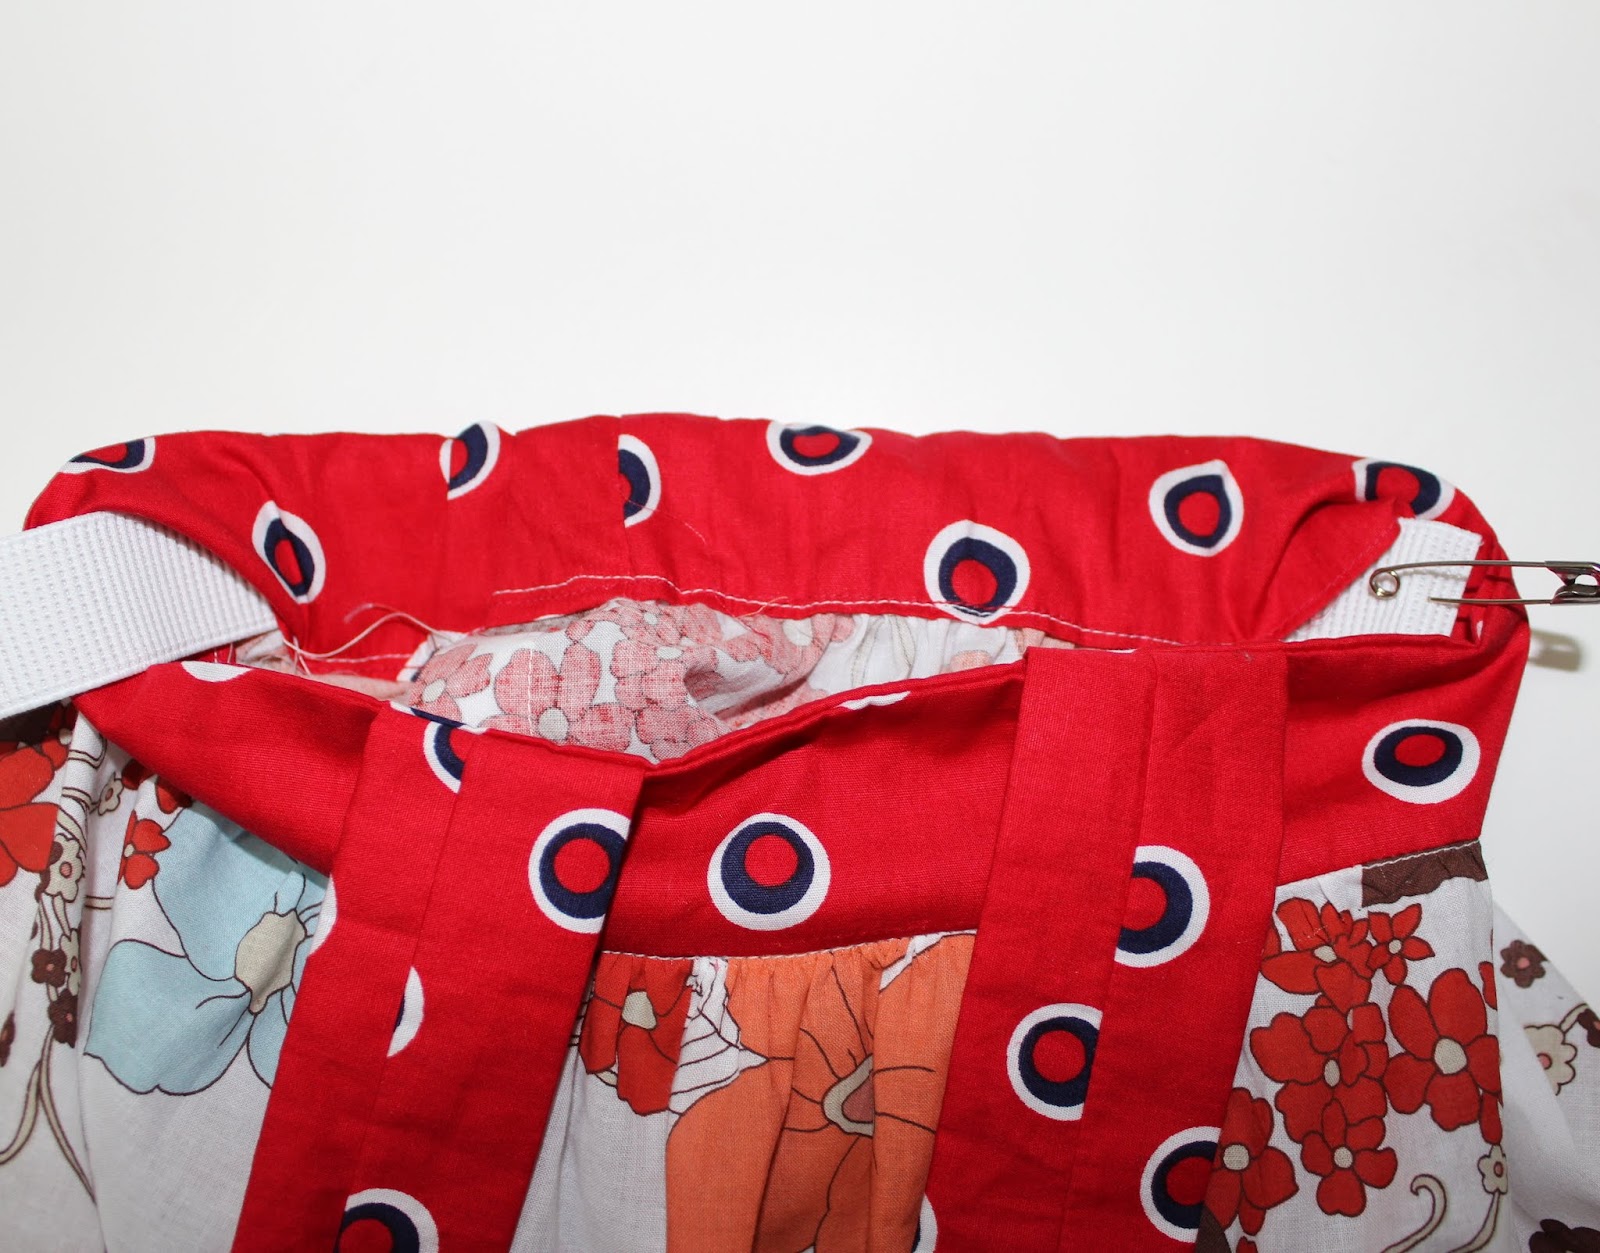 |
| picture from some other project, just to illustrate the process |
Insert elastic through one of the gaps with the help of a safety pin. Pull it out from the other end.
12. Pull the elastic such that the total width of jumper is about 2 inch less than child's waist.
13.
 |
| picture from some other project, just to illustrate the process |
Fix the elastic in place with zig-zag stitches at the ends. Go over the elastic 2-3 times with zig zag stitch to reinforce. This seam will be under a lot of stress when the jumper is worn so you want it to be strong.
14. Sew the openings shut.

15. Sew two buttons at the ends of shoulder ties and two buttonholes on the front bodice.
 |
| Front |
 |
| Back |
16. Hem the skirt by folding twice. Iron the pleats well for the nice peek-a-boo effect.
PS: If you make it don't forget to share the pics with me. I love to see your creations. Also if any step is unclear please let me know in the comments.

great tutorial! :-)
ReplyDeleteAdorable dress, thanks for the great tutorial!
ReplyDeletenice tutorial
ReplyDeleteWhat a pretty dress, who wouldn’t love it!
ReplyDeletehttp://www.blissfulsewing.blogspot.com/
great tutorial! Thanks for linking up to Sew Woodsy!
ReplyDeleteGorgeous little dress with fabulous fabrics too!
ReplyDeleteThanks for linking to a Round Tuit!
Hope you have a fabulous week!
Jill @ Creating my way to Success
http://www.jembellish.blogspot.com/
So cute! Thanks for linking up! Hope to see you again this week.
ReplyDeleteThis comment has been removed by a blog administrator.
ReplyDeleteslot judi terpercaya
ReplyDeleteslot terpercaya
slot togel
togel slot
slot online
NagaQQ : Slot Gacor & DominoQQ Minimal Deposit 10.000
ReplyDeleteDENGAN DENGAN TINGKAT KEMENANGAN 95%
new MEMBER DENGAN TINGKAT KEMENANGAN 98 %
NagaQQ adalah Agen Judi Online Terpercaya Dan Tentu Saja Memberikan Kemenangan Besar Setiap Harinya.
Modal Receh Cuan Meleleh, Pastinya aman dan tepercaya
Hanya bermodal Rp10.000 anda sudah bisa bermain dengan seru dan menarik pastinya.
Jika tidak percaya yuk mari singgah dulu bergabung di situs NagaQQ , hanya di NagaQQ kemenangan berapapun di bayar dengan lunas dan tidak ribet prosesnya
Menyediakan deposit pulsa XL & TSEL tanpa potongan
Tersedia bonus ROLINGAN 0.5% & BONUS REFFERAL 20%
Untuk info lebih lanjut yuk gabung dengan link gacor yang ada di bawah ini
www.nagasatu.net