Showing posts with label easy sewing project. Show all posts

Thursday, January 12, 2012

Bottoms Up - Part 6 - Skirt Leggings

Skirt Leggings sewing tutorial

Here's the story behind the series, the second part of the series is here, third part of the series is here,  part 4 is here  and go here for part 5. 


So the munchkin is now old enough to go to a daycare ( really? when did that happen?). I still remember that when I brought her home from the hospital, even 1 month seemed like far away in the future. Oh the days, that turned into months and years....Ok zap back to reality!
When I was sorting her clothes to wear at the daycare, I realized that she had enough tops (thanks to my recent bout of Octoberizing her Tees) but all her pants were either - Too short (already) or too..errr...well loved ( turmeric stains anyone) to be worn outside home. Yeah! didn't I just made her like a dozen pants? Anyhow, the fact remains that she has too few pants and most of them don't match well with the tops she has.
So I decided to make her some leggings this time, specially because leggings are easier to layer if we need to.
After 2-3 pairs, I decided I wanted to jazz up some of those. So I came up with these skirt leggings and I love how they turned out.

Supplies:

Two co-ordinating knit fabric - 1 for the leggings and one for the skirt above it.
1 jelly roll strip of coordinating woven fabric (2.5 inchesX 40 inches) for ruffle - Actually you could also use knit for this but since I used woven I'm writing woven in the list.
1 inch wide elastic - for waistband
Ric-rac  to finish the hemline (optional)

Construction:
Construction of leggings:
1.

Use any pair of leggings that fit well and trace their boundaries leaving 3/8 inch of sewing allowance all around except for the hem. Leave a 1 inch allowance at the hem. You don't need to leave a bigger allowance for the waistband.

2.
Using this template cut two pieces on fold

3.

Keeping each piece folded right side together, sew the inseam of each leg.

4.

Turn one the pieces inside out and insert into the other leg.

5.

Sew along the crotch area carefully aligning the inseam of both legs.

6. Cutting the skirt
I made an A-line skirt to attach to these leggings.To make an A-Line skirt the width at the  top of the skirt should be equal to the width at the top of the leggings.

The way I determined the dimensions for the skirt is following.

Width at the top WT = total circumference at the top of the leggings divided by 2 + sewing margins X 2

Length of the skirt = length from top of the leggings to the crotch.
I kept the length of the skirt exactly equal to the crotch because I intended to add a ruffle which would make it slightly longer than the below the crotch area. That was the length I was going for. If you want any other length feel free to alter the length but keep in mind that the ruffle will increase the length by roughly 2 inches.


Width of the skirt at the bottom - WT +3 inches
 ( This was sort of guesswork and I got a decent flair with this measurement but if you feel that your baby is chunky at the butt you may need to add more than 3 inches)


Construction of skirt:

7.

Cut the front and back of the skirt as shown in the diagram above. Place both the pieces right sides together and sew along the sides. Please bear with me...my drawing skills are...err..basic, I just wanted to give you an 
idea of how to cut. This image is not made to scale or symmetrical.


8. Hem the jelly roll strip at one edge. I usually do it by serging the edge once and then folding it on the wrong side and sewing on it as close to the edge as possible. I find it faster than folding it twice. If you don't have a serger, you could always fold it twice. Just keep it as narrow and even as possible.

9. Ruffle the jelly roll strip by setting machine tension on the highest, stitch length on longest and machine speed on fastest. Adjust the ruffled fabric by hand to match the width of the skirt.


10.

Line up the bottom of the skirt with the ruffled edge of the strip ( Right sides together) and sew a seam along the bottom edge of skirt.

11.


Fold the ruffle out and with the seam allowance turned towards the main body of the skirt top-stitch as close to the edge as possible.


12. Attaching the skirt to the leggings:


Turn the skirt inside out. Keep the leggings right side out. Line up their tops such that the seams of the skirt fall on the side of the leggings.

Sew a seam together along the top edge of skirt and leggings. With right side of skirt together with wrong side of leggings.

13.

Turn the skirt right side out

14.
Top-stitch as close to the edge as possible. I have used zig-zag stitch here but you can use the regular stitch as well.


15.


Now sew another seam about 1.5 inches below the top-stitching. Leave a 1 inch gap where the seam ends. This will be the opening to insert elastic in the leggings.

16. Inserting the elastic:


 Pull apart the skirt and the leggings at the place where you left the gap.


18.

 In this opening insert an elastic with the help of a safety pin.

19.


Sew both ends of the elastic together

20.

Go over the elastics multiple times to reinforce the stitching. I use stitch 1-14 on my machine that looks like broken zig-zag. If you don't have it in your machine, you could use the regular zigzag.

21.

Sew the opening shut.


Bye bye plain leggings! Hello skirt leggings !

Pin It

Monday, December 19, 2011

Oh Summer! Jumper and bloomers set

Sewing Project: Jumper and Bloomers Set

I know you're thinking that I have gone nuts! Summer in December? Yup! While most of us are only thinking about the shawls, sweaters and coats, there are some places where summer is but just around the corner. This is a jumper and a bloomers set that was a custom order from one such place. The top is made in a lightweight butterfly print. I also appliqued some butterflies to match the print on the bodice.


These are made in size 6T and the client wanted something in light yellow. I took the liberty of pairing it with gray print and apparently my client likes it. Here they're together:


Of Course, Whats a little girl's outfit without a matching hair-bow. Here's the close-up.


Simple and sweet. I like it this way. Hope the little girl likes it as well. I have only recently started taking custom orders and so far I'm really enjoying it. Its a little stressful to prepare something with a deadline, but its also a lot more creative, to make something according to a clients specifications and tastes and to a little girl's liking.
Here they are. All wrapped up and good to go.


Pin It

Friday, December 2, 2011

Sew Easy part 13 : Hot chocolate skirt

Sew Easy Tutorial: Box Pleated Skirt

You can read the story behind this series and the first part here. Click here to read the secondthirdfourth, fifth, sixth, seventh, eighth, ninth, tenth,  eleventh and twelfth edition of this series.


I was searching for something else in my stash when I found this scrap of really nice corduroy. Of course I had thought it would make a nice skirt for little one and of course I forgot all about it. So instead of putting it back there and forgetting about it once again, I put everything else aside and got to work with the scrap. The result is this Hot chocolate skirt. It was super quick, I actually had company when I made this and my guest was surprised that I made it so quickly.
Here's the skinny:

Supplies:
Corduroy or some other heavyweight fabric: half yard
Elastic : 1 inch wide for the waist: 15 inches
Heavy fabric scraps in a coordinating color: 2-3


Measurements:

Length: Your desired length + 2.5 inches: L
Width: Measure your little one at the widest part from waist down ( tummy or butt)
Add 5 inches to it and divide by 2 : W

Construction:

1.

Cut to rectangles of length L and width W. If your fabric still has selvage with it use it to reduce your work. Cut the rectangle such that the two selvage ends fall on the same side when you sew the side seams. Actually in this skirt these seams are not the side seams but front center and back center seams.


2.

Sew two seams along  both L sides.

 While sewing these seams ( right sides together) Leave about 3-4 inches unsewn at the bottom of selvage side. If you don't have selvage side in your fabric, don't worry, you could always finish the edges. If you look at the left bottom corner, you can see the part I left unsewn.


Sew another seam at the right side from top to the bottom. 

3. Making the front pleat


To make the pleat at the front sew about 5-7 inches long seam about 1.5 inches from the earlier seam at the top right side. It should be parallel to right ( actually front center) seam.

3.


The smaller seam that you just did will make a partial tube at the front. Now just flatten this tube such that the smaller seam falls on the front-center seam. Now sew a rectangle around this seam such that the smaller seam is smack in the center of the rectangle and the rectangle lies within the flattened tube. Also make sure the length of this rectangle is only up to the smaller seam.
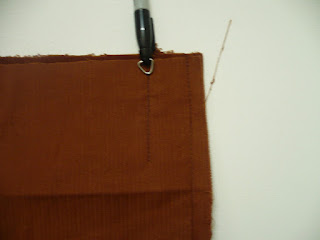
Since it is difficult to see the seams in the original pic, I edited it and the black lines in the above pic is the rectangle I was talking about.

Still Confused?
Here's another tutorial on sewing box pleats. For this skirt you just have to make sure that the original seam ( the longer one) stays right in the center of the pleat.


This is how box pleat will look at the outside.


4. Hem the skirt


Finish the unsewn part of the center back seam by folding and sewing down the fabric at the seam allowance. I didn't have to do it because I cut at the selvage so my edges were already finished, I just folded them and took them in while finishing the hemline.
Hem the skirt by folding the fabric twice and sewing ( seam allowance 1/4 inch).


5.


Prepare the elastic casing by folding the fabric at the top about quarter inch and sewing and then folding again about 1.5 inch and sewing. Leave two one inch gaps in the seam on either side of the skirt, because we are making this skirt flat front.

6.


 Insert the elastic from one gap and take it out from another. Pull the elastic a bit to gather the back of the skirt. I highly recommend holding the elastic with some safety pins and trying on the child at this point to check that the skirt is snug but not uncomfortable.

7.

 Sew the elastic down to the skirt at both ends. I use stitch 1-14 shown above but if your machine doesn't have it any zigzag stitch will do. Go over each side 3-4 times for additional strength.

8.


For appliques I cut out some flowers from another baby cord fabric and just sewn them without any interfacing. If you don't want the hassle of interfacing etc, make sure you use a heavier fabric like denim, corduroy etc. I just sew the
regular stitch to fix these to the skirt but I guess zig-zag would work better. I also applied some fray check on the boundary of these appliques to reduce fraying in the wash, but I'm guessing that their circular shape will anyway help reduce fraying.


Just like that, "The Hot chocolate skirt"


Pin It

Tuesday, November 15, 2011

Tutorial: Devil's advocate Hat

Sewing Tutorial: Knotted Baby Hat


This is a tutorial I did as a guest post on Bear Rabbit Bear last month. Just republishing it her in case you'd missed it earlier.

Devil's advocate baby hat:

Supplies

    * Knit fabrics: Take 2 pieces of same fabric or two different fabrics – use up those scraps that are too big to throw away but too irregular to make into a dress, top etc.

    * Print out the pattern [PDF page 1 and page 2], tape the two pages as shown and cut out both pieces of the pattern (total of 3 cuts – piece 1 spans both pages and piece 2 is on page 1. Once you cut out all the three pieces, tape both parts of Piece 1 by overlapping the small part over the bigger part, up to the line on page 2.

   1. Fold each fabric in two layers, then fold one more time. Place each pattern piece on fold and cut. So now you have two pieces of #1 and two pieces of #2.

Note: Just Ignore the joint in the center...its there because I didn't have enough fabric, but if you cut the patterns on the fold, you shouldn't have it.
2.  Sew together pieces of #1 along the cone, bunny ears side, leaving just the bottom straight side raw, right sides together. Sew together pieces of #2 along the semi-circular side, right sides together.

This is the place where my camera died and I couldn't take pics of the rest of the process, so I continued
with another hat next day.

   3. Now join #1 and #2 by sewing along the raw edge, right sides together. Leave about 2 inch opening.

   4. Using the opening, turn the whole thing inside out. Use a pencil or point turner to poke the ears out on fabric #1. Push the fabric #2 inside fabric #1.
   5. Slip-stitch the opening shut.

   6. Tie two knots with the 'ears' of Fabric #1. You may have to adjust these knots a bit to give them the right look. The knots also give you some control over the size of the hat so you can make it fit the child's head a little better.

If the hat is a little big, you can turn some of the bottom out to fit the head of the baby. The best part is that these hats don’t have a any inside seams to bother the baby skin. Enjoy your little devil's advocate...he'll soon be coming up with some tough questions.

Sunday, June 12, 2011

Are you sick of peasant dresses yet!

Sewing Many Peasant Dresses
Another one...I just can't help myself. They are a great stash(scrap) buster and they come together so easily and there's so little that can go wrong. How can I not love them?
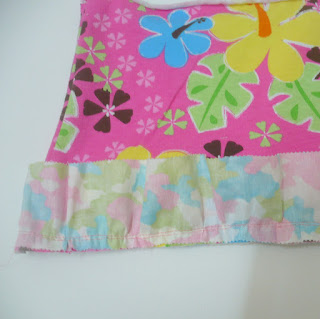
Well, at least I learnt a new hemming technique in the process. A close-up...

Isn't this rolled hem pretty? So glad I finally nailed this. I already have a tons of ideas on the places I'm going to use it. As for the peasant dresses...I promise the next post would be about something else...but I can't promise about the post next to that. Hey, didn't I tell you I LOVE them.