Showing posts with label pants. Show all posts

Wednesday, November 23, 2011

Bottoms up part 5: Lilly Frilly ruffle pants tutorial

Ruffle pants sewing tutorial


Here's the story behind the series, the second part of the series is here, third part of the series is here, go here for the part 4.                                          

The following post has been published as a guest post on craftsy blog, I am republishing it here now.
These are a very quick and easy refashion and a great way to jazz up a plain boring pair of baby pants or leggings. This technique is also an easy way to increase the length of pants that fit well at the waist but are a couple of inches too short. This will also come in handy if you want to make pants coordinated with a dress, but don't have the time/skill to sew the whole thing yourself. You could just add a ruffle at the bottom and may be a couple of embellishments and just like that! matching pants!

Supplies:

1 baby pants that fit well at the waist ( length doesn't matter here, because we can always cut them to the right length, or add ruffles to increase the length)
5 inchesX full fabric width of coordinating woven fabric

Instructions:
Here's a quick rundown of how I did it.
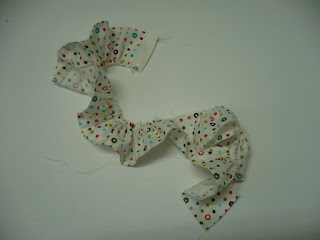
Cut two strips of 2.5 inches X width of the fabric. I used a precut jelly roll strip from Moda's "Meadow Friends" line by Deb Strain. Hem along one long edge of these strips.


Along the other long edge, sew a seam after setting your machine's tension to highest and stitch length to maximum. This will ruffle up the strips.

Take the pants and cut off the cuffs about 1 inch above the hemline. This is where you adjust the length of the pants if they're too short or too long. If they are too long, cut them to a length where they are about 1 inch shorter than the perfect length. If they're too small, then cut them as close to the hem as possible.


Place the ruffle on this new raw edge of pants such that the ruffle and pant are right sides together and their raw edges line up. Sew a seam along this raw edge to attach the ruffle to the pants. Serge or sew a zig-zag stitch at the edge to finish it.


Turn out the ruffle, top-stitch as close to the edge as you can. For a better finish top-stitch one more time, this time 1/4 inch away from the edge. ( you could also use twin needle to do both the seams at once)

Adding the bow in the front:


Cut a 9 inch long piece from the jelly roll.


Fold it in half along the length with right sides together. Sew along the raw ends to make a tube.

Now rotate the seam such that it falls in the center of back if you iron the tube flat.

Now sew a seam along the bottom of this tube.
Sew another seam at the top of this tube but leave a gap of 1 inch at the center of this seam. This gap will be used to turn the whole thing out. I have left the gap where the green seam ripper is placed.


Now snip the corners to get this rectangle to turn smoothly.
Now turn out. Use a pencil or corner turner to poke the corners out.
Iron flat.


Sew over the opening you had left earlier to close it fully.


Now fold it like an accordion in the center. I made three folds in mine, with the center fold being a little bigger then the ones on the sides.

Now cut a ribbon or twill tape about 3 inches long. Wrap it over the accordion folds you just made. If needed use a pin to hold everything together.

Now hand-sew the ribbon at the back of the bow. Cut off excess ribbon.

The bow is ready. Now place it at the center of the front of pants and again hand sew it to attach it to the pants. Make sure you sew multiple stitches for added strength.


Ruffled pants are ready! Make one,


Make two. Make Many! enjoy!

Another embellishment idea:

Appliques:

Cut hearts from the fabric in various sizes.


Arrange them in any manner you want.
Hand sew along the edge. The stitch I have used makes sure that the edges are covered so they don't fray. If you want to be doubly sure, use fray check.

Look! A sweet little heart. Now do the same for other pieces.

You could applique whatever shape you like. If your ruffle fabric has some interesting print, you could even cut that and applique it.


Ta da! Sew Unique, Sew creative, Sew you!

Pin It

Friday, November 11, 2011

New Item in the Shop: Turquoise Ruffle Pants - Size 12 months

Blooms And Bugs Studio: Turquoise Ruffled Pants


Here's the latest addition to Blooms And Bugs etsy store. "Turquoise ruffle pants". I made these with ready to wear fleece pants in 12 months size. I like how the ruffles at the bottom and the bow at the front jazz up a plain pair of pants.


See...much better, right? I have also made a matching headband that I'll add with these for free. For $10 you could have these for your little one, just in time for Thanksgiving.
Available for sale here.

Pin It

Thursday, October 20, 2011

Bottoms Up - Part 4 - Two color pieced pants

Sewing Tutorial: Pieced Pants in two colors
 pieced pants sewing tutorial
                 
Here's the story behind the series, the second part of the series is here, third part of the series is here.                                         

1. Just take any pants pattern

cutting out a pants pattern  

This time we're cutting 4 panels for these pants 2 for front and 2 for back, so no need to cut on fold, juts place the pattern on four layers of fabric and cut. However since we're going to piece another fabric near the bottom, leave out the last 2 inches or so from the pattern. In the above pic, the pattern is placed upside down, so if you look carefully, the bottom 2-3 inches of the pattern( top of the pic...it is upside down) are hanging outside the fabric, meaning that area will not get cut in this fabric.


2.
cutting pieced pants
Here's the pattern traced out and cut 2 inches too short.

3.
pieced pants pattern
Now using a big bowl or any circular object, cut an arc near the bottom of the pants. make sure to cut the arc such that you cut lesser near the curvy part of the pants and more from the straight art. No logical reason for that, it just looks better in my opinion.

4.
sewing tutorial for pieced pants
Now place the cut pattern on four layers of coordinating fabric, make sure two layers are placed right side up and two layers are placed wrong side up.

5.
two color pants sewing pattern

Place your pattern on top of the fabric and align properly with fabric 1.. Trace it on fabric 2, also trace the curve from fabric 1 on fabric 2 and cut.

6.
how to sew pants for kids

7.
Now lets sew the pants
First join the four Fabric 1 panels with fabric 2 panels. Make sure you line up the curves properly.
Clip some notches to help the curve sit straight.

Top-stitch at the right side.

8.
Line up front and back panels, sew at the straight line, right sides together. At this point, it will be helpful to start sewing from the point where fabric 1 and fabric 2 meet and go up first. Then start again from the meeting point of fabric 1 and fabric 2 and go down. This will ensure that the pieces are perfectly aligned. You can always trim if any of the ends have small mismatch.

9. Now that you've got your two pieces ( right leg and left leg), just sew them like the basic pants. Don't forget to embellish with matching trims and notions.
And Done!
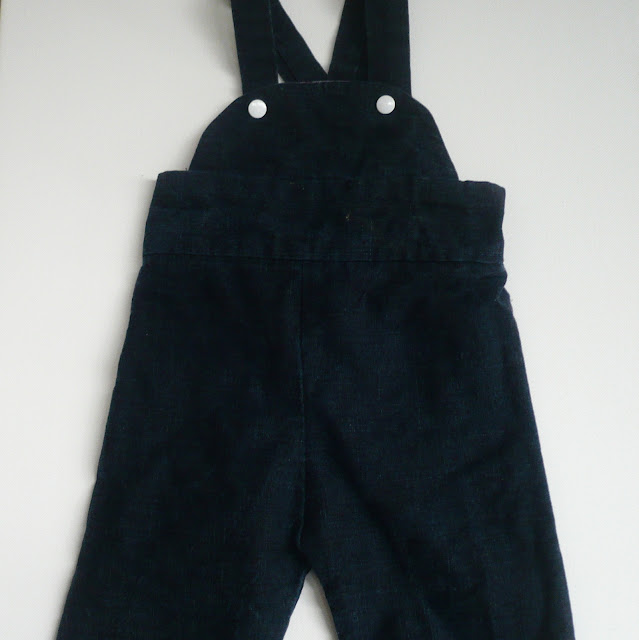
sewing pants tutorial


And just for fun here's another one of the Grow And Gather dress that I made to go with these pants.

halter neck dress

I think they look great together....Don't they?

pieced pants with dress

Sunday, September 25, 2011

Bottoms up part 3: Rumble Tumble Coveralls

Coveralls sewing tutorial
coveralls sewing tutorial

Here's the story behind the series, the second part of the series is here.

For this edition of Bottoms Up series, I decided to bring you these coveralls. I love coveralls - the front yoke, the shoulder straps, the elastic in the back, all make for a very cute outfit. On the practical side, they are a perfect garment for a small powerhouse, the straps make sure that the pants stay in place during all the jumping, running and other toddler adventures. The denim or corduroy fabrics wear well through the daily washes that kids cloth endure.These will also be a good choice for cooler months ahead. So without further ado, here's how you can make your own Rumble Tumble coveralls.

Supplies:

Denim or corduroy fabric: 1.5 yard
Lining Fabric: 10 inchs X 10 inches 
Closures: 2 ( buttons or snaps )


sewing pattern coveralls

We're using the simple trouser pattern( page1, page 2) for these coveralls with some changes:
1. DONT cut it on fold now, you will need 4 pant pieces for these coveralls
2. Leave top 2 inches of the pants from the pattern, because we'll be making a separate waistband here.
    (Basically just fold 2 inches from the top of the pattern and ignore that part)
Cut all 4 pieces for the trouser from the pattern.  Remember that you don't need a waistband for this pattern so the top of the pants is a little shorter than a regular trouser.

how to sew coveralls

Sew these parts like regular trousers. 
First sew the outer straight seams
Next sew the inseams of the pant legs.
Then turn one leg right side out and push into another leg and sew the crotch seam.
how to sew overalls


Now measure a rectangle of length 5 and width = circular width of the pants' top + 1inch.
Fold and cut it into half such that you get 2 strips of 2.5 X width
These pieces will serve as waistband.


sewing yoke to coveralls
For the yoke front cut an arc of 4 inches X 8 inches.

lining for the overalls yoke


Use it as a template to cut a similar sized lining piece. Sew the yoke and lining( right sides together) along the curve.


Snip some notches all around the seam to help it retain shape after turning out. Turn inside out.

turing out the yoke

Fold into half along the width, and snip a small notch to mark the center.

sewing shoulder straps for overalls

Now lets make shoulder straps:

Cut 2 strips of 4 inches width and 25 inches length. Fold into half along the length and sew along the longer side to make a long tube, turn out. Now iron these straps such that the seam is in the center of one side.

Assembling the yoke and waistband of the coverall:


Take both the 2.5X width strips we earlier cut for waistband. Mark their centers by folding them in half and snipping a notch in them.


Now align the raw edges of yoke and waistband strips such that yoke is sandwiched between right sides of the waistband strips and the notches that mark center of all three layers line up. Sew a seam along the yoke length.

Here's how it will look.


Now sew the waistband to the pant by aligning one raw edge of waistband with the raw edge of pants. Here you need to make sure that not only their right sides are together, but also, you are sewing the side that will keep the yoke right side on the front, after you turn out. You can sew a few stitches and check to see if you're doing it right.


Go all around the pants, joining waistband to the pants. When you reach close to the ends, measure how much you need to finish and use the rest of strip as sewing margins. Sew both ends together. Now finish sewing the seam to join waistband and pants.


This is how it will look at the back. Now place you shoulder straps in the back such that the seam on the straps in facing you. Place the straps 2.5 inches apart at the center of back. Now cover them with the other waistband strip such that it sandwiches both the straps in between waistband.Sew along the raw edges of waistband, making sure you are catching the straps.


Now iron half an inch of the raw side of waistband to fold on the inside.

Now lets insert the elastic in the back:
Sew along the waistband seam (ONLY IN THE BACK), as close to the seam as you can but not over it. This will ensure that you catch the folded waistband on the inside of the pant.


Once you have done this at the back, insert an elastic from one end of back, pull it out at the other end of back. Pull the elastic a bit to gather the waistband. I gathered the waistband about 2 inch lesser than its width
to make it snug in the back. Now sew it on both ends to secure it. Sew along the rest of the seam to finish attaching the waistband.


Now add some closures to the yoke and shoulder straps. You can finish the raw ends of shoulder straps by
serging them, or by pushing them inside a little and top-stitching.

how to sew coveralls

At this point I highly recommend trying these on the baby to determine exact length desired. Mark the appropriate length and use the rest of the length to finish the hems by folding twice and sewing.

rumble tumble coveralls tutorial

Rumble Tumble coverall is ready to accompany your toddler in all her adventures.