I just love how this one turned out. Now the tutorial and free pattern is live at Clothworks blog. Hop on over to check out how to sew the pumpkin pie dress.
This is a tutorial that I did a couple of weeks back at Ricochet and Away. I'm sharing it with you all here because I think its a good one for fall.Enjoy!
For this post I wanted to bring you something that would be useful to almost everyone. You know how we all are left with Tees at the end of the summer, they look and fit great but they are half sleeved, so they can't be used during the fall and winter. By the time summer rolls back again, they're too short already.
I have found myself with a pile of half sleeved clothes and wondering...Gosh!! these clothes are so nice, I wish I could use them somehow, until it hit me...adding sleeves shouldn't be that hard. After all, I do it all the time for the clothes I sew from scratch. Adding just the sleeves would be a lot more easier..and quicker.
So here's a tutorial on adding sleeves to your little one's ( or your own) tees and then adding just a little more detail to bind it all together. I'm calling it Octoberizing that Tee because a full sleeved version will be just right for the weather in the beginning of fall and also because the colors are just right for October.
Supplies ( 2 year old size)
1 half sleeved Tshirt
1 XL Tshirt in a contrasting color ( or any knit fabric will do - using T shirt was much quicker because I didn't have to hem)
Adding the full sleeves:
Cut off the sleeves from the adult tee.
Lay the small Tee straight and place the sleeves from the big tee next to the small Tee sleeves. Make sure that both the Tee sleeves and the new sleeves make a straight line and overlap about half inch. Now measure from the shoulders of little Tee to the hem of sleeves of big Tee, this is how long your final sleeve will be. Compare it with the sleeve length needed for your child.If this is too big, increase the overlap to reduce the length. If it is too small you have two options - 1 You can pick open the hem of sleeves, this will give you one extra inch. you could do rolled hems on the sleeves later.
Another option is to use T-shirt body, or a knit fabric instead of sleeves. This is not very complicated either. Just fold a knit fabric along the width and use it the same way I'm showing you using the existing sleeves. You just have to hem these sleeves...that's all.
Once you have determined the correct length you have to determine the width. What we want to do is make an addition to the sleeve that is as wide as the existing sleeve's end in and then it tapers off following natural shape of arm.
So you will measure the width using the hem of existing sleeve and add 1 inch to it for sewing margins.
Do the same for the other sleeve.
Now fold each sleeve in half along the width ( right sides together) and sew a seam on the side using up sewing margins. Repeat for the other sleeve.
Turn this tube of sleeve inside out. Now line it up with the real sleeve as shown above. Now gently slide the wider end of new sleeve into the existing sleeve. Straighten both the sleeves using your hand. Make sure the new sleeve is fitting the old sleeve evenly. Use hand basting or pins to hold it in place.
Sew a seam along the joint of the new and old sleeves to fix it in place.
Note: It is easier to go from the neckline to sew this seam, at least it was for me.
Repeat for the other sleeve.
Ta da! Your tee has full sleeves now...smile!
Adding contrasting stripes at the front.
Cut two rectangles from the contrasting knit of width equal to the width of Tee and length = 5 inches. Place them one over the other and then onto the Tee at a position you like.
Pin or hand-baste these to make sure they stay in their place.
Now sew parallel lines along the hand-basting. Mine are about 5/8 inch apart. You can use your sewing machine foot as a guide to get evenly spaces lines.
Once you're done sewing, its time to cut. Cut between the seams, Making sure you're cutting only the extra layers and not the Tshirt itself. I used a small scissor to do this. Try to stay in the center between two seams but you don't have to be precise. We are taking advantage of the fact that knits don't fray. So we can leave the cut edges raw.
Congratulations! You have successfully Octoberized your Tee. Right now the orange is looking like a color-block at the front, but these knit strips will curl up in the wash.
So they look more like ruffled stripes of orange and white. For more pizazz you could use more layers, and also graded color layers. So when you cut, you will see colors of different intensity. I haven't done that but I think it would look cool.
PS: Here's a very helpful comment from Amanda:
"I've been doing this with my son's shirts for a couple of years. Since toddler/preschooler shirts are rather small, it's hard to sew the fabric on as a tube. I open out the underarm seam on the t-shirt so I can sew on the new sleeve as a flat piece of fabric, then turn inside out and resew the underarm seam all the way to the cuff. I cut the arm extensions from too-small knit pants sometimes-- they often already have a ribbed cuff."
Great comment Amanda! I'm sure it will be helpful to many readers. I'll also try it this way.
Here's the story behind the series, the second part of the series is here.
For this edition of Bottoms Up series, I decided to bring you these coveralls. I love coveralls - the front yoke, the shoulder straps, the elastic in the back, all make for a very cute outfit. On the practical side, they are a perfect garment for a small powerhouse, the straps make sure that the pants stay in place during all the jumping, running and other toddler adventures. The denim or corduroy fabrics wear well through the daily washes that kids cloth endure.These will also be a good choice for cooler months ahead. So without further ado, here's how you can make your own Rumble Tumble coveralls.
Supplies:
Denim or corduroy fabric: 1.5 yard
Lining Fabric: 10 inchs X 10 inches
Closures: 2 ( buttons or snaps )
We're using the simple trouser pattern( page1, page 2) for these coveralls with some changes:
1. DONT cut it on fold now, you will need 4 pant pieces for these coveralls
2. Leave top 2 inches of the pants from the pattern, because we'll be making a separate waistband here.
(Basically just fold 2 inches from the top of the pattern and ignore that part)
Cut all 4 pieces for the trouser from the pattern. Remember that you don't need a waistband for this pattern so the top of the pants is a little shorter than a regular trouser.
Sew these parts like regular trousers.
First sew the outer straight seams
Next sew the inseams of the pant legs.
Then turn one leg right side out and push into another leg and sew the crotch seam.
Now measure a rectangle of length 5 and width = circular width of the pants' top + 1inch.
Fold and cut it into half such that you get 2 strips of 2.5 X width
These pieces will serve as waistband.
For the yoke front cut an arc of 4 inches X 8 inches.
Use it as a template to cut a similar sized lining piece. Sew the yoke and lining( right sides together) along the curve.
Snip some notches all around the seam to help it retain shape after turning out. Turn inside out.
Fold into half along the width, and snip a small notch to mark the center.
Now lets make shoulder straps:
Cut 2 strips of 4 inches width and 25 inches length. Fold into half along the length and sew along the longer side to make a long tube, turn out. Now iron these straps such that the seam is in the center of one side.
Assembling the yoke and waistband of the coverall:
Take both the 2.5X width strips we earlier cut for waistband. Mark their centers by folding them in half and snipping a notch in them.
Now align the raw edges of yoke and waistband strips such that yoke is sandwiched between right sides of the waistband strips and the notches that mark center of all three layers line up. Sew a seam along the yoke length.
Here's how it will look.
Now sew the waistband to the pant by aligning one raw edge of waistband with the raw edge of pants. Here you need to make sure that not only their right sides are together, but also, you are sewing the side that will keep the yoke right side on the front, after you turn out. You can sew a few stitches and check to see if you're doing it right.
Go all around the pants, joining waistband to the pants. When you reach close to the ends, measure how much you need to finish and use the rest of strip as sewing margins. Sew both ends together. Now finish sewing the seam to join waistband and pants.
This is how it will look at the back. Now place you shoulder straps in the back such that the seam on the straps in facing you. Place the straps 2.5 inches apart at the center of back. Now cover them with the other waistband strip such that it sandwiches both the straps in between waistband.Sew along the raw edges of waistband, making sure you are catching the straps.
Now iron half an inch of the raw side of waistband to fold on the inside.
Now lets insert the elastic in the back:
Sew along the waistband seam (ONLY IN THE BACK), as close to the seam as you can but not over it. This will ensure that you catch the folded waistband on the inside of the pant.
Once you have done this at the back, insert an elastic from one end of back, pull it out at the other end of back. Pull the elastic a bit to gather the waistband. I gathered the waistband about 2 inch lesser than its width
to make it snug in the back. Now sew it on both ends to secure it. Sew along the rest of the seam to finish attaching the waistband.
Now add some closures to the yoke and shoulder straps. You can finish the raw ends of shoulder straps by
serging them, or by pushing them inside a little and top-stitching.
At this point I highly recommend trying these on the baby to determine exact length desired. Mark the appropriate length and use the rest of the length to finish the hems by folding twice and sewing.
Rumble Tumble coverall is ready to accompany your toddler in all her adventures.
I wanted to send across something handmade for my little niece who lives across the pond. The best part is that she and my daughter are almost the same size so I can make something matchy matchy for the cousins.
I wanted to make something cute but also modern and smart. I finally decided on this jumper and I think it fits the bill. I call it "The Happy Dress" because the colorful stripes really seem to bring cheer. It is made with a thick and soft sweater knit so it just feels right for layering during the cooler months ahead.
Here's a hairband I made to go with it:
Again simple and modern....and I love it...maybe even more than the dress itself.
Know a little girl around you who could use this? Lets see how to make The Happy Dress and headband.
Supplies:
For the dress:
Sweater Knit:
Dark Denim - Few scraps ( Lets say 10 X20 inches, I didn't really measure this)
Co-ordinating knit for the ruffle. - 4-5 inches X width of the fabric.
Two snaps, or buttons for closure on the front.
For the headband:
FOE ( Fold Over Elastic) :
Felt in colors matching with the dress fabric
A co-ordinating button for the center
Measurements:
1. Measure the child from chest to where you want the dress hemline. Keep in mind that we are going for a mod and sleek look, so a little above knee would be better. Add half inch to it. Lets call it L.
2. Measure the child all around the widest part of her body. If she has a toddler belly, measure her around the stomach. If she has a big butt..measure that. Add 2 inches. Lets call it W.
Cutting the fabric
Cut the sweater knit into a rectangle of length L and width W. Fold it in half along the width, right sides together and sew along the length. If you choose a stripey fabric like mine, make sure you match the stripes at the seam. It's not necessary because the seam will be at the back. But properly matched stripes just look more finished. Finish the inseam with a serger or a zig zag stitch.
Preparing the belts
Cut two 5 inch X 10 inches rectangles from denim.
Fold it into half ( right sides together) along the width to get a 2.5X 10 rectangle. Sew the raw seams at the 10 inches long side to make a long tube. Turn out. Iron such that the seam is in the center. This is the back of the shoulder straps.
Preparing the ruffle:
Cut a rectangle of length 4 and width W from the co-ordinating knit.
Attaching ruffle and the shoulder straps.
First position the seam on the main body such that its at the center of the back.
Now pin the shoulder straps 2.5 inches apart in the front. With strap's wrong side ( the side where the seam shows) touching the dress' wrong side. Now lay the knit ruffle fabric on the top, such that knit right side touches straps right side.
Sew along the width, making sure to catch all the layers in the seam. Turn out. top-stitch as close to the
edge as you can.
Now sew another edge parallel to the top-stitching, half inch below the top-stitching. Leave a 2 inch opening. Now using a safety pin. Insert an elastic from the opening between knit ruffle and dress fabric.
Join the ends. Sew the opening shut.
Now lets make a wide bias tape for the hem. Actually since the hem is straight, you don't even need to cut it on bias. Just cut a denim strip 4-5 inches wide on the grain.
Here's how I made my bias tape:
Fold the strip in half along with the width. Iron.Open.
Fold one half up-to the crease onto itself. Iron. If you ironed the first fold well, the crease will still be there after ironing the second fold.
Fold the other half over the second crease. Doing this will ensure that this fold is just a tiny bit wider than the other half. This is required to sew the tape properly. Otherwise it will be difficult to catch it at the wrong side when you top-stitch your bias tape. ( I will explain more later)
Now sew the tape all along the hemline with the raw edge of narrow part of bias tape aligned with raw hem.
Leave a small piece unsewn in the beginning. This will be used to join the ends later.Try to sew it exactly on the crease. This will make it look very finished.
When you get close to the end, leave about an inch or two before the end.
Now measure how much more tape you need to get to the end, add one more inch. Keep that much and cut-off the rest.
Now carefully sew a seam at the extra part of both the ends of the tape, right sides together. You need to measure exactly how much you need, too much and you will have a pleat in your bias tape. Too little, and you will have a pleat in the dress ( at hem :/). You want to avoid both the situations.
Now sew the unsewn part of the tape to the dress, same way as you have done till now.
Now fold the tape over to the other side.
If you have placed the smaller side in the front earlier, you will notice that the tape at the wrong side of hem, goes just over the seam that you did to sew the tape in the right side.
Now come back to the right side of the dress. Make sure your thread is the same color as dress fabric. Now sew a seam as close to the upper side of the tape as possible. Go slow and steady. This seam shows on the right side so you want to sew this as perfect as you can. Ideally, it shouldn't be visible unless somebody inspects it up close.This will happen if you sew this seam in a matching color ( matching with the dress, Not the tape) and very close to the tape ( but NOT ON the tape). Stop occasionally to check that you're indeed catching the bias tape on the wrong side.
Now add some sort of closures on the shoulder straps and back of bodice. Button, Snaps, velcro...anything that suits you would be fine. If you want you could also add more than one closures on the strap to make it adjustable.
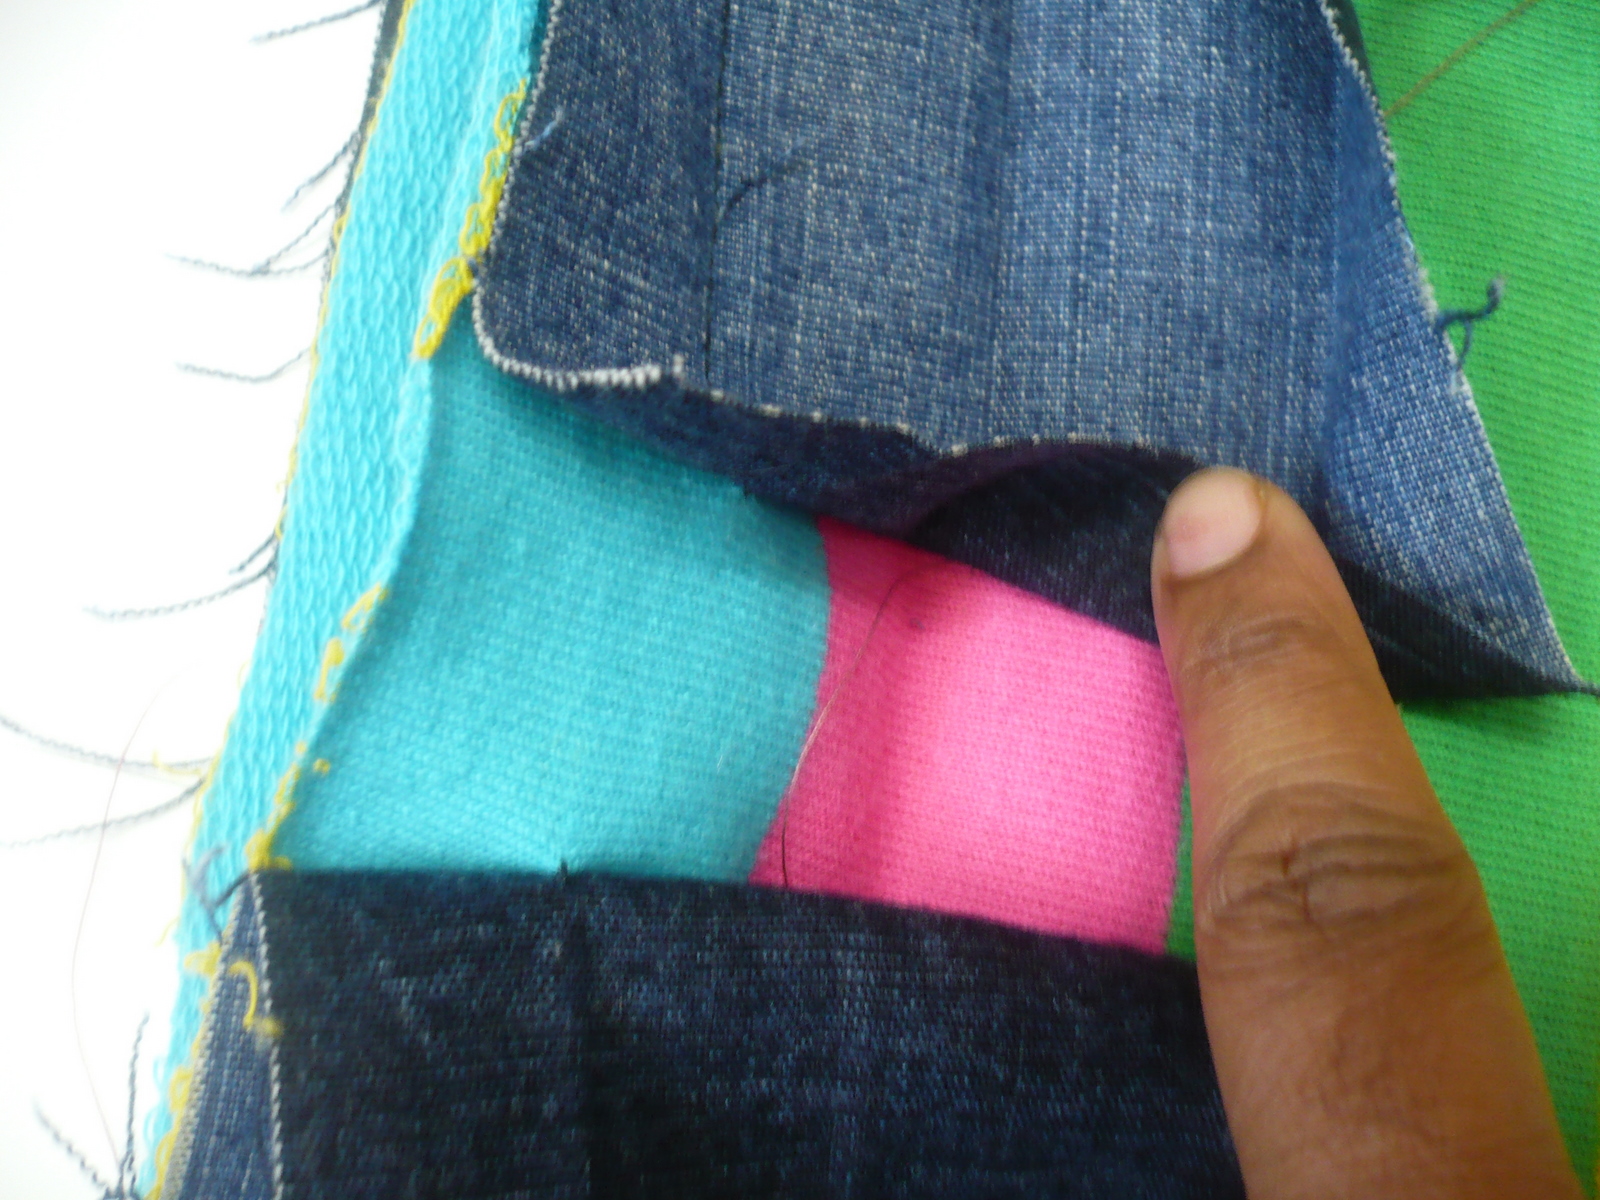
Optional - Personalizing the Dress:
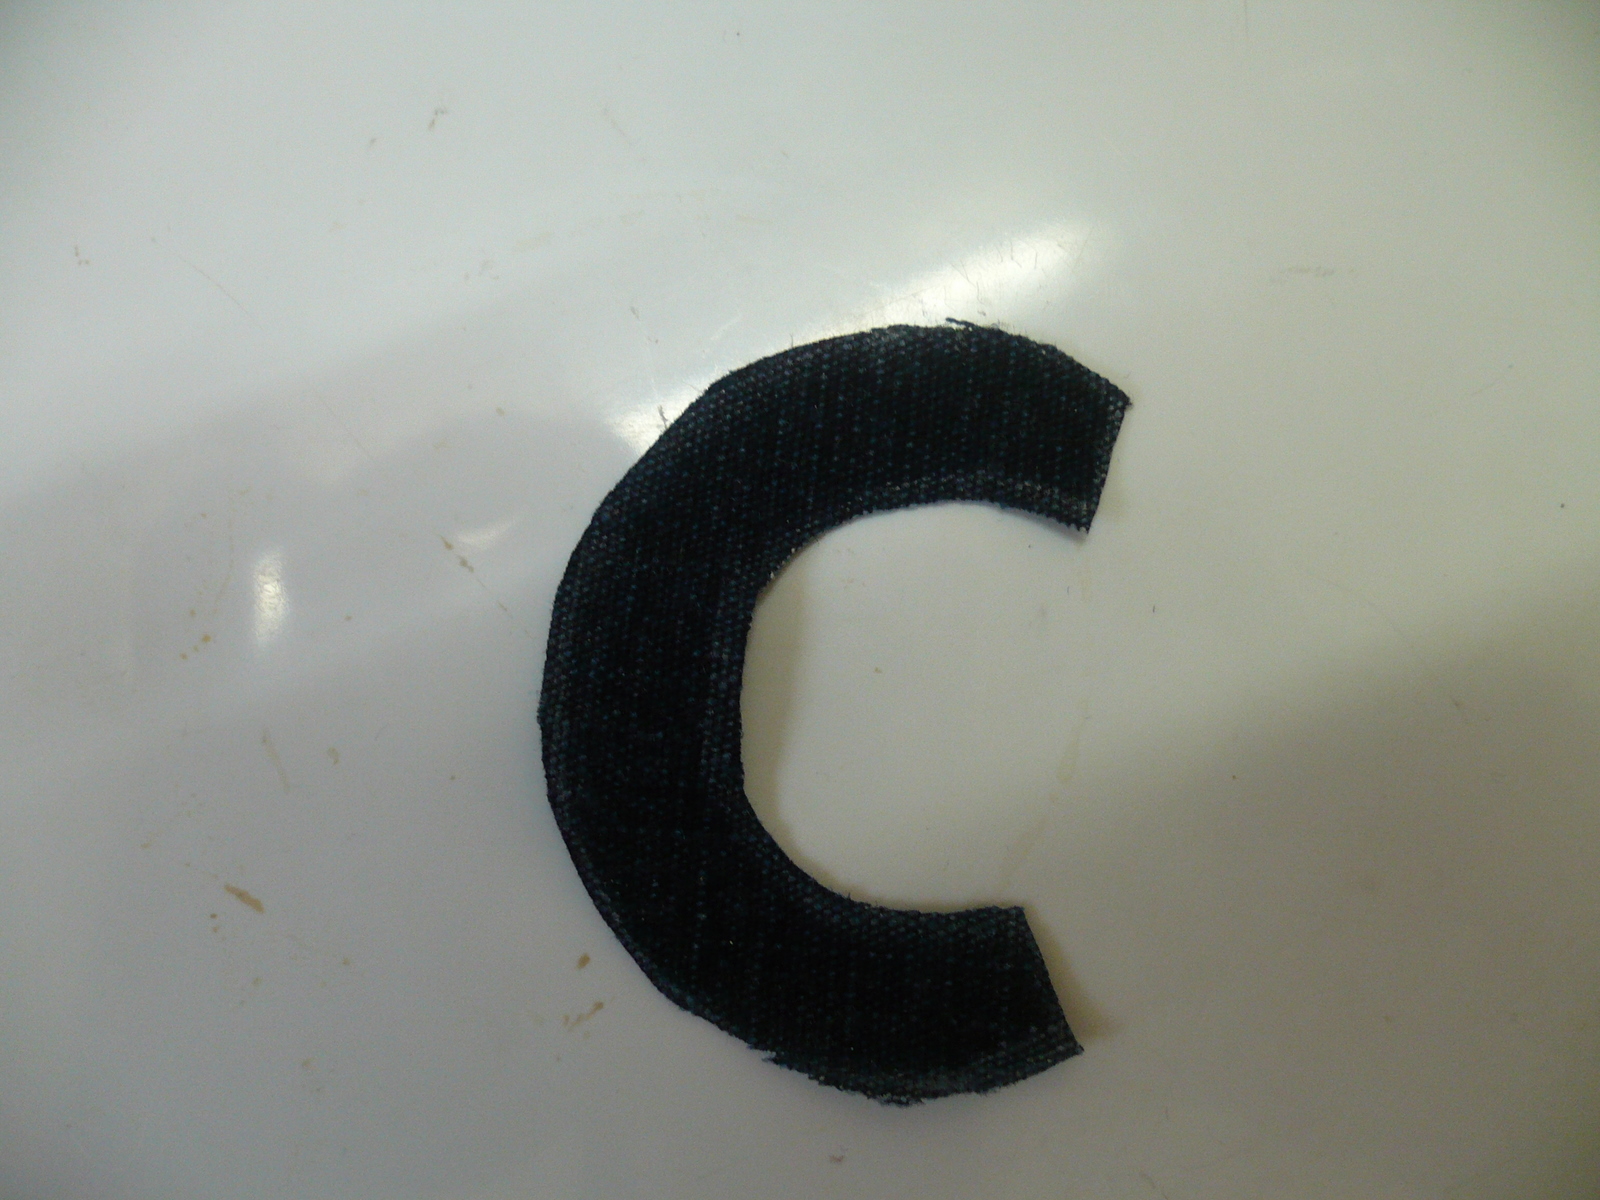
Draw a letter on the right side of the denim, in your favorite font. I used a crayon to do this.
Cut out.
I used fabric glue to stick it at the desire position, but you could also hand-baste or use pins ( I'm kind of phobic to pins, especially in children clothing)
Once the applique is stable, set your machine speed on minimum and stitch size to very small. Check that the thread is denim colored and very carefully go over the applique, sewing very carefully along the boundaries.
I used a different color thread to show you the top-stitching and you can see where my sewing ran amok. Thats why I recommend sewing with the matching colored thread, that way, it wouldn't be so obvious.
Apply fray check along the raw edges of the applique.Air dry for a day.
The Happy Dress is good to go. Put it on your little one and see how happy it makes them..And you :)
Happy hairband:
I don't have pics for this but making this is really straightforward.
Cut 3 circles of different sizes from felt. I just folded the felt into a quarter and cut an arc to get sorta circular shape. You could also use household things like mugs, small bowls, coins etc, to get circles of different sizes.
Now cut a 12 inch long piece of FOE and join both the ends by overlapping them a little and sewing together.
Now place the biggest felt piece at the bottom, then place the FOE joint over it and then place second largest circle, smallest circle and the button respectively.
Thread the needle with 2-ply of thread matching the color of the button. Now sew the button by going over opposite holes repeatedly. Just make sure that every time you insert the needle in the hole, make sure you're going through all the layers of felt.
The happy headband is ready.