Thursday, September 19, 2013

Waverize It! A Contest from Joann and Waverly

Waverize it Contest By Jo-Ann and Waverly Fabrics

I'm a bit late to write about it but there is still time to enter the "Waverize It" Contest hosted by Jo-ann and Waverly to mark the 90th anniversary of Waverly fabrics.

Basically you need to sew a project with Waverly Fabric, upload it to the contest website and if your project gets selected you could win up to 9 yards of fabric and a gift card. Sounds good! so go enter the "Waverize It" contest here.


Need some inspiration? Here is a great pinterest board called Waverly @Jo-Ann curated by Jo-Ann. This board features tons of great ideas that have already entered "Waverize It!" and will surely get those creative juices flowing in your head.

I have also received a yard of pretty waverly fabric from Joann's to sew a project with and I will be posting again about what I made with it.


Pin It

Monday, September 16, 2013

Everything Blue Block Hop - My Unquilty quilt block contribution


Last month I got an invitation to join Everything Blue Block Hop, hosted by Clothworks Blog. They sent me some gorgeous white blue fabrics and asked me to make a quilt block.
I dragged my feet for a long time around this project simply because the precision required for quilting scares me. There! I said it! I'm scared of quilting, I'm scared of the commitment to dimensions it requires.


I finally finished my block today, because the deadline for submissions is..guess what...today! Now that I have somehow finished my project, I have discovered ...Surprise! Surprise! I'm not a quilter.
The block came out as crooked as possible.


I had this idea in mind to quilt a block that looks like a stack of books on a shelf. Well I still think that the idea was full of possibilities, but its the execution where I got into trouble. Somewhere between cutting and sewing, the lines took directions of their own.

To add insult to the injury there are those pretty and perfect blocks scattered all over the Clothworks Blog.

But hey! I tried. You know, what they say about putting yourself out of your comfort zone. Well! I ventured outside, got uncomfortable and came scurrying back into the safety of skirts, tops, pants and dresses.  So you go check out the Everything Blue Block Hop while I lick my wounds and look for some simpler quilting blocks to try.


Pin It

Monday, September 9, 2013

Free Sewing Tutorial: Peekaboo Pleated Skirt

Back to School Sewing : Pleated Peek-a-boo Skirt


Today's tutorial is a guest post from Remona of The Stitching Scientist.

It rarely happens that something comes out of nowhere and leaves you wowed! When Remona asked me for guest post explaining that she is a new blogger I reluctantly clicked on her blog thinking that it might be just a roughly put together blog with a couple of posts ( yeah! something like the way mine looked..and still looks) but oh my! was I in for a shock! Her blog is so professionally put together, starting from social media icons, down to the well clicked shots, everything is polished to perfection. And don't even get me started on her tutorials. I had such a hard time picking a couple to highlight here. Once you look at them you will know why:

Take for instance this Bow clutch:


Swoon..sigh! I would love to carry this baby to a party.


Or this Gypsy Doll Face Pillow. My daughter would bug me until I make her one if she sees this.


I could go on and on about sewing freebies she has on her blog but lets talk about this Pleated Peekaboo Skirt that she has brought us today. You can check her
complete sewing tutorials here.

Take it away Remona...

I would really like to thank Anshu for giving me the opportunity to guest post on her blog. I am fan of her work and she is truly an inspiration.
I decided on this pleated peekaboo skirt because I think pleats are a true classic for back to school styles. I found this alphabet fabric at my local fabric store and fell in love with it. What better than a pretty little skirt for my pretty little girl. I think this will look great for fall with a cute yellow or white top or in the winter with a cute pair of tights and cardigan.


The skirt has box pleats all the way around and is wrapped with a curved upper fabric. It is then tucked in on the side with a big button. It has an elastic waist which makes it easy for little girls to put on and take off by themselves.


Skill Level:Beginner

Time:
1 hour

Supplies (2T):
1/2 yard of bright colored cotton
1/4 yard of coordinating upper fabric
1" wide Elastic 20" long
Liquid Starch
Pattern: 
Self drafted - Drafting instructions included

Seam Allowance:
1/2"

Techniques Used:
Box Pleats

Construction:
For the main fabric, measure the waist of your child and multiply it by 3. My daughter's waist is 20" so I cut my main fabric 60" long. To get the width, measure from the waist to just on the top of the knee. My main fabric ended up being 60"x10".

For the coordinating top fabric, measure the waist of your child and multiply it by 2. To get the length, cut 2" shorter than your main fabric. My measurements for the upper fabric ended up being 40"x 8".
For the elastic, take the waist measurement plus 1". Mine was 21".

To make the upper part of the skirt:

Fold the upper fabric in half. Put a mark on the bottom of where the fold is. Put another mark about 3" from the top of the other end. Connect your two marks making a curve. Serge or zig-zag all your edges.


To make the main part of the skirt:

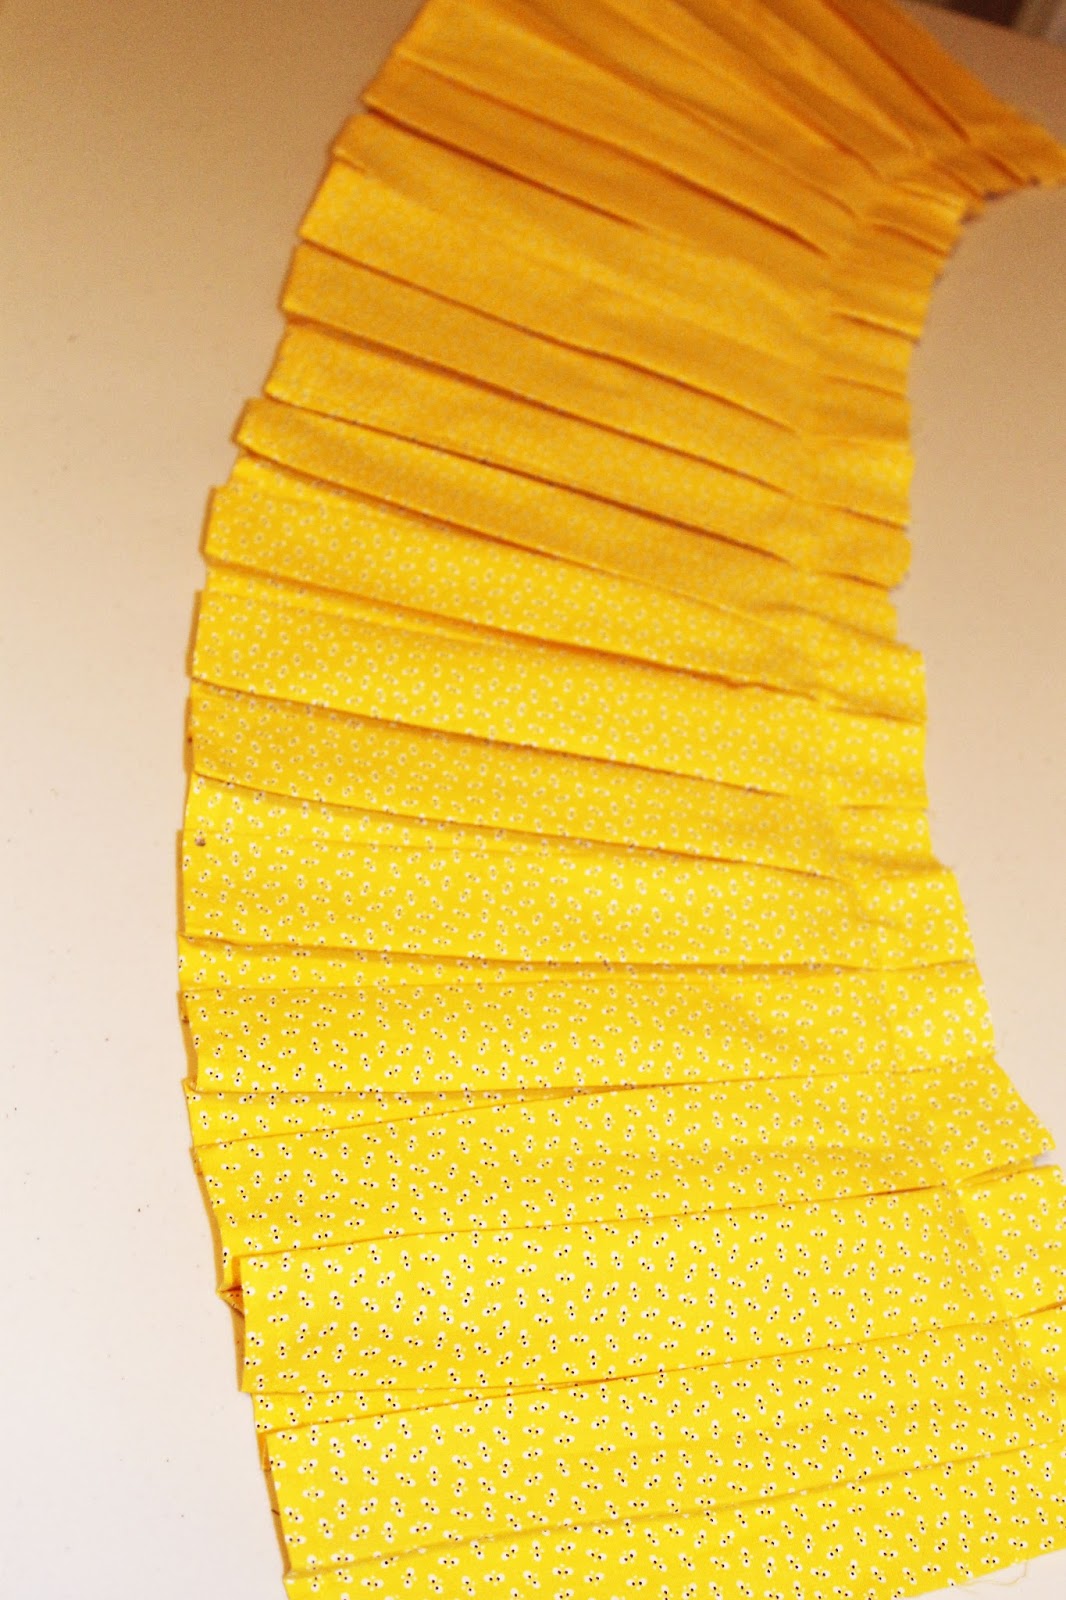
Hem the bottom of your fabric by folding 1/4" in and then another 1/4". Serge or zig zag the top and the sides of the fabric. Take your fabric to the ironing board and make 11/2" box pleats. This is done by folding 1/2" of the fabric in and then another 1/2" over (hard to explain). Here is a video to help. The key to pleats in my opinion is good starch! Something that will hold down the pleats. I use Mary Ellen Best Press Ironing Starch. The stuff is amazing. It holds pleats together even after washing.


 Make box pleats with the entire fabric, starching and ironing as you do each one.


Once you have all the pleats done, sew a basting stitch about 1" from the top to hold the pleats in place.


Putting the two pieces of fabric together:

Take your upper fabric wrong side down and lay it on the top of your main fabric right side up. Sew the two together 1/12" from the top. If your fabric doesn't line up because of the pleats not being equally spaced, simply cut out a few pleats to make the bottom main fabric line up to the top.


Fold both pieces inwards and sew the ends close all the way down the side using 1/2" seam allowance.


Fold the top down and sew all the way around leaving 3" to thread the elastic through. Once the elastic is in, sew close your 3" opening.


To add the button, scrunch up the front piece of the upper fabric and hand sew the button.


 That's it! Enjoy your little girl in her Pleated Peekaboo Skirt. I am sure all eyes will be on her as she models this creation to school!


Thanks Remona for stopping by. It was great to have you here at Blooms And Bugs.

Readers, if you liked the tutorial please visit The Stitching Scientist and let her know or better yet subscribe to her blog so you don't miss the sewing awesomeness that she is going to share.

Pin It

Friday, September 6, 2013

Free Sewing Pattern: Baby Kimono Top

Free Sewing Pattern: Baby Kimono Top
free sewing pattern kimono top

Here is my latest free sewing pattern and tutorial for Baby Kimono Top on Cutting Corners College ( Riley Blake Fabrics).

Kimono Top free pattern

This cute top features a yoke in the back and velcro closures. Makes a great baby shower gift and great "Sewing for baby" project.
The fabric I have used is Boy Crazy by Dani Mogstad for My Mind's Eye.


Pin It

Thursday, August 22, 2013

Free Sewing Pattern: Tahiti Halter Neck Top Sewing Tutorial

Tahiti Halter Neck Free Sewing Pattern
tahiti halter neck top pattern


I first found out about Modern Yardage from this Shirred Summer dress tutorial on Make It and Love It. "What a cool concept!" I remember thinking. Basically Modern Yardage has fabrics in a lot of prints and designs and you could order whichever fabric you like and they will print on demand. Yes! you can pick however much you like in whichever print you like and also you can pick the scale you want the print in ( they have three options) and they will print it and ship it to you. So you can rest assured that your favorite print will never go out of stock. What a novel idea!

So I read about them on Make It and Love It and asked them if they would like to sponsor fabric for a halter neck top I wanted to sew. They said yes and soon I had on my hands fabric from this beautiful Earth To Sky collection from Katie Schrader. The thing that struck me most about this collection was its earthiness, the colors reminded me of pottery and bricks being made of dirt. Very different from florals or paisley I typically like but beautiful nonetheless. I whipped up this halterneck the first chance I got.

Here is how I went about it ( and you can too)

Skill Level:
Intermediate

Time:
1  hour

Supplies:
3 fat quarters
1 button
For embellishment:
Decorative Buttons
Pellon Wonder Under

Pattern: 
Download the four-page Tahiti Halter Neck Pattern ( size 3T-5T). Print it on A4 (8.5 X 11 inches) paper with margins set to 0 and Portrait Orientation
Please note that this pattern has a lot of flexibility in terms of sizing. You could make it wider by adding more of shirred portion in the back. So the same pattern will work from 3 to 5 years size.

Seam Allowance:
1/4 inch unless otherwise stated.

Techniques Used:
Sewing buttonholes, Shirring, Appliques, Making and sewing Bias Tapes

Construction:

halterneck top sewing tutorial
1. Cut a rectangle 13 inch ( length) X 15 inch( width) from the fat quarter picked for the back. Fold it in half on 13 inch side.

Free halter neck pattern
2. Fill bobbin with elastic thread and sew 4 to 5 rows of shirring about 3/8 inch apart. Don't worry if doesn't seem to gather much. Once you are done sewing steam iron the piece well. this will help it gather well. Here is a great tutorial on shirring from Make It and Love It.
Depending on how much the piece gets shirred we may need to use the whole piece or a part of it. To determine this either measure the child's chest and subtract the front bodice width from it. The measurement you are left with + 1 inch is the required width of shirred piece.
However, if you can its best to not cut it just yet and measure it on the child once its partially sewn. That is the best way to check and adjust the fit. You need to have the child nearby in order to do this though. I will show you how to do it in step 6.

cut out the pattern pieces
3. Cut out the front pieces using the pattern. Cut one from the main fabric and one from lining.

sew with right sides together
4. Place the main fabric and lining right sides together. Sew along the armholes and keep going over the shoulder straps, neckline all the way to the end of another armhole. Leave the sides and bottom raw.
Snip notches all along the curves  to get a crisp finish along the edges when you turn it out.

sandwich the back between the front pieces
5. Open the front piece on the sides and slide the shirred piece in between such that right side of shirred piece is together with main fabric of bodice. Cover with lining fabric and sew along the sides. Note that the front pieces are curved along the sides, so while sewing the back pieces just follow the curve of the front, we will cut out any excess fabric later on.

sew along the sides
6. Stretch the other end of the shirred fabric to line up with the other side and sandwich the shirred piece the same way as we did in Step 5. Keep the back piece width to whatever measurement you arrived at in Step 2.
The rest of the piece will be hanging out on one side and that is fine, we will take care of it later once we have tried the top on the child.

Sewing tutorial - halter neck top
7. Turn the top out and iron. Its looking like the halter neck now. Now try this on the child and see if the back is a snug fit. Ideally it should be snug without being uncomfortable. If it is a good fit then go ahead and cut off the excess shirred piece that was hanging on one side, if not then unpick the side seam of step 6 and adjust the back width as needed.

making wide bias tape
8. Cut out a 3.5 inch wide fabric strip from the back fabric and fold it like a bias tape, only in this case the raw edges don't get folded all the way to the center. I kept mine at 1/4 inch on one side and 3/8 inch on the other. Basically what we need is a wide bias tape without sacrificing a lot of fabric. So the precise width of the fold doesn't matter, just fold a little bit so you can sew it. Here is a detailed tutorial on making and sewing bias tapes from MADE.

sewing the bias tape
9. Sew the bias tape from Step 8, all along the bottom of the top ( including the back).

sew button and buttonhole
 10. Sew a cute button and a buttonhole on the shoulder straps for closure. Buttonhole and Button sewing tutorial on MADE.

I was almost done with the top at this point...but then I noticed this on the fabric

applique tutorial
The fabric I had received had this swatch of the collection in all colorways. So cute, it was just begging to be added into the top. I obliged.
Here is a detailed applique tutorial from my earlier posts.

appliquing with wonder-under
11. I cut out a rectangle of Pellon's Wonder Under and ironed it on the back of swatch piece.

How to sew appliques
12. Then I cut out these triangles from the swatch and peeled off the backings. I ironed them in place along the bias tape slightly off center to the right.

applique tutorial

13. I set stitch length to smallest, set the machine speed to lowest and sew a seam along all the triangles with black thread.
I also added a couple of cute buttons near the neck.


And...woohoo! Who is ready for last bit of summer fun..in a cute halter neck?


Pin It

Friday, August 16, 2013

Reader Appreciation Month: You Made It!

Knotted Baby Hats, from Buffaloes and Butterfly Wings

Its amazing to see that such a simple project received so much attention from readers. But then we all can use easy DIY baby gifts, right?

Amy of Buffaloes and Butterfly Wings created these cute knotted hats while waiting for her baby. Here is the tutorial for Knotted Baby Hat.

August is Readers Appreciation Month on Blooms And Bugs. You Made It series is part of readers appreciation posts where I put you and your projects in the spotlight.
Have you made anything with Blooms And Bugs Free Tutorials and Patterns? Email me a pic at bloomsandbugs [at gmail   along with your blog/website or anything you would like me to give a shout out to, and I will feature it in one of the You Made It editions.


Pin It

Friday, August 9, 2013

Rader Appreciation Month: You Made It!

layered skirt with pickups
Springy Ruched Skirt, Peaches And Bees

Annie from Peaches And Bees made this super cute Springy Ruched Skirt for her little girl based on the Claire Skirt Tutorial. And boy did she made it better! I love all the tulle peeking out from the inner layer. Simply beautiful! Go to Peaches And Bees to get more details and also see the super cute model donning this skirt.
Well Done Annie.
August is Readers Appreciation Month on Blooms And Bugs. You Made It series is part of readers appreciation posts where I put you and your projects in the spotlight.
Have you made anything with Blooms And Bugs Free Tutorials and Patterns? Email me a pic at bloomsandbugs [at gmail   along with your blog/website or anything you would like me to give a shout out to, and I will feature it in one of the You Made It editions.
Other posts in the series:
You Made It (1): One Shoulder Ruffle Top

Pin It