Showing posts with label sew with knits. Show all posts

Monday, March 25, 2013

Free Sewing Tutorial: Tshirt Neck Binding

Free Sewing Tutorial: How to bind Tshirt Neck
sew with knits

If you are following my blog for some time, you would know that I have been trying to learn how to bind a Tshirt/knit garment neck for a while. I have gotten better and better with each effort. Now I have reached a point where I feel fairly confident sharing this technique with you. Here is how I do it.

Supplies:
Knit fabric for the garment
Knit fabric for the binding

Process:
I use a different fabric for binding just to get some contrast but if you want to use the same fabric for garment body and binding then that is fine too.

binding tshirt neck
1. Cut the garment in your desired Tshirt or Top pattern. Sew along the shoulders and the sides.

cutting out the binding


2. In this tutorial I have used the armhole to show how I bound it, but the neckline is done pretty much the same way. So first you measure all around the curve ( neck or armhole) that needs to be bound. Lets call this measurment L. Now cut a strip of binding fabric 3 inches long and 2/3L+0.75 inch wide.

tshirt sewing tutorial

3. Sew the 3 inch ends of the strip ( right sides together). Now you have a tube, now mark every quarter of this tube by placing pins there.

easy sew tshirts

4. Align the joint in this tube with the lower joint of the armhole such that the joint of the tube is about 1 cm away from the armhole joint. This will ensure that all the layers are not being sewing together at the joint of armhole.

5. Pin the rest of the tube to the armhole such that every quarter point of the strip falls at every quarter point of armhole. Since we have taken the strip to be 2/3 of armhole length, its quarter will be naturally bigger than the quarter of binding. It is intentional, we want the binding to stretch a bit when we sew so that it holds the shape of the armhole.
armhole binding tutorial

6. Sew along the raw edge of armhole and binding. You will have to stretch the binding a bit to ensure that their are no gathers when you attach the armhole.
Tshirt sewing tutorial

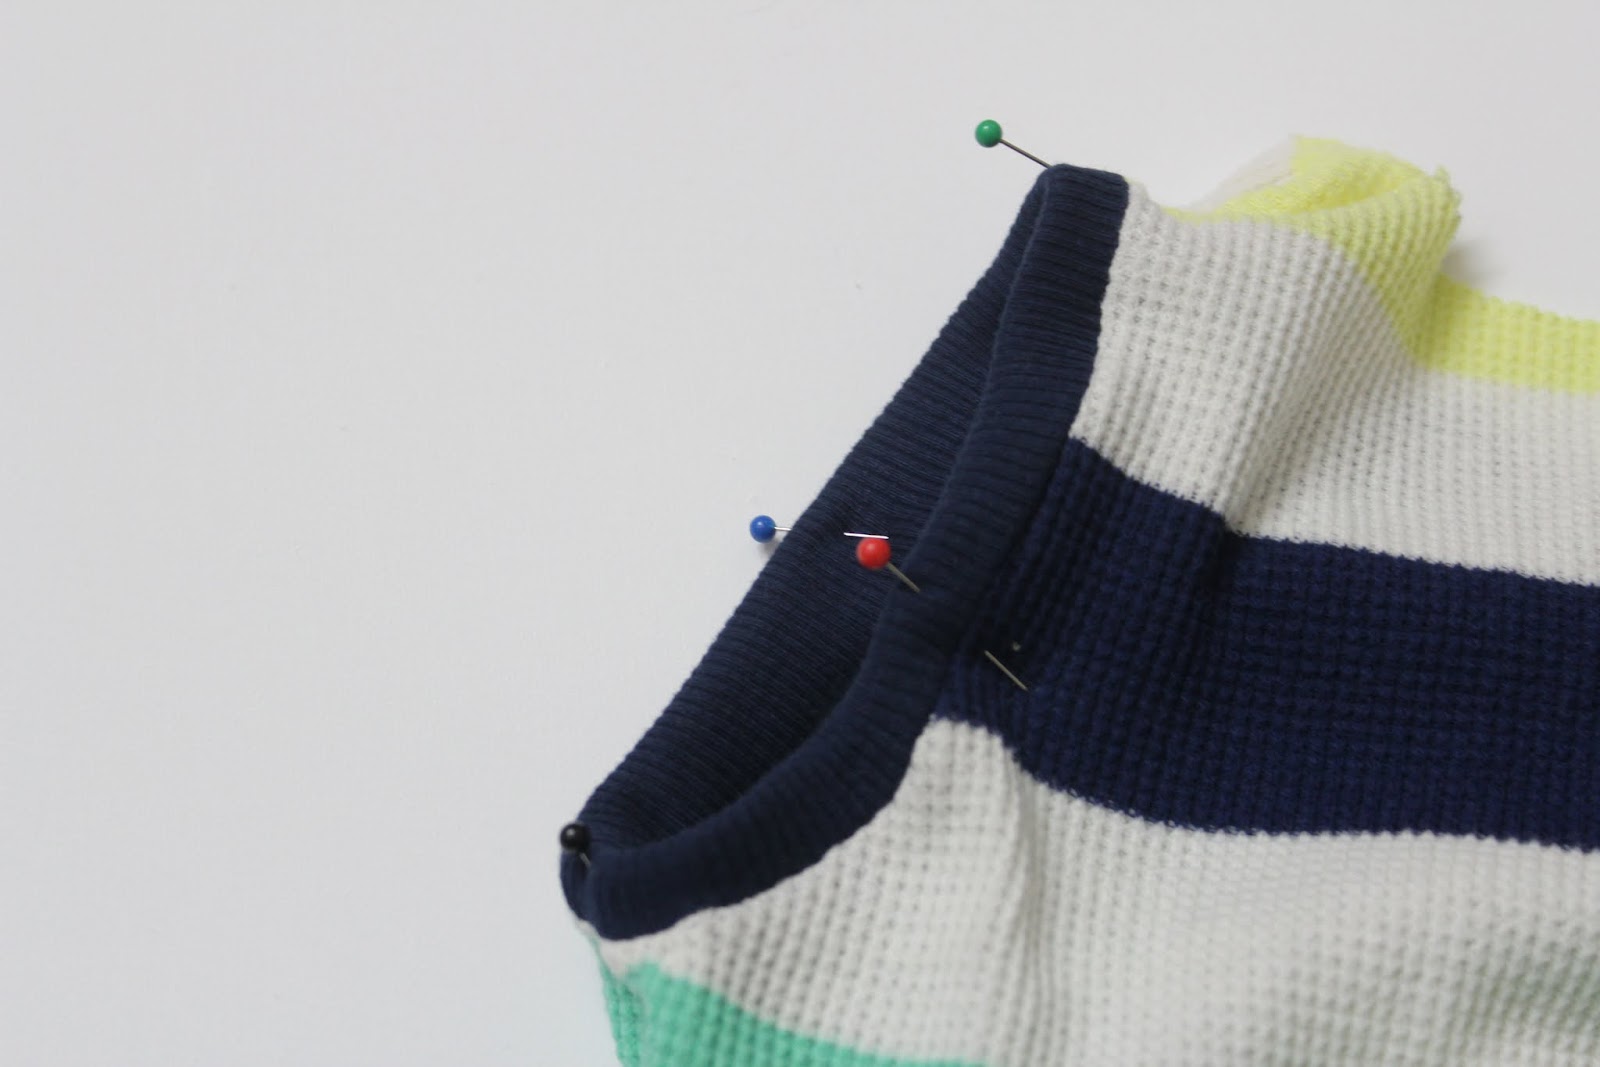
7. Fold the binding in half on itself and then fold it on the inside. Use pins to hold it in place. Be generous with pins, you don't want any part of binding to slip when you sew it in next step.


8. Sew a seam right below the binding, making sure you are catching the binding at the back. Go slow and steady.

9. Here is how it looks on the inside.

sewing with knits
And done! If you feel that the neckline or armhole binding looks wonky, just steam iron it, that should help it get back into shape.
Do share the pics with me if you decide to give it a spin!

Pin It

Friday, August 19, 2011

Sew Easy - Part 7: Carnival Dress

Sew Easy tutorial: Knotted knit dress

You can read the story behind this series and the first part here. Click here to read the second, third, fourth , fifth  and sixth edition of this series.

After having many tutorials with woven fabrics, I think its time we go back to knits and up-cycle some more T-shirts. With that in mind, I made this Carnival Dress. I named it so, because all the strips reminded me of the buntings and other festive decorations. I love how blue and yellow look so happy together. It is mostly a cut easy project, instead of sew easy. Interested in making one of your own? Lets do it.

Supplies:
2 T shirts in co-ordinating colors, same colors will also work
Basic sewing supplies - scissor, thread matching with the Tshirts

Measurements - Measure your child from shoulder to the desired length of the dress, lets call it L
               Measure your child all around the chest and add 4 inches to it, then divide it all by 2. Lets call it W.


1. First cut one of the shirts to L length, measuring from hem upwards.  Basically we want to reuse the Tshirt hem as our dress hem. Ok?


2. Now place this on top of the other and decide how much overlap do you want between the two. And starting from bottom cut that much. So we can reuse the hem from second T as well.

3. Now insert one Tshirt into another such that their raw sides align. Look at the picture.


4 . Now start cutting 3 inches long slits, one inches apart from raw ends on all four layers.

Keep cutting until you reach W width from one end.

When you reach W, instead of cutting a slit, keep cutting upto the hem. To get a Four layered piece of length L and width W.


5.


Now start Knotting these slits with one strip from Tshirt 1 and one strip from Tshirt 2 right behind it. Pull the strips a bit while tying the knot, this will cause the fabric to bunch up a little, which will give us a little gathered look. Tie the knot one more time to secure. 
Just leave 4 sets of strips 2-3 inches apart in the center. Dont tie them, because they will become the shoulder straps of the dress.
 Keep tying the knots with the other strips at the back as well, when you reach near the center of the back, leave 2 sets of strips then tie the center strips and then again leave 2 sets of strips.


6.
This is how it will look after tying all the knots. I have knotted the front and back shoulder ties together, but I recommend doing it at the very end.


7.


Now lets sew together the side of the dress thats still open.


Pull apart both the layers, taking care not to stretch the knots too much. Now sew each layer, right sides together.
Settle them back in place.


8.
Now take a look at all the hanging strips and see if you like them as is. Maybe they need a haircut. Cut them to a length you like.
At the end, mine were about 1.5 - 2 inches long.


Neckline at the front...and the reason why I shouldn't cut my toddler's hair :D


This is how mine looked from the back, after cutting the strips to a smaller length.


9. Now sew a seam along the neckline ( and back) as close to the knots as you can get. This will help the strips stay in place.


10.


Now slip it on the child and tie the shoulder ties. This may take a couple minutes, so bribe with candy.

Enjoy your carnival dress!