
Hope you had a fun and relaxing long weekend with your family.

With summer here, its time to get ready for summer weddings.
Am I the only one who thinks that little flower girls are the cutest part of any wedding party ( Did I just invite the wrath of all the brides and brides-maids?)
I thought this would be a good time to share the tutorial for a simple and elegant flower girl dress.
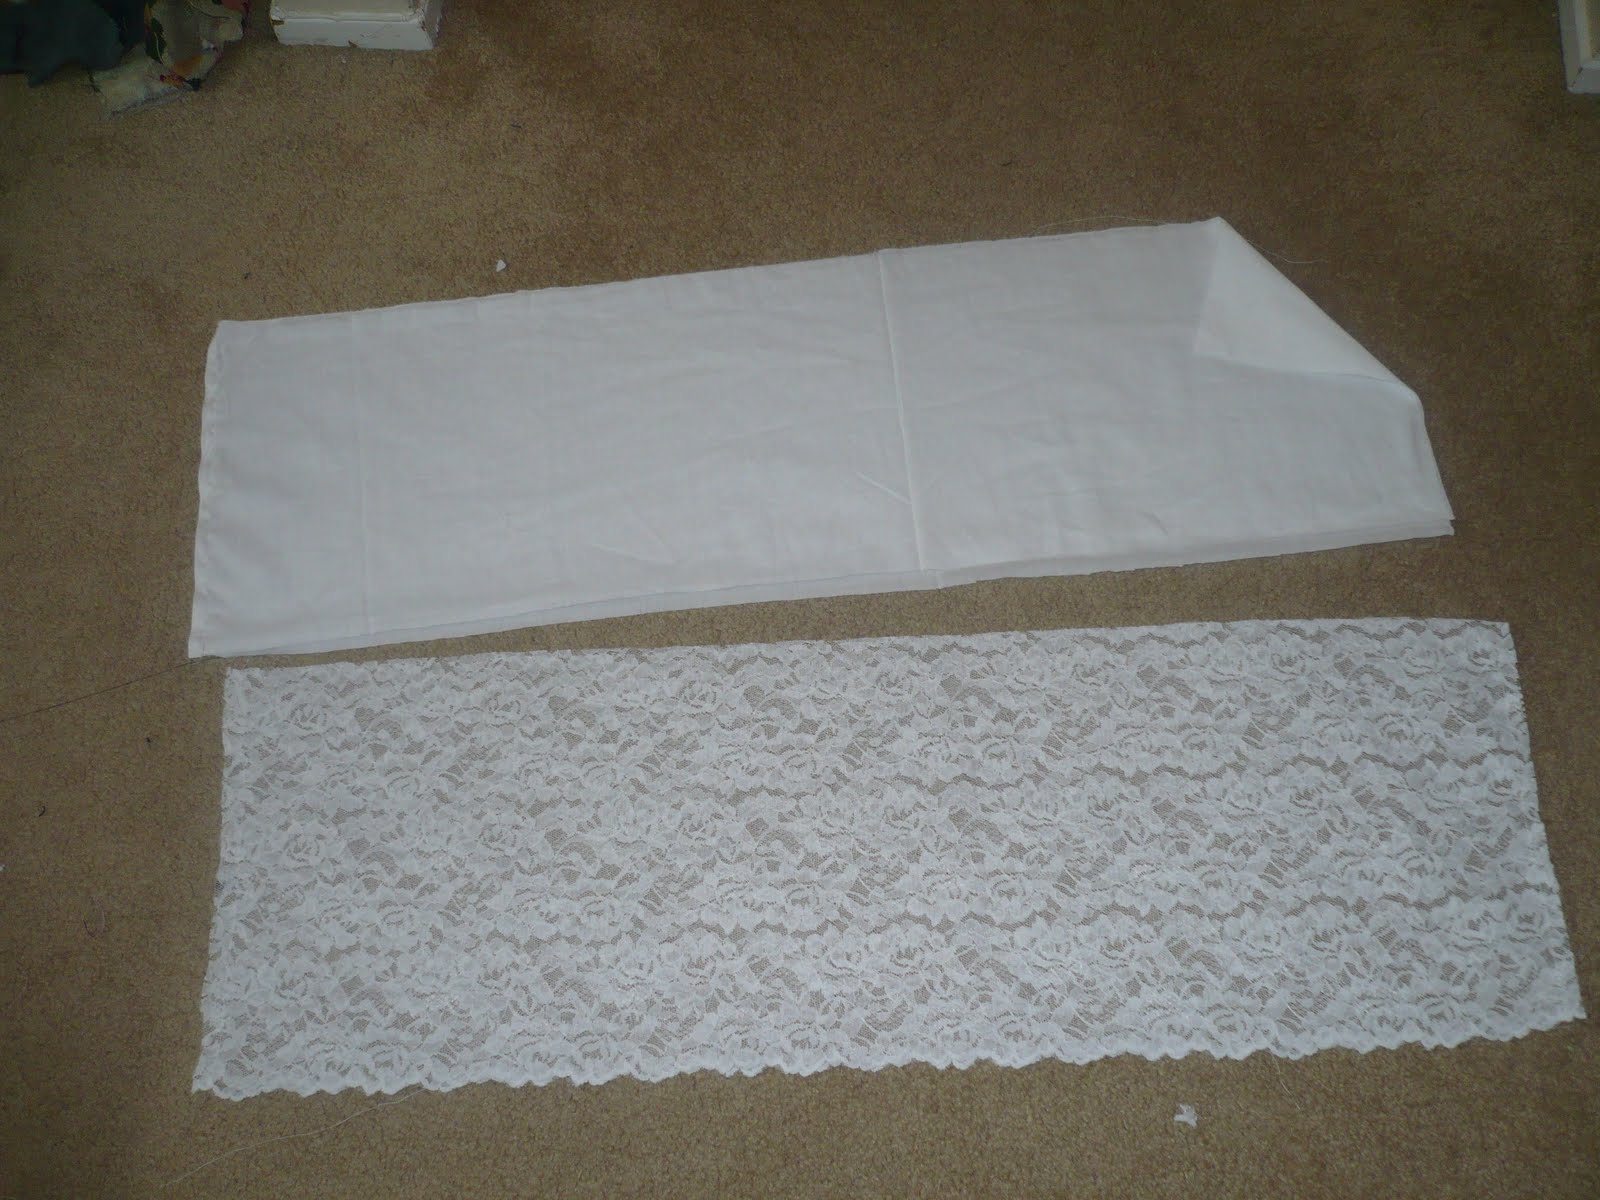
Step 1. Take any plain dress pattern that you have and cut bodice pieces from the lining as well as main
fabric. I used lace for my main fabric and cotton for lining because little one is allergic to poly materials.
If that is not a concern, you can choose satin as the lining. It looks better with lace and not that hard to work with.

Step 2. Join the lining pieces at the shoulders. Also join the main fabric pieces at the shoulder, right sides together.

Step 3.
Now make a slit ( roughly 3 inch should be good) at the center of back of neckline ( both main fabric and lining). This will help in getting the dress over the head while wearing.
Now join the lining and main fabric at the neckline, right sides together; treat the slit you just made as part of neckline . Go slow and make sure the seam width is same across the neckline, and also that you are catching both the fabrics. The necklines make or break the dresses so be sure of getting it right.
One you have sewn across the neckline, cut small notches throughout the neckline going up to the seams but not cutting into it. This will help the fabrics sit flat when you turn the neck out.
Turn the dress out at the neckline and iron from the lining side.

It is looking like a lined bodice now.

Now lets work on armholes:

Here's another pic:


And this the part where we have sandwiched the main bodice between main fabric and lining from the other side.
Now join the main fabric and lining at the armhole, make sure you're catching only the fabrics from the armhole you just brought to this side and not any other part of the bodice.
Now cut some notches inside the curvy part of the armhole you had just sewn, just the way you did it for neckline.
Now turn it out by pulling out the bodice that has been sandwiched inside. It is hard to visualize ( dang! no pics) but quite intuitive when you're actually doing this.
Congrats! You have just finished the armhole of one side.
Finish the other armhole in the same way. Here you are:

Step 5. Finishing the sides:
now from the bottom of the bodice pull apart the fabric and lining. You will get something like this:

Now sew the side seams starting with main fabric right sides together and keep going when you reach the lining and sew the side shut, do it for both the sides. Turn out. Iron.
Now sew on a button and buttonhole (or snaps, or velcro) on the slit at the back to provide a closure.
Voila, bodice is ready! Now we will work on the skirt part of the dress.
For the skirt also we will cut two pieces one from main fabric ( lace) one from lining.
For determining the size of these pieces, you can just measure the width of bodice (W) and and half of W to it. So the total becomes 1.5W. So if your bodice width ( all around is 20 inches, your skirt width will become 30 inches. This will give you a skirt that is fuller than the bodice, but not too flouncy. In my opinion that looks better in formal dresses, but feel free o add more to the width, if you want a fuller skirt. As for the length, since the bodice is ready, you can just measure the total length of dress you want on the child and then subtract bodice length from it, that will give you desired skirt length, add 1 inch to this length for seam allowance and you get the length(L) and width(1.5W) of the rectangles for skirt.
Now cut one rectangle of above length and Width each from Main fabric and lining.
While cutting lace, if you can cut such that one end falls on the selvage, it would be great. That way you won't have to hem the main fabric at the end
Now for each fabric make a tube by bringing together length sides, right sides together and sewing it shut.
Now turn both inside out and place lining fabric tube inside main fabric tube. Such that lining right side is touching main fabric wrong side. Now sew two rows of seams along the top of this tube. Hold the bobbin thread from these seams and pull it gently to gather the top. Even out the gathers and measure the top of skirt against the bodice width. Once the top of skirt becomes equal to the bodice width, check the gathers again and even out if they are uneven.
Now the skirt is ready to be attached to the bodice.

Turn the bodice and skirt inside out. Line up the lengthwise seam of the skirt with the center of the back of bodice and pin the bodice to the skirt along the width ( Right sides together). You may have to even out any uneven gathers during this step. Now sew across the width to attach the bodice to skirt. Finish the seam from inside with a serger or by zigzag stitch on your sewing machine.
Turn the whole thing inside out.

Sew on a button/snap/velcro at the slit you made at the back for closure.
Hem the hemline of lining fabric ( also main fabric if it is raw edge - rolled hem seems to work better for lace fabrics )
Marvel at your sewing skills! You just made a fully lined dress.
Now lets make a sash to match the wedding colors.
For the sash I made ( with ruffles in the front ) I took a sheer fabric of
Length = 5 inch
Width = 72 inches ( twice the width of a standard fabric, so you may have to join two strips together for this)
(Although I chose sheer fabric, I highly recommend making the sash from satin instead, looks much better)
Sorry no pics of this step, but I will tr my best to explain it to you.
Now fold the strip right sides together along the length ( to make a 2.5 inch strip ) Now sew along the raw edge at the 72 inch side.
Turn the strip inside out. Now you have a tube of 72 inches which is open from both ends.
Gathering the ruffles in the front
Mark 20 inches mark from both ends, and sew two rows of seams between these two marks at the center of the strip. Now pull the bobbin threads of these seams gently from one end to gather the strip.
Make the gathers equal to the front width of the bodice.
Sew the ruffled area on the bodice with a zigzag stitch.
Finish the raw ends of the sash by tucking them inside the tube and top-stitching them. This can be tied at the back.
The front:

Put it on your favorite flower girl! Enjoy!
That is absolutely adorable! I love the lace, and the pretty bow!
ReplyDeleteLove!! Thank you for sharing!
ReplyDeleteVery nice frock!! Just adorable...
ReplyDeleteAdorable! I love the lace.
ReplyDeleteliZ
this is so adorable.
ReplyDeleteDon't forget to add it to our weekly party for our readers to discover.
http://www.passionatelyartistic.com/2011/07/weekly-talent-search-with-linking-party.html
Thanks
Maggie
How adorable!I love it : )
ReplyDeleteCome check out my awesome giveaway!
http://dahlingkadie.blogspot.com/2011/06/giveaway.html
Thankyou for the tutorial, that is a gorgeous little dress :)
ReplyDeletevery cute love all the lace
ReplyDeleteadorable!
ReplyDeleteThis is SOOOO Cute!!! Stopping by from the Creation Corner Party.
ReplyDeleteI would love for you to link this up to My Favorite Things Friday Party going on all week!
Be sure to enter my $50 stencil giveaway too =D
XX
~Iffy~
www.stayathomenation.blogspot.com
I just wanted to stop by & say thank you for linking up to My Favorite Things Friday Party last week, you are in this weeks Stay At Home Nation Spotlight! Please stop by & check it out. I can't wait to see what you link up with me this week! Have a great weekend!
ReplyDelete~Iffy~
www.stayathomenation.blogspot.com
cute design for a flower girl but wouldn't it be nice not to combine black with white? i think its better to have it in pure white or if not have the belt red.
ReplyDeleteSmith industrial workwear