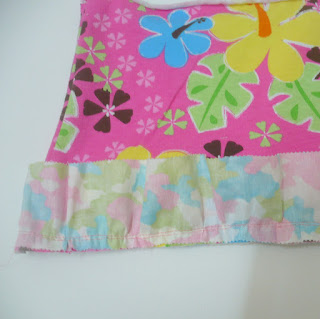
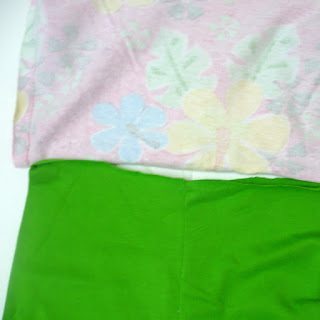
Here's the story behind the series, the second part of the series is here, third part of the series is here, part 4 is here and go here for part 5.
So the munchkin is now old enough to go to a daycare ( really? when did that happen?). I still remember that when I brought her home from the hospital, even 1 month seemed like far away in the future. Oh the days, that turned into months and years....Ok zap back to reality!
When I was sorting her clothes to wear at the daycare, I realized that she had enough tops (thanks to my recent bout of Octoberizing her Tees) but all her pants were either - Too short (already) or too..errr...well loved ( turmeric stains anyone) to be worn outside home. Yeah! didn't I just made her like a dozen pants? Anyhow, the fact remains that she has too few pants and most of them don't match well with the tops she has.
So I decided to make her some leggings this time, specially because leggings are easier to layer if we need to.
After 2-3 pairs, I decided I wanted to jazz up some of those. So I came up with these skirt leggings and I love how they turned out.
Supplies:
Two co-ordinating knit fabric - 1 for the leggings and one for the skirt above it.
1 jelly roll strip of coordinating woven fabric (2.5 inchesX 40 inches) for ruffle - Actually you could also use knit for this but since I used woven I'm writing woven in the list.
1 inch wide elastic - for waistband
Ric-rac to finish the hemline (optional)
Construction:
Construction of leggings:
1.
Use any pair of leggings that fit well and trace their boundaries leaving 3/8 inch of sewing allowance all around except for the hem. Leave a 1 inch allowance at the hem. You don't need to leave a bigger allowance for the waistband.
2.
Using this template cut two pieces on fold
3.
Keeping each piece folded right side together, sew the inseam of each leg.
4.
Turn one the pieces inside out and insert into the other leg.
5.
Sew along the crotch area carefully aligning the inseam of both legs.
6. Cutting the skirt
I made an A-line skirt to attach to these leggings.To make an A-Line skirt the width at the top of the skirt should be equal to the width at the top of the leggings.
The way I determined the dimensions for the skirt is following.
Width at the top WT = total circumference at the top of the leggings divided by 2 + sewing margins X 2
Length of the skirt = length from top of the leggings to the crotch.
I kept the length of the skirt exactly equal to the crotch because I intended to add a ruffle which would make it slightly longer than the below the crotch area. That was the length I was going for. If you want any other length feel free to alter the length but keep in mind that the ruffle will increase the length by roughly 2 inches.
Width of the skirt at the bottom - WT +3 inches
( This was sort of guesswork and I got a decent flair with this measurement but if you feel that your baby is chunky at the butt you may need to add more than 3 inches)
Construction of skirt:
7.
Cut the front and back of the skirt as shown in the diagram above. Place both the pieces right sides together and sew along the sides. Please bear with me...my drawing skills are...err..basic, I just wanted to give you an
idea of how to cut. This image is not made to scale or symmetrical.
8. Hem the jelly roll strip at one edge. I usually do it by serging the edge once and then folding it on the wrong side and sewing on it as close to the edge as possible. I find it faster than folding it twice. If you don't have a serger, you could always fold it twice. Just keep it as narrow and even as possible.
9. Ruffle the jelly roll strip by setting machine tension on the highest, stitch length on longest and machine speed on fastest. Adjust the ruffled fabric by hand to match the width of the skirt.
10.
Line up the bottom of the skirt with the ruffled edge of the strip ( Right sides together) and sew a seam along the bottom edge of skirt.
11.
Fold the ruffle out and with the seam allowance turned towards the main body of the skirt top-stitch as close to the edge as possible.
12. Attaching the skirt to the leggings:
Turn the skirt inside out. Keep the leggings right side out. Line up their tops such that the seams of the skirt fall on the side of the leggings.
Sew a seam together along the top edge of skirt and leggings. With right side of skirt together with wrong side of leggings.
13.
Turn the skirt right side out
14.
Top-stitch as close to the edge as possible. I have used zig-zag stitch here but you can use the regular stitch as well.
15.
Now sew another seam about 1.5 inches below the top-stitching. Leave a 1 inch gap where the seam ends. This will be the opening to insert elastic in the leggings.
16. Inserting the elastic:
Pull apart the skirt and the leggings at the place where you left the gap.
18.
In this opening insert an elastic with the help of a safety pin.
19.
Sew both ends of the elastic together
20.
Go over the elastics multiple times to reinforce the stitching. I use stitch 1-14 on my machine that looks like broken zig-zag. If you don't have it in your machine, you could use the regular zigzag.
21.
Sew the opening shut.
Bye bye plain leggings! Hello skirt leggings !


This is so cute! You did a great job. Seeing fun things like this make me wish my sewing machine worked lol!! :)
ReplyDeleteSo cute! I am definitely going to have to try this. Thanks for the tutorial!
ReplyDeleteGreat idea! I love the contrasting colors you have used..
ReplyDeleteThanks for linking at craftionary..
Absolutely adorable!
ReplyDeleteVery neat and awesome tutorial, just the type of thing I would love to showcase on my blog! Would you mind sharing on SaMiE's SURPRISE linky parties- it's the first ever! You can find it http://samiedesigns.blogspot.com/p/samies-surprise-linky-parties.html
ReplyDeleteSuch a cute little idea!! Would love it if you would stop by and share this at my linky party going on right now :) http://everything-underthemoon.blogspot.com/2012/01/bedazzle-me-monday-16.html
ReplyDeleteHave a great week!!
Great tutorial! Thanks for linking up!
ReplyDeleteLoving the Bottoms Up - Part 6 - Skirt Leggings! The perfect combo of style and comfort, these leggings give you the best of both worlds—sleek leggings with a chic skirt overlay. Whether for workouts or casual wear, they’re a must-have! Need a health check before hitting the gym? Use the CallonDoc promo code for quick and affordable online healthcare. Stay stylish and healthy at the same time
ReplyDelete