Showing posts with label toddler. Show all posts

Saturday, October 8, 2011

Harvest Princess Dress ( Size 2T- 3T): In store now

Blooms And Bugs Studio: Harvest Princess Dress
harvest Princess dress

I'm slowly adding holiday stock to my etsy shop. The latest addition to it has been this Harvest Princess Dress and Hairband.

I wanted a design that says fall/autumn to me..but doesn't scream Halloween or Costume in my ear. I don't like the concept of clothing that is just meant to be worn once, particularly handmade. I think this dress fits the bill I had. A little girl could wear it with a crown of leaves and become the harvest princess for trick-n-treat, but more importantly she could wear it throughout the fall with a Tee underneath or a shrug over it.


Elastic in the back and multiple button and buttonholes in the shoulder ties will ensure that the dress grown with her.

The dress is made with finest quality cottons from Moda Fabrics ( Deb Strain's Meadow friends collection).

harvest princess headband

There's also this cute hairband that comes with it to complete the ensemble.

Blooms And Bugs Studio

Does your princess need a dress this fall?


Pin It

Tuesday, October 4, 2011

How to sew gathered bodice halterneck dress


Hey, here's the big news I have been dying to share with you all. My "Grow and Gather Dress" made it to Moda Bake Shop.

gather n grow dress sewing tutorial


Go here to get the full tutorial. Something tells me that this is the first...but not the last time, I'm featured on Moda....<smiles>

Pin It

Sunday, September 25, 2011

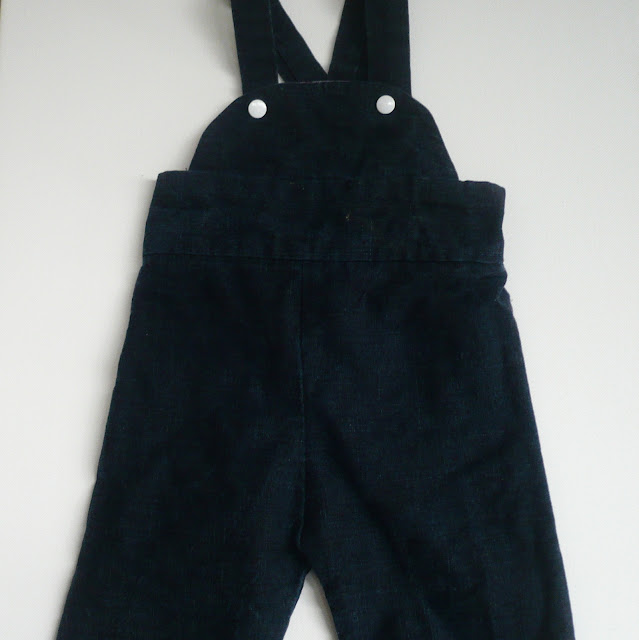
Bottoms up part 3: Rumble Tumble Coveralls

Coveralls sewing tutorial
coveralls sewing tutorial

Here's the story behind the series, the second part of the series is here.

For this edition of Bottoms Up series, I decided to bring you these coveralls. I love coveralls - the front yoke, the shoulder straps, the elastic in the back, all make for a very cute outfit. On the practical side, they are a perfect garment for a small powerhouse, the straps make sure that the pants stay in place during all the jumping, running and other toddler adventures. The denim or corduroy fabrics wear well through the daily washes that kids cloth endure.These will also be a good choice for cooler months ahead. So without further ado, here's how you can make your own Rumble Tumble coveralls.

Supplies:

Denim or corduroy fabric: 1.5 yard
Lining Fabric: 10 inchs X 10 inches 
Closures: 2 ( buttons or snaps )


sewing pattern coveralls

We're using the simple trouser pattern( page1, page 2) for these coveralls with some changes:
1. DONT cut it on fold now, you will need 4 pant pieces for these coveralls
2. Leave top 2 inches of the pants from the pattern, because we'll be making a separate waistband here.
    (Basically just fold 2 inches from the top of the pattern and ignore that part)
Cut all 4 pieces for the trouser from the pattern.  Remember that you don't need a waistband for this pattern so the top of the pants is a little shorter than a regular trouser.

how to sew coveralls

Sew these parts like regular trousers. 
First sew the outer straight seams
Next sew the inseams of the pant legs.
Then turn one leg right side out and push into another leg and sew the crotch seam.
how to sew overalls


Now measure a rectangle of length 5 and width = circular width of the pants' top + 1inch.
Fold and cut it into half such that you get 2 strips of 2.5 X width
These pieces will serve as waistband.


sewing yoke to coveralls
For the yoke front cut an arc of 4 inches X 8 inches.

lining for the overalls yoke


Use it as a template to cut a similar sized lining piece. Sew the yoke and lining( right sides together) along the curve.


Snip some notches all around the seam to help it retain shape after turning out. Turn inside out.

turing out the yoke

Fold into half along the width, and snip a small notch to mark the center.

sewing shoulder straps for overalls

Now lets make shoulder straps:

Cut 2 strips of 4 inches width and 25 inches length. Fold into half along the length and sew along the longer side to make a long tube, turn out. Now iron these straps such that the seam is in the center of one side.

Assembling the yoke and waistband of the coverall:


Take both the 2.5X width strips we earlier cut for waistband. Mark their centers by folding them in half and snipping a notch in them.


Now align the raw edges of yoke and waistband strips such that yoke is sandwiched between right sides of the waistband strips and the notches that mark center of all three layers line up. Sew a seam along the yoke length.

Here's how it will look.


Now sew the waistband to the pant by aligning one raw edge of waistband with the raw edge of pants. Here you need to make sure that not only their right sides are together, but also, you are sewing the side that will keep the yoke right side on the front, after you turn out. You can sew a few stitches and check to see if you're doing it right.


Go all around the pants, joining waistband to the pants. When you reach close to the ends, measure how much you need to finish and use the rest of strip as sewing margins. Sew both ends together. Now finish sewing the seam to join waistband and pants.


This is how it will look at the back. Now place you shoulder straps in the back such that the seam on the straps in facing you. Place the straps 2.5 inches apart at the center of back. Now cover them with the other waistband strip such that it sandwiches both the straps in between waistband.Sew along the raw edges of waistband, making sure you are catching the straps.


Now iron half an inch of the raw side of waistband to fold on the inside.

Now lets insert the elastic in the back:
Sew along the waistband seam (ONLY IN THE BACK), as close to the seam as you can but not over it. This will ensure that you catch the folded waistband on the inside of the pant.


Once you have done this at the back, insert an elastic from one end of back, pull it out at the other end of back. Pull the elastic a bit to gather the waistband. I gathered the waistband about 2 inch lesser than its width
to make it snug in the back. Now sew it on both ends to secure it. Sew along the rest of the seam to finish attaching the waistband.


Now add some closures to the yoke and shoulder straps. You can finish the raw ends of shoulder straps by
serging them, or by pushing them inside a little and top-stitching.

how to sew coveralls

At this point I highly recommend trying these on the baby to determine exact length desired. Mark the appropriate length and use the rest of the length to finish the hems by folding twice and sewing.

rumble tumble coveralls tutorial

Rumble Tumble coverall is ready to accompany your toddler in all her adventures.

Thursday, August 25, 2011

Bottoms Up - A new series


While I was busy sewing up gifts and writing tutorials my little munchkin was growing up like a weed. When I found a moment to take stock of her wardrobe, I found that every pair of pants came a few inches too short.Whoa! when did that happen? Probably its because she still fits in those pants at the waist. Its the same size as it was one year ago. Anyhow, I revised my go to pants pattern to accommodate her growth spurt ( I still can't believe that it is the template for my itty bitty baby), and went to town,cutting, sewing, ironing...and a couple days later her stock of pants was replenished.

While doing all this sweat shop sewing, I realized that I can't be alone in this...so I thought of doing this new  weekly series, where we will focus on just the bottoms, like pants, leggings...maybe one or two skirts for little ones.
I'll be starting out with the most basic pants pattern, you must have seen it bazillion times around the blogosphere, I still decided to keep it here for the sake of completeness. Along the way, I'll give you some of embellishment ideas ( and how to do them ) for these basics. I hope you will find it useful, as well as enjoyable.

So lets get started with the basic pants for a skinny mini butt. You can find a lot of patterns for these basic pants all over the blogosphere. For the sake of completeness, I'll also upload the one I have been using for my skinny toddler. These work for us but you may need to alter the pattern a bit to suit your baby's length and
waist. Or you can take up any basic pants pattern and start. I'll start with the basic pattern and show how to
go about creating a bunch of variations of it.

So download/get a pants pattern you feel comfortable with and lets start.

Supplies:

Basic pants for a 2 yr old

1 yd fabric - For pants use fabrics that are a little heavy like - quilting weight cottons, baby corduroy, denim of course.

Elastic - I used 17 inches of  5/8 inch wide elastic. But the best way to measure is to place it around your child's waist and see what length of elastic is most comfortable for him/her.

Optional - A narrow ribbon for embellishing 1.5 yds.

Basic sewing supplies - scissor, thread in matching color, pen for tracing out the pattern.

Cutting:

1.
cutting out basic pants

Lay your fabric straight, then fold it lengthwise, then fold it one more time.

2.
basic pants sewing tutorial

 Now place your pattern on the fold such that the straight line aligns with the fold.

3.


Trace the pattern and cut out.
Sew Easy tip: Try to place your pattern about an inch above the raw edge of the fabric. This will give you some margin, in case the fabric is not cut straight.

4.
sewing basic pants

 Now sew the inseams of both legs of the pant separately. Right sides together.

5.

Now turn out one of the legs.

6.

Insert one leg inside the other, such that the crotch areas align.

7.

Sew along the edges of crotch area, go over the lowest part a couple times, as this is the most stressed area of the pants and you don't want seams to unravel. Also serge if you can.

8. Turn the pants inside out.

9. Now lets make the waistband.

10.

Fold the waist quarter inch inside and sew.

11

. Fold it one more time about an inch this time. Sew, but make sure you leave about an inch of opening.

12.

Using a safety pin, insert the elastic piece inside this opening.

13.

 When the elastic comes out, Join both ends of elastic by sewing together. I use stitch num 1.14 as recommended by my machine manual. If you don't have this stitch , use zig zag stitch instead. Just make sure you go over the elastic at least 3-4 times.

14. Sew the opening shut.

At this point I highly recommend trying the pants on the child, to get a sense of the fit. The elastic at the waist should be snug but comfortable. Similarly, mark the length where you want the pants to end, and fold the remaining length of pants inside out. That will give us exactly the length we can use to hem the pants.

15. Iron the lengths you have just marked while trying on the pants.

16.

Ideally you should fold quarter inch first and then fold again about half an inch, but thats just a guideline.
     Use the length you have marked to fold the hems twice.

hemming the pants

The basic pants are done. Once you have the template and elastic width and other measurements down, you can easily make one of these in half an hour. (I'm guessing here, I still have to time a basic pant)

Embellishment idea.

For these pants I thought of embellishing these only at the end. so you can skip it if you want.
The idea is very simple though, take a narrow ribbon, and sew it in criss-crossing lines near hem of the pants. I went with a free-style simply because it felt stylish and also because its difficult to sew even rows near the narrow pants opening.
basic pants free pattern

I just cut two equal pieces of ribbon (~25 inches each ) and went around the legs sewing it on criss-crossing lines.


free pants pattern


Pattern pieces are here(page 1) and here (page 2).


Saturday, May 14, 2011

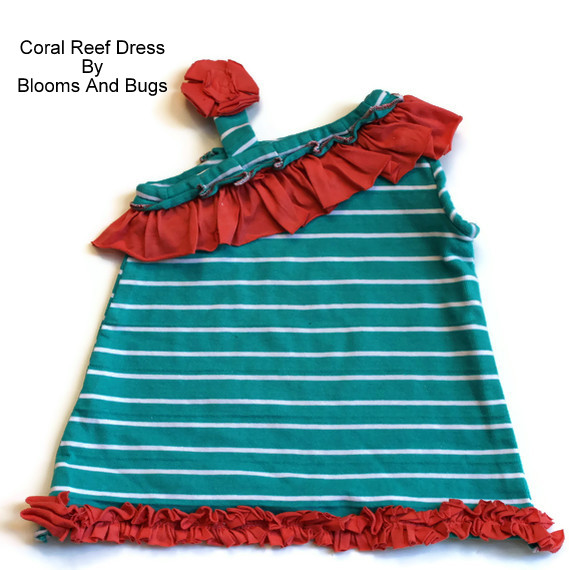
Coral Reef Dress - Tutorial

Dress Sewing Tutorial : One shoulder coral reef dress
one shoulder dress sewing pattern

Would you like to make one of these. Come on, lets do it together.

First take any dress pattern ( only body) that fits the little girl you are sewing for and fold it such that one shoulder ( including sleeve opening) gets hidden. Now place this on two layers of fabric ( right sides together). Trace and cut.

Now lets make ruffles and shoulder strap.
Cut a 4 inch wide strip for the ruffle and the length should be twice the measurement of the neckline. Note that since this is off shoulder dress, the neck line means neck+ one shoulder.
Note that the width of my ruffle strip is much smaller than 4 inches ( and I deeply regretted it). If you want the dress to look exactly like mine, you can keep the width 2.5 inches but I strongly feel that you should go with a wider ruffle.
For the shoulder strap cut a strip about 3 inches wide and 10 inches long. You probably won't need all 10 inches but I usually keep some allowance to adjust it once I try it on the child.
Now on to sewing:

Sew the one shoulder seam, and both side seams of the main body, set it aside:


Now pleat or ruffle the ruffle piece such that the final length is close ( just a little bit more) to the neck-line.


For the shoulder strap just sew the strip across the 10 inches length, right sides together, turn inside out to make a tube.

Now join the shoulder strap to the main body.
Turn the main body inside out, so the right side is outside. Mark the place ( front and back) where you want to put your straps, and decide how long you want it to be. Mine are 7 inches for a one and half year old.
Now pin one end of shoulder strap to the wrong side of body such that the wrong side of the strap is touching the wrong side of the main piece front. Now pin the other end of shoulder strap to the wrong side of
 back again make sure that the wrong side of the shoulder strap is touching the wrong side of back piece.

Sew over the straps to attach them, do not snip the hanging part of shoulder strap yet, It will help you adjust the fit later on and you can snip it at any point.
Now add the ruffles: pin the ruffle at the wrong of neckline such that right side of ruffle is with wrong side of main  fabric. Sew the ends closed and sew along the neckline to join ruffles to the main body.

Now turn the ruffles over to the right side. The dress is ready to try on.
If you feel that the shoulder strap is big or small, you can adjust it now by picking out stitches from one of the ends where it has the extra tail and increase or decrease the length. Snip the tail once you're done. If you don't want to add another ruffle, topstitch along the neck line.

Most of the dresses I saw at Gymboree or Gap had only one ruffle, so this tutorial is enough if you want to get that look. For me however it was not working because my ruffle strip wasn't wide enough so I had to add one more ruffle. I'll get to how I did it in a bit, but before that I will show you how to finish the armhole.

Cut a strip of about 15 inches at the bias:

Sew it along the armhole ( right sides together).


Now turn it out, and turn it over the seam into the wrong side of armhole. Topstitch.

Since the knits don't fray I didn't worry about tucking the raw edges in. you may want to do it if you're working with wovens instead of knits.

Now giving the dress some pizzazz:
Cut two strips

S1: 3 inches wides X 40 inches
S2: 2 inches wide X 40 inches

Sew S1 at the longest stitch setting along one side of the strip, do not backstitch. After sewing, pull the bobbin thread from one end, to create a ruffle. Spread the ruffles to evenly space them. Sew this ruffle beneath the ruffle that is already there along the neckline. Make sure that the top ruffle completely covers the seams on this one. Now topstitch the top ruffle along the neckline.


For the ruffle at the hemline, take strip S2 and run a stitch along the center of the length, again at the longest stitch setting. Again pull the bobbin thread to make a ruffle but this time the ruffle has to be only as long as the front hemline. Evenly space the ruffles by hand. Now sew it over the hemline. Since it is a knit fabric, I didn't bother finishing the hems, you may have to do it if you're working with wovens.

If you want you can add a flower at the shoulder strap, I'm still debating whether it is too much.
Make It and Love It has a flower tutorial here at the end.
coral reef dress pattern

Enjoy your new dress.