Wednesday, September 14, 2011

Knotted baby hat tutorial

Sewing for baby: Knotted hat tutorial
I did this guest post over at Whip Up a few weeks ago. Since then, I have modified the pattern a bit, so the final product looks more finished. Posting it here in case you missed it over at Whip Up and also adding the revised steps (in blue).


With the birth of my niece last month, newborn gifts are on my mind these days...Here's a tutorial for making a knotted hat for newborns. I love making and gifting these hats....because they are useful and practical?....naah...because seriously, what's cuter than a teeny-tiny hat on a teeny tiny head. The fact that hats are particularly pricey and difficult to find in ready-to-wear clothes doesn't hurt either. So without further ado...here's how to make one:

Supplies:

Knit fabrics: Take 2 pieces of same fabric or two different fabric. 

This is a great project to use up those scraps that are too big to throw away but too irregular to make into a dress, top etc.

1. Print out the pattern, tape the two pages as shown and cut both pieces of pattern ( total 3 cuts). Piece 1 spans both the pages whereas Piece 2 is only on Page 1.
Once you cut out all the three pieces, tape both parts of Piece 1 by overlapping the small part over the bigger part, up to the dash (-) mark.


2. 

Fold each fabric in two layers, then fold one more time. Place each pattern piece on fold and cut. So now you have two pieces of 1 and two pieces of 2.

3.

 Sew together pieces of 1 along the conical side, right sides together. Sew together pieces of 2 along the semi-circular side, right sides together. 

Note: Leave  a 2 inch opening while sewing piece 2 ( lining). This is an improvement from earlier version where I leave the opening at the joining seam in step 4.

4. 

Now join 1 and 2 by sewing along the raw edge, right sides together. Leave about 2 inch opening.
Note: It was only after sewing a couple of these hats, that I realized I should have left the opening in inner lining piece instead of the seam joining the two pieces. It was one of those "Duh...I'm so stupid" moment.

5. 

Using the opening, turn the whole thing inside out. Use a pencil or point turner to poke the cone out on fabric 1. 
Note: Slip-stitch the opening in fabric 2 shut. I missed this step when I wrote the guest post. 

Push the fabric 2 inside fabric 1. 

6.

Tie a knot with the cone of fabric 1. 
If the hat is a little big, you can turn some of the bottom out to fit the head of the baby. The best part is that these hats don't have a any inside seams to bother the baby skin. Enjoy your little munchkin...hats and all.

Tuesday, September 13, 2011

Link Love this week

Blooms And Bugs: Blog updates


Image courtsey Sullivan via MorgueFile


The last week brought with it a lot of recongnition at many reputed blogs.
Rosita Layered Skirt tutorial got picked up by Craft Gossip, Strawberry Vanilla Dress got featured at Totally Tutorials. This was my first feature at Totally Tutorials and I'm pretty excited about it.

Thanks a lot for spreading the word about my little blog. It is very encouraging to see all the pins of my tutorials, so many readers liking my posts and so many of you taking time to stop by and comment. Makes the whole process of crafting, writing tutorials, taking pictures so worth it.

I am working really hard on some projects...some are finished...and they look awesome. Drop by often, there's a lot of excitement building up at Blooms And Bugs Studio. Details ( finished projects, sneak peek of new items for the shop, pictures of orders shipped, tutorials, action shots and lot more is in the pipeline). Happy Sewing.

Monday, September 12, 2011

Friday, September 9, 2011

Military and Lace Dress: tuorial

Dress Pattern: Military and Lace Dress Tutorial
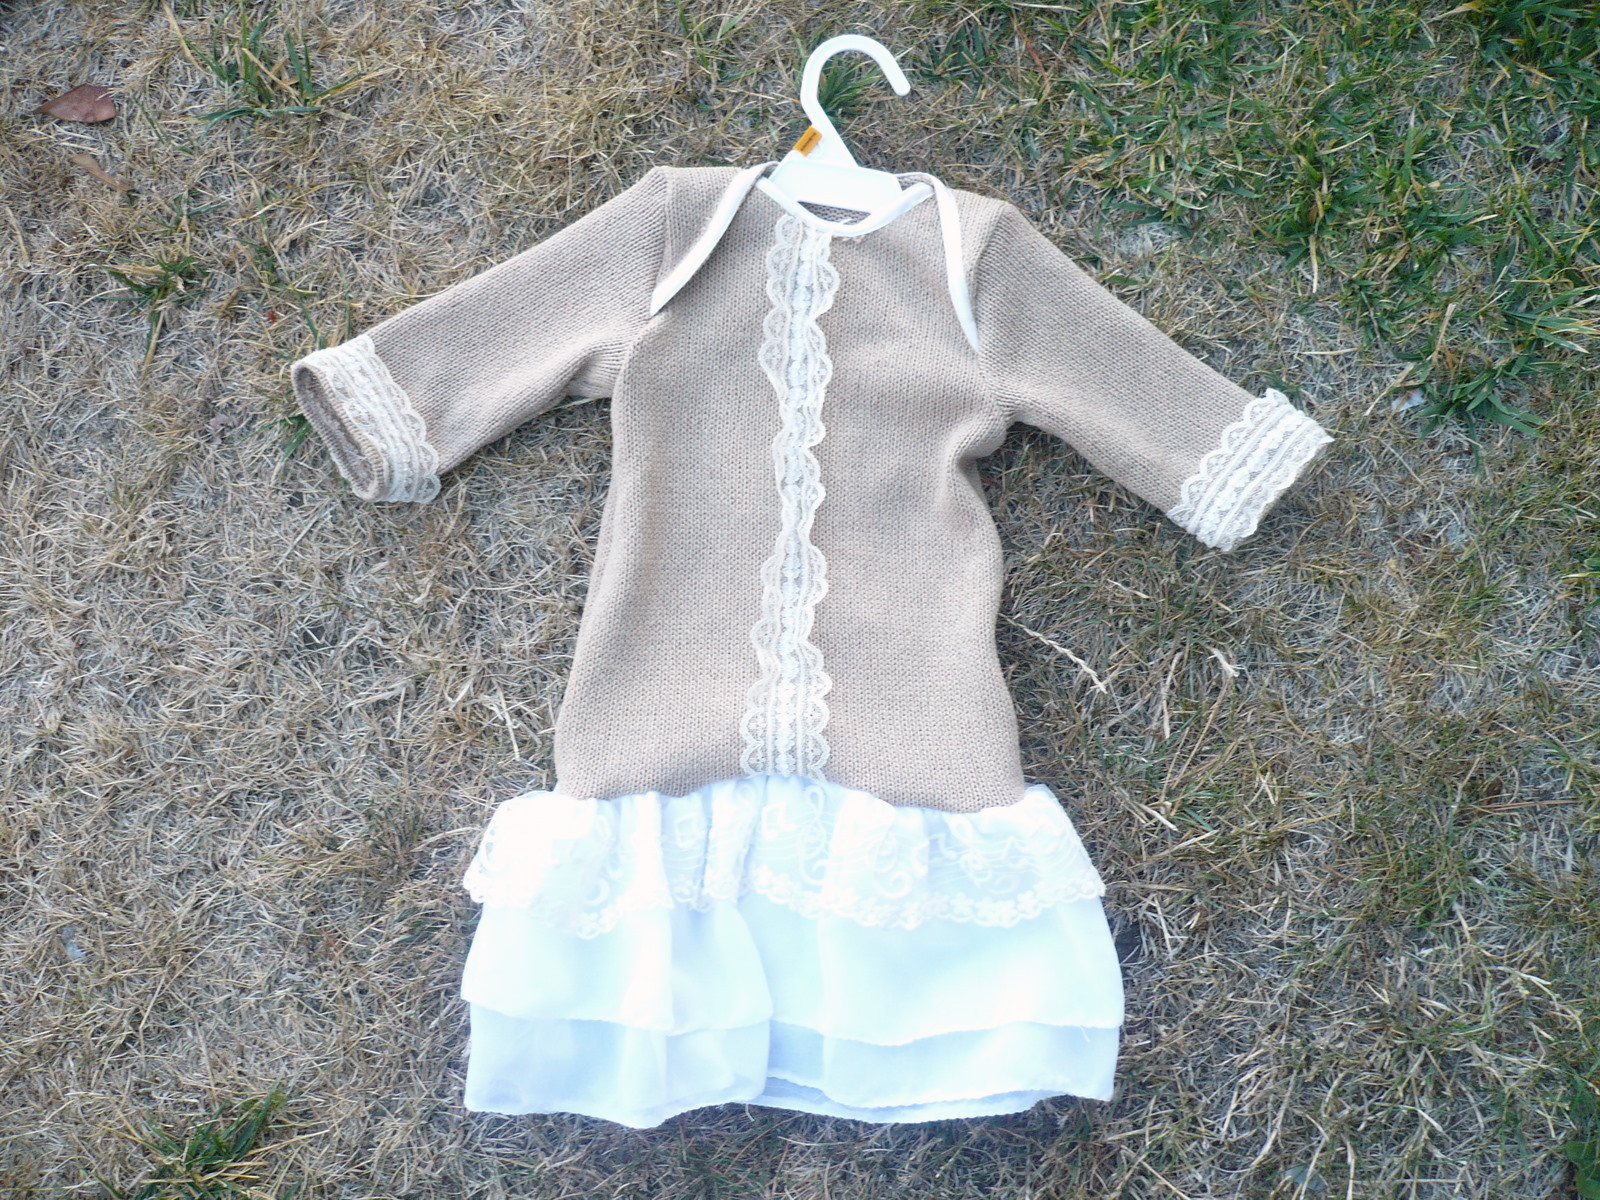
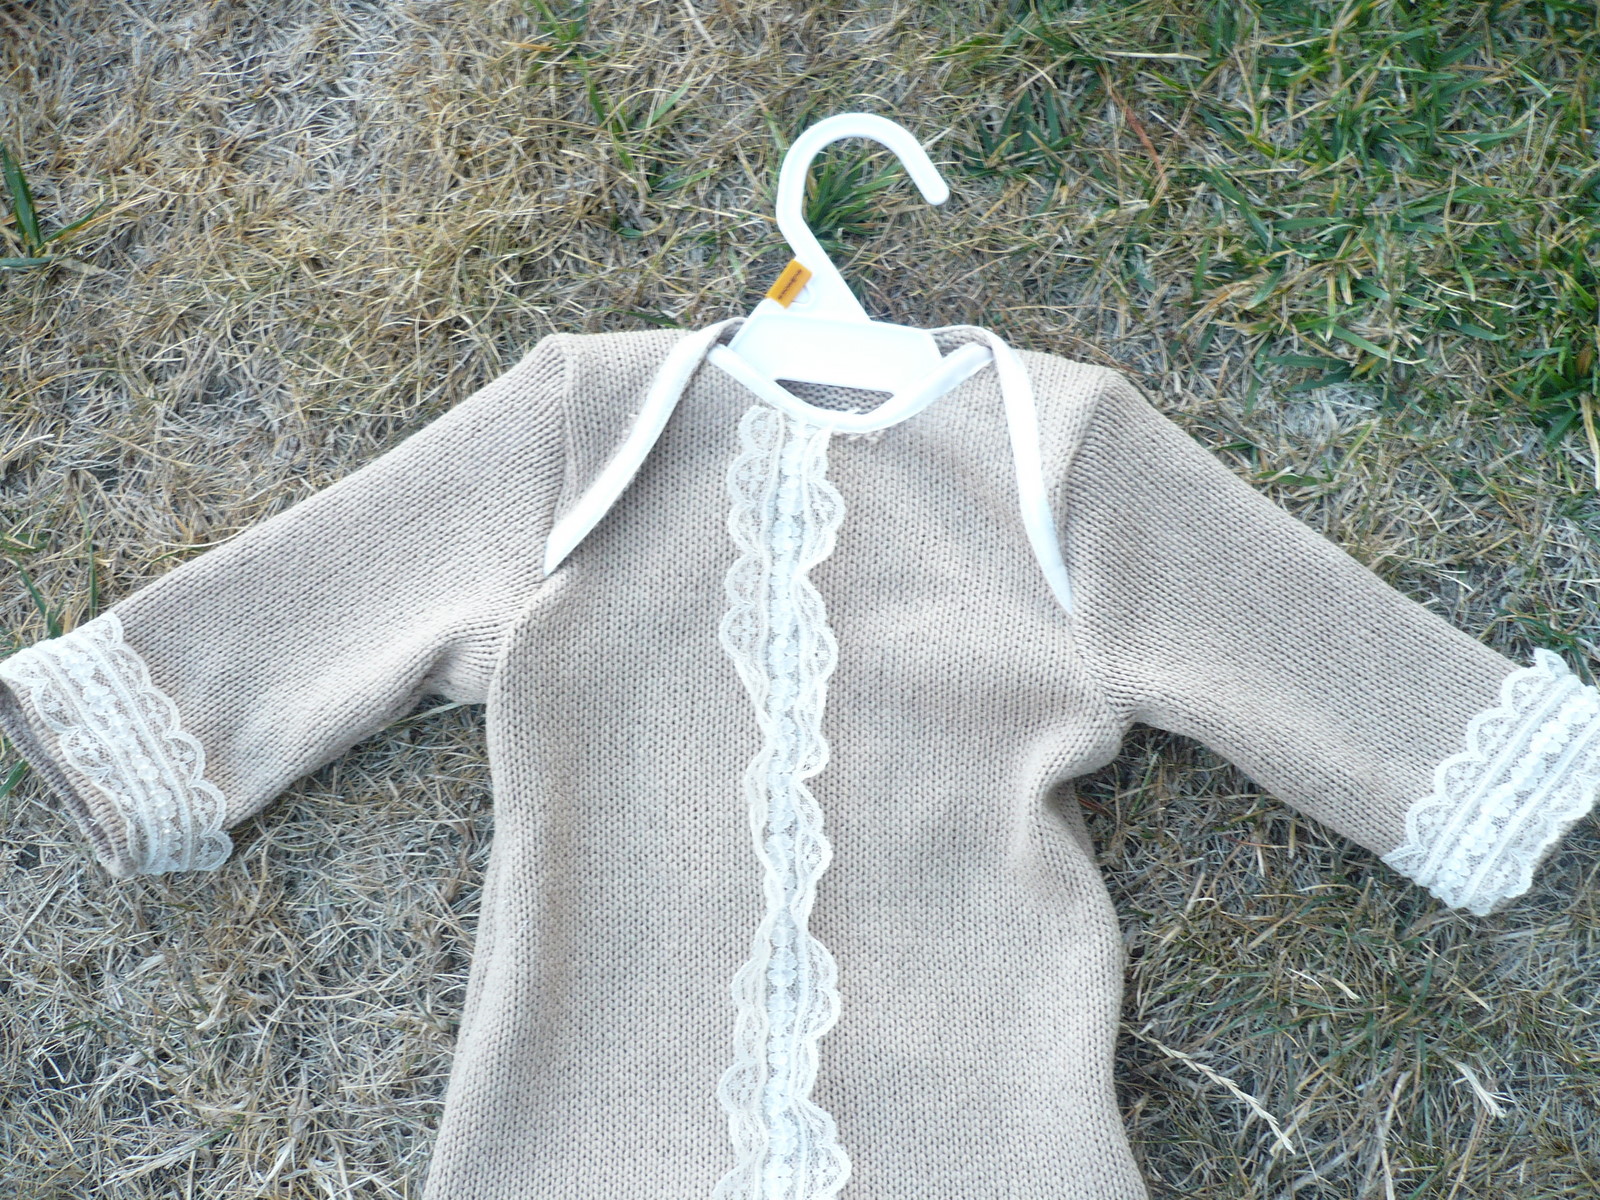
I found this super cheap sweater knit in khaki and bought multiple yards of it. The fabric is so soft and perfect for the fall...only problem..its so uninspiring and boring. When you're sewing clothes with reds, bright greens, magenta, yellow and turquoise, It is very difficult to imagine something with khaki. Last week I challenged myself to do something with this knit and that thing was "Military and Lace Dress". I love the final product, and the best part was that it turned out exactly the way I envisioned, which doesn't happen often around these parts of the world. I actually made it as a gift and after partially sewing it, I put it on my daughter to check the fit. Well, lets just say that the 'gift' is not leaving our place anytime soon. Little miss wouldn't take it off and since that's also a rarity around here ( most days she would bolt at the mention of new dress) I was more than happy to let her wear it for the day...unhemmed cuffs and all. Want to make one for your chikadee? Here's how: There are two ways of going about this, the easy way is to get a full sleeved lap tee in a neutral color ( brown, khaki, gray) and add a skirt to it.
 Supplies:
 For skirt: Ivory color Sheer flowing fabric ( I chose georgette) 2-3 inch Wide Ivory Lace 1 yd - 1.5 yd 1 inch wide Ivory Lace 2 yd Ivory bias tape - preferably satin - 1yd If you want to make your own bodice as well: 1 yd knit fabric in a neutral color ( brown, khaki, gray) If you want to make it using an existing lap tee, skip the bodice making and go straight  to making the skirt part.
Making the bodice:
 Measurements: This is a drop waist dress, meaning the bodice will fall well below the actual waist of the child and will hit just above the crotch area. So measure your child from shoulder to the part where thighs join the torso. Lets call this length L. Measure the child's sleeve from shoulder to just above the wrist ( or whatever length you prefer). Lets call it S. For the other measurements I just used a Tee that fits her well, instead of taking all the measurements. So that's what I'm going to show you in the tutorial.
 Marking and Cutting: 1.
Fold the knit fabric into 4 layers along the stretchy side. Fold the tee in half and place on fold, trace around it. If the Tee is very well fitting, you can add some seams margin while tracing. If the tee is not a tight fit then you can trace it as is. The Dress would look better if it fits snugly. 2.
I traced around the Tee for shoulders and side seams. For armholes, I just marked a few points along the armhole by lifting the Tee up and then  joined the shoulder and side seams with a curve. You may have to eyeball a bit here, or just use an armhole curve from some other pattern. You can also trace the Tshirt armhole on a wax paper and trace it on the fabric after cutting the wax paper. 3.
Now extend the shoulders by 3 inches (as show above) and cut out. 4.
Now separate the two layers from the front layer, cut the neckline, 1.5 inches deeper. 5.
Now extend the neckline to the extra 3 inches at shoulder. Remember that the neckline is concave but we need to make it convex at the shoulder ( just look at the pic above), do the same for the other ( back) piece. 6.
Cut sleeves of length S by measuring the armholes, but only up to their original mark, do not take the extended part into account that we added in step 3. Separate the two sleeves pieces, sew the sleeve sides by sewing along length S ( Right sides together). Now your sleeves are ready to be attached to the bodice. Sewing 7.
Sew on a lace trim vertically at the center of front piece. 8.
Sew on a bias tape on neck front and back. Make sure you catch the trim at the center when you sew the bias tape on the neck front. Sew the side seams right sides together. Turn out. 9.
Adding sleeve to a lap Tee ( bodice in this case) is actually easier than a regular Tee because the overlap hides any minor difference in cutting or sewing margins, but its easy to get confused. Here's how I do it.
Turn the bodice inside out, Place the sleeve from inside the bodice such that sleeve right side and dress right sides are together. Now align the side seam of the bodice with side seam of sleeve and start sewing along the armhole joining the sleeve to the BACK of neckline. Its important that you do back first because in lap Tees we want the back of neckline to show a little bit in the front.
10.
Once you finish going over the back of neckline. back-stitch a bit to stabilize the seam. Then start at the side seam again, this time attaching the armhole at front of neckline to the sleeve. The front will overlap quite a bit over the back armhole, that's good! keep at it until you reach the end of front armhole, then back-stitch.
11.
Here's how it will look at the back. Repeat this for the other sleeve. Turn out.

12.
Here's how it will look after attaching both sleeves. Now lets finish the sleeve by folding them in twice and sewing at the cuffs.
13.
Take some more trim and sew it along the sleeves to add a pretty detail.
14.
Here's the finished bodice.
Making the skirt:
Measurements:
The skirt is quite simple:
  •  Measure the length you want the skirt to be from the end of bodice, Add half inch for seams. Lets call it L2. 
  •  Measure the total width of the bodice (all around). Double it to account for gathers. lets call it W2.
Marking and Cutting 
  • Now cut one rectangle of length L2 and width W2 from sheer fabric. 
  • Cut another rectangle of length L2 -2 and W2.
  • Cut W2 from the wide lace that you have.
Sewing

1. 
  • Sew together L2 sides of the bigger rectangle ( right sides together).
  • Sew together L2 - 2 sides of the smaller rectangle (right sides together).
  • Sew together the raw sides of the lace ( right sides together)
2. Now align both the rectangles ( now tubes after sewing ) at one raw end such that the L2-2 piece sits on top of L2 piece. And the wrong side of smaller piece touches the right side of bigger pieces. Now align the raw edge of lace with the raw edge of sheers. Make sure the wrong side of lace touches right side of smaller sheer piece. 3.
Sew two rows of seams along the raw edge where all the fabrics ( and lace) are aligned. Make sure you're catching all the layers. Now pull the bobbin threads of these seams to gather the fabric. Adjust the gathers such that the width becomes equal to the bodice width. Now attach the skirt to the bodice by sewing the gathered side of the skirt to the raw end of bodice ( Right sides together). Make sure that the seam of all skirt fabrics lines up at the back. 4. Turn out. Finish the hems of the sheer fabric by rolled hem.

Enjoy the dress.

Tuesday, September 6, 2011

Sew Easy - Part 9 - Rosita Layered Skirt


Layered skirt sewing tutorial

You can read the story behind this series and the first part here. Click here to read the secondthirdfourth, fifth, sixth, seventh and eighth edition of this series.
 

Here's a skirt that I made this week. I think its a great fit for Sew Easy series because it takes just 4 straight seams to finish the basic structure of the skirt, and the resulting garment looks really good. These are also a good staple for back to school wardrobe.

Supplies: 
2 Adult size Tshirts of co-ordinating colors
Elastic - 1 inch elastic
Embellishments:
Narrow satin Ribbon - 20 inches
Felt piece of matching color - 2X2 inches


Measurements:
Measure the length you want the skirt to be, add half inch. Lets call it L1
Measure the desired length of the smaller layer, a 3-5 inch smaller layer should work L2.
Measure a comfortable elastic length by tying it around the child's waist.If you can't measure the child,
a good rule of thumb is 3 inches less than waist measurement.


Instructions:


1.
sew a skirt with two tshirts


Lay the Tshirt1 flat and cut length L1 from the bottom.
Lay Tshirt2 flat and cut length L2 from the bottom.


You will get two tubes, one of length L2 and another length L2.


Note: In most cases it would be ok to cut through the entire width of TShirt, A good rule of thumb is that
the Tshirt should be at least 7 inch wider and at most twice the waist of child. If it is too narrow, the skirt
would be tight at the butt and even though Tshirt material is stretchy and it will stretch, it wouldn't look good.
If it is too wide, it will gather too much at the waist and look odd. If your Tshirt width doesn't look right, consider cutting off a portion of it and sewing it on one side with right sides together, or piecing it with another Tshirt.

2.


sewing layers together


Now place L2 tube inside L1 tube, with L2 right side together with L1 wrong side.


3.
rosita layered skirt pattern


Sew along the raw edge.


4.
insert elastic in a skirt


Turn L2 out. Top-stitch as close to the edge as possible.


Now sew another seam 1.5 inches below the top-stitching, leave a 1.5 inch opening.


Now insert an elastic through this opening. Join both ends of elastic. Sew the opening shut.


5.
sewing a rossette on a skirt


Make a fabric flower with Tshirt1 fabric. I made a rolled fabric rosette with a felt circle underneath. Hand-sew it to the skirt, near the elastic casing. If you need instructions on making flowers, this post has a bunch of pointers to make different kinds of flowers.
Cut  the ribbon into 2 strips of 10 inches. Fold the strips into two and hand-sew near the flower.


7.
rosita skirt with headband tutorial


While you're making the flowers, make a couple more with both Tshirt1 and Tshirt2. You can make a nifty coordinated hairband with them.
Rosita Layered skirt tutorial


Your skirt is ready.

As cute as they come

Knotted baby hat modeled shots
knotted baby hat DIY

Our very first baby model...donning a hat from Blooms and Bugs. He's just so adorable!

Thursday, September 1, 2011

Bottoms Up - Part 2: Reversible Pants

Reversible Pants Sewing Tutorial

free pattern for reversible pants

Read the first part of the series Basic Pants.

With fall coming up, it will be great to have these reversible pants on hand.

There're a lot of reasons I love these pants:

1. You can switch up sides to match two outfits.
2. With fall coming up, having two layers provide some warmth to the little tush.
3. With a baby like mine, who's allergic to all the artificial fabrics, this is the only way I can make her wear fancy stuff, like velour, with a cotton lining inside.
4. If you make it in contrasting colors and a little longer, you can have nice contrasting cuffs, which will later become plain pants, when your baby grown 2 inches overnight.

Do you need anymore reasons to try these out?
Lets get going then...

Supplies: Two fabrics. - half yard each for a 2 yo size
                Elastic for waistband - 1 inch wide
A good rule of thumb for determining elastic length is to measure the waist of child and subtract 3 inches.
This works for me but if you can, just pin (use safety pin) a loop at a length that seems reasonable to you. and try putting this loop on child's waist. If it is comfortable and snug then that is the ideal length.


Lay the fabrics folded into four layers lengthwise, lay fabric 1 on top of fabric 2.

cutting out reversible pants pieces
Place your pattern on fold on fabric, with straight side lining up with the fold.
free pattern for reversible pants

Trace and cut. If you want contrasting cuffs at the hem, extend the legs by one inch.
reversible pants sewing pattern

Now sew the inseams of legs on all 4 pieces.

how to sew reversible pants

Join the two fabric1 legs together. Also Join the two fabric2 legs together. So you have 2 pants, which don't have waistband or hems done, yet.

join both sides of reversible pants


Now join both pants at the hems. ( both legs right sides together)

turn out reversible pants


reversible pants sewing tutorial

Pull out both pants and now insert fabric 1 inside fabric 2, this time wrong sides together.

Now iron the fabric at the waistband, about half inch inside. Top-stitch this seam, leaving a 1.5 inch opening.

Sew another seam parallel to the top-stitch, about 1.5 inch below this one, leave no opening.

From the top seam opening, insert an elastic. Sew both the ends of elastic.

Sew the opening shut and done!

how to sew reversible pants

diy reversible pants