Showing posts with label baby. Show all posts

Monday, January 23, 2012

Sleeper to Jacket Refashion

Blooms And Bugs: Sleeper to Jacket refashion tutorial

This post was published as a guest feature at Me Sew Crazy last December. Publishing it here again in case you missed it last time around.


Ever since my daughter started walking her growth has only been vertical. That means clothes that fit well in the waist and body but are a few inches too short. Way too many of them. I found some fleece sleepers that were almost new but were at least two inches short already. Since she needed some jackets for the light California winters, I decided to try and refashion these sleepers into fleece jackets. And what do you know! It was super simple and it worked! Here's how I did it.

Supplies:

1.  Sleeper that fits well in the width but may be too short or too long
2. Fat quarter of coordinating woven fabric

Construction:

1.

 Close the zip up to the top. (This is very important, if you keep the zip open, you may not be able to close it completely after you cut. Don't ask me how I know that. Just keep that thing shut...ok.) Find the length that you think would be good for the jacket. Cut the sleeper horizontally 1 inch above that length. I chose to cut it right above the legs to get the maximum possible length. The finished jacket comes to my daughter's thighs, making it longer than the usual but I like that length. If you want a particular length for the jacket make sure you cut accordingly.

2.


 Pick out the cuffs on the sleeves using a seam ripper. This may take a few minutes so be patient. Usually if the sleeper is shorter in length than it is likely shorter at the sleeves too, I'll show you how to increase the length of sleeves a bit.

3. Measurements

Now measure the circumference of the hemline, lets call it L1. Also measure the circumference of cuffs. Lets call it L2. Now cut a 3 inch wide strip of length L1+(2xL2) + 5 inches. We will use this to finish the hem and cuffs of the coat.

4. Making the 'Bias Tape' for hemline and sleeve cuffs

I'm calling it Bias tape but actually it is cut on grain not on the bias. We can get away with this because we will be using it on the straight edges and not curves. However if you would like to use a bias tape that would work too.

Fold the strip you cut earlier in half along the length and iron.


Now fold one edge quarter inch and iron, this may take a few minutes. You may want to make a crease by hand before ironing to make it easy to iron. Quilting weight cottons retain crease well so they're easier to work with for this project.

Now fold the other raw edge a little less than quarter inch. Folding it lesser will ensure that when we sew this bias tape, it will catch the seam on the inside.
I'll explain more when we get to sewing it.

In the pic above the top edge is folded lesser than the bottom edge.


Here's the finished bias tape.


5. Finishing the hemline


Line up the raw edge that is folded more with the raw hemline of the sleeper ( right sides together). Make sure you leave one inch bias tape unsewn in the beginning. Sew along the hemline. Try to keep the seam on the crease of the fold as shown in the pic above.


When you get close to the starting point ( within 3 inches), measure the tape you will need to finish it and cut half inch longer bias tape than that.

Now line up both the raw ends of bias tape and sew with right sides together. This will ensure a very clean finish.

 Now finish sewing the remaining of the seam along the hemline.


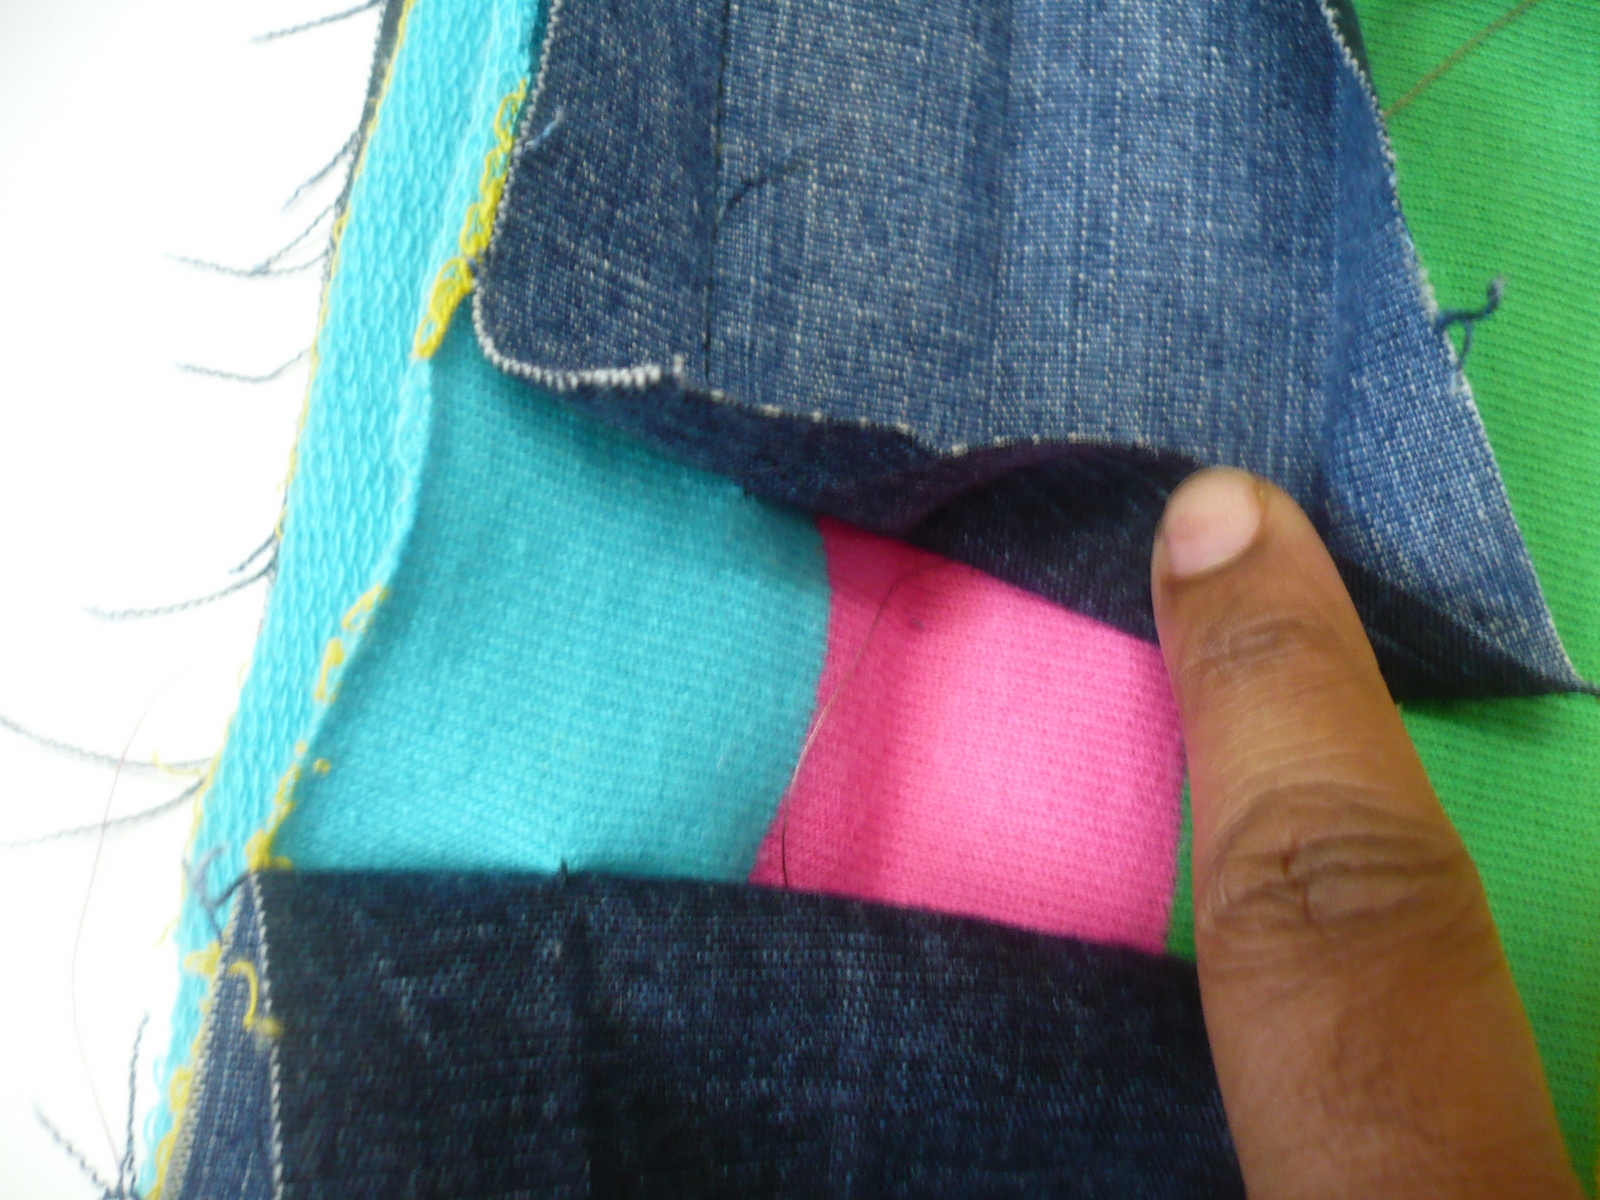
Now fold the bias tape down and fold the part below the center crease inside.


Make sure that the bias tape is folded on the inside with no raw side visible. Since we folded that end lesser, when we fold it on the inside that edge of bias tape will go higher than the edge on the outside. Now sew a seam as close to the bias tape ( but not on) as possible. Go slowly on this seam as it will show on the outside.


The hemline is ready.

6. Adding the cuffs on the sleeves:


The cuffs are made the exact same way as the bias tape at the hemline. The only thing I need to mention is that you could make the cuffs a different length than the hem, so measure the length of existing sleeves and compare with the length you need and adjust the bias tape width accordingly.


So that's our easy refashion - A sleeper to a fleece jacket. Sew easy, sew fun!


Make one, make many! Enjoy!
Pin It

Tuesday, October 4, 2011

Devil's advocate Baby Hat tutorial: Guest posting at Bear Rabbit Bear

How to sew knotted baby hat
knotted baby hat sewing tutorial


Just popped in to say that I'm over at Bear Rabbit Bear today, Guest posting my tutorial for Devil's advocate Baby Hat. Hop on over and check out this tutorial as well as other cool tutorials Melanie's guests are sharing for Fall Project Week.


Pin It

Sunday, September 18, 2011

Sew Easy - Part 10: The happy dress and Hairband

Easy Sew Tutorial: Happy Dress and Headband

happy dress sewing tutorial


I wanted to send across something handmade for my little niece who lives across the pond. The best part is that she and my daughter are almost the same size so I can make something matchy matchy for the cousins.
I wanted to make something cute but also modern and smart. I finally decided on this jumper and I think it fits the bill. I call it "The Happy Dress" because the colorful stripes really seem to bring cheer. It is made with a thick and soft sweater knit so it just feels right for layering during the cooler months ahead.

Here's a hairband I made to go with it:
happy headband tutorial

Again simple and modern....and I love it...maybe even more than the dress itself.

Know a little girl around you who could use this? Lets see how to make The Happy Dress and headband.

Supplies:

For the dress:
Sweater Knit:
Dark Denim - Few scraps ( Lets say 10 X20 inches, I didn't really measure this)
Co-ordinating knit for the ruffle. - 4-5 inches X width of the fabric.

Two snaps, or buttons  for closure on the front.

For the headband:
FOE ( Fold Over Elastic) :
Felt in colors matching with the dress fabric
A co-ordinating button for the center

Measurements:

1. Measure the child from chest to where you want  the dress hemline. Keep in mind that we are going for a mod and sleek look, so a little above knee would be better. Add half inch to it. Lets call it L.
2. Measure the child all around the widest part of her body. If she has a toddler belly, measure her around the stomach. If she has a big butt..measure that. Add 2 inches. Lets call it W.

Cutting the fabric
dress sewing tutorial

Cut the sweater knit into a rectangle of length L and width W. Fold it in half along the width, right sides together and sew along the length. If you choose a stripey fabric like mine, make sure you match the stripes at the seam. It's not necessary because the seam will be at the back. But properly matched stripes just look more finished. Finish the inseam with a serger or a zig zag stitch.

Preparing the belts

Cut two 5 inch X 10 inches rectangles from denim.

Fold it into half ( right sides together) along the width to get a 2.5X 10 rectangle. Sew the raw seams at the 10 inches long side to make a long tube. Turn out. Iron such that the seam is in the center. This is the back of the shoulder straps.

Preparing the ruffle:
Cut a rectangle of length 4 and width W from the co-ordinating knit.
how to make a dress


Attaching ruffle and the shoulder straps.

First position the seam on the main body such that its at the center of the back.
Now pin the shoulder straps 2.5 inches apart in the front. With strap's wrong side ( the side where the seam shows) touching the dress' wrong side. Now lay the knit ruffle fabric on the top, such that knit right side touches straps right side.
attaching ruffle at the neckline

Sew along the width, making sure to catch all the layers in the seam. Turn out. top-stitch as close to the
edge as you can.
Now sew another edge parallel to the top-stitching, half inch below the top-stitching. Leave a 2 inch opening. Now using a safety pin. Insert an elastic from the opening between knit ruffle and dress fabric.
Join the ends. Sew the opening shut.


Now lets make a wide bias tape for the hem. Actually since the hem is straight, you don't even need to cut it on bias. Just cut a denim strip 4-5 inches wide on the grain.

Here's how I made my bias tape:

Fold the strip in half along with the width. Iron.Open.

Fold one half up-to the crease onto itself. Iron. If you ironed the first fold well, the crease will still be there after ironing the second fold.

Fold the other half over the second crease. Doing this will ensure that this fold is just a tiny bit wider than the other half. This is required to sew the tape properly. Otherwise it will be difficult to catch it at the wrong side when you top-stitch your bias tape. ( I will explain more later)

Now sew the tape all along the hemline with the raw edge of narrow part of bias tape aligned with raw hem.


Leave a small piece unsewn in the beginning. This will be used to join the ends later.Try to sew it exactly on the crease. This will make it look very finished.
When you get close to the end, leave about an inch or two before the end.

Now measure how much more tape you need to get to the end, add one more inch. Keep that much and cut-off the rest.
Now carefully sew a seam at the extra part of both the ends of the tape, right sides together. You need to measure exactly how much you need, too much and you will have a pleat in your bias tape. Too little, and you will have a pleat in the dress ( at hem :/). You want to avoid both the situations.

Now sew the unsewn part of the tape to the dress, same way as you have done till now.

Now fold the tape over to the other side.

If you have placed the smaller side in the front earlier, you will notice that the tape at the wrong side of hem, goes just over the seam that you did to sew the tape in the right side.

Now come back to the right side of the dress. Make sure your thread is the same color as dress fabric. Now sew a seam as close to the upper side of the tape as possible. Go slow and steady. This seam shows on the right side so you want to sew this as perfect as you can. Ideally, it shouldn't be visible unless somebody inspects it up close.This will happen if you sew this seam in a matching color ( matching with the dress, Not the tape) and very close to the tape ( but NOT ON the tape). Stop occasionally to check that you're indeed catching the bias tape on the wrong side.

Now add some sort of closures on the shoulder straps and back of bodice. Button, Snaps, velcro...anything that suits you would be fine. If you want you could also add more than one closures on the strap to make it adjustable.

Optional - Personalizing the Dress:


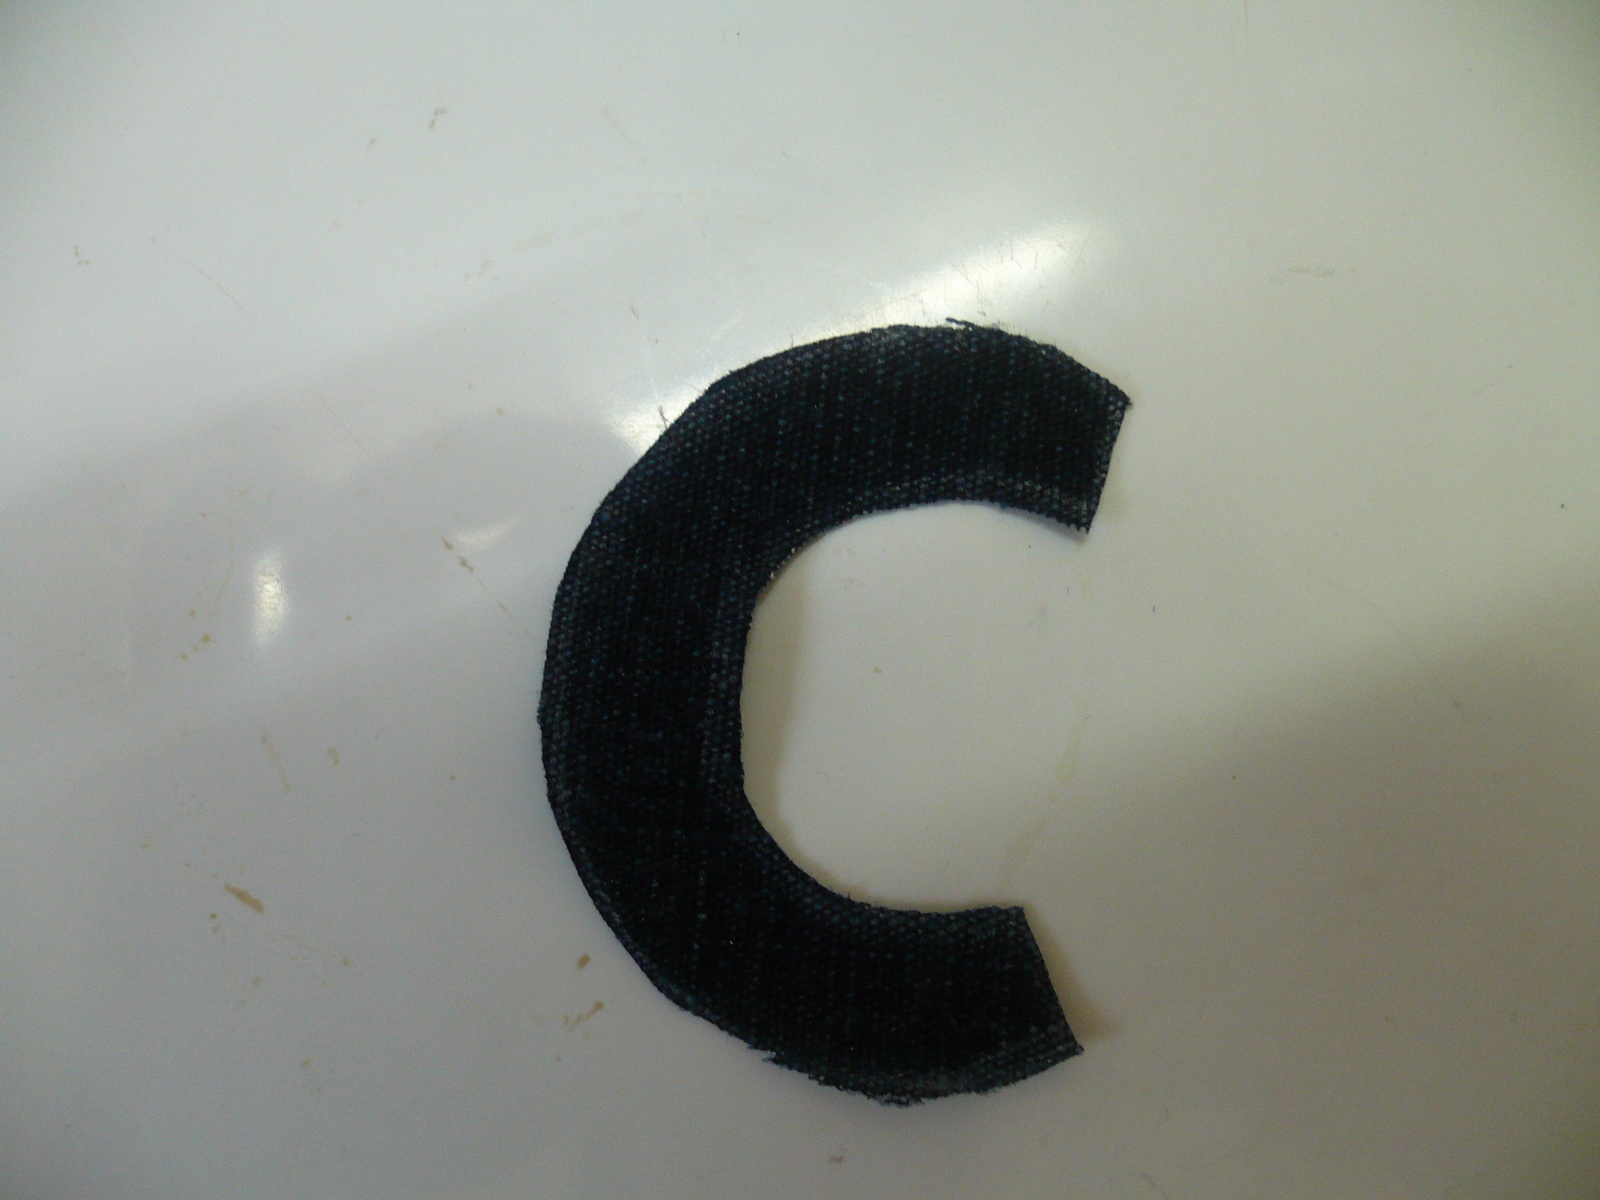
Draw a letter on the right side of the denim, in your favorite font. I used a crayon to do this.

Cut out.


I used fabric glue to stick it at the desire position, but you could also hand-baste or use pins ( I'm kind of phobic to pins, especially in children clothing)

Once the applique is stable, set your machine speed on minimum and stitch size to very small. Check that the thread is denim colored and very carefully go over the applique, sewing very carefully along the boundaries.
I used a different color thread to show you the top-stitching and you can see where my sewing ran amok. Thats why I recommend sewing with the matching colored thread, that way, it wouldn't be so obvious.


Apply fray check along the raw edges of the applique.Air dry for a day.

The Happy Dress is good to go. Put it on your little one and see how happy it makes them..And you :)


Happy hairband:


I don't have pics for this but making this is really straightforward.

Cut  3 circles of different sizes from felt. I just folded the felt into a quarter and cut an arc to get sorta circular shape. You could also use household things like mugs, small bowls, coins etc, to get circles of different sizes.
Now cut a 12 inch long piece of FOE and join both the ends by overlapping them a little and sewing together.
Now place the biggest felt piece at the bottom, then place the FOE joint over it and then place second largest circle, smallest circle and the button respectively.
Thread the needle with 2-ply of thread matching the color of the button. Now sew the button by going over opposite holes repeatedly. Just make sure that every time you insert the needle in the hole, make sure you're going through all the layers of felt.
The happy headband is ready.

Wednesday, September 14, 2011

Knotted baby hat tutorial

Sewing for baby: Knotted hat tutorial
I did this guest post over at Whip Up a few weeks ago. Since then, I have modified the pattern a bit, so the final product looks more finished. Posting it here in case you missed it over at Whip Up and also adding the revised steps (in blue).


With the birth of my niece last month, newborn gifts are on my mind these days...Here's a tutorial for making a knotted hat for newborns. I love making and gifting these hats....because they are useful and practical?....naah...because seriously, what's cuter than a teeny-tiny hat on a teeny tiny head. The fact that hats are particularly pricey and difficult to find in ready-to-wear clothes doesn't hurt either. So without further ado...here's how to make one:

Supplies:

Knit fabrics: Take 2 pieces of same fabric or two different fabric. 

This is a great project to use up those scraps that are too big to throw away but too irregular to make into a dress, top etc.

1. Print out the pattern, tape the two pages as shown and cut both pieces of pattern ( total 3 cuts). Piece 1 spans both the pages whereas Piece 2 is only on Page 1.
Once you cut out all the three pieces, tape both parts of Piece 1 by overlapping the small part over the bigger part, up to the dash (-) mark.


2. 

Fold each fabric in two layers, then fold one more time. Place each pattern piece on fold and cut. So now you have two pieces of 1 and two pieces of 2.

3.

 Sew together pieces of 1 along the conical side, right sides together. Sew together pieces of 2 along the semi-circular side, right sides together. 

Note: Leave  a 2 inch opening while sewing piece 2 ( lining). This is an improvement from earlier version where I leave the opening at the joining seam in step 4.

4. 

Now join 1 and 2 by sewing along the raw edge, right sides together. Leave about 2 inch opening.
Note: It was only after sewing a couple of these hats, that I realized I should have left the opening in inner lining piece instead of the seam joining the two pieces. It was one of those "Duh...I'm so stupid" moment.

5. 

Using the opening, turn the whole thing inside out. Use a pencil or point turner to poke the cone out on fabric 1. 
Note: Slip-stitch the opening in fabric 2 shut. I missed this step when I wrote the guest post. 

Push the fabric 2 inside fabric 1. 

6.

Tie a knot with the cone of fabric 1. 
If the hat is a little big, you can turn some of the bottom out to fit the head of the baby. The best part is that these hats don't have a any inside seams to bother the baby skin. Enjoy your little munchkin...hats and all.

Thursday, September 1, 2011

Bottoms Up - Part 2: Reversible Pants

Reversible Pants Sewing Tutorial

free pattern for reversible pants

Read the first part of the series Basic Pants.

With fall coming up, it will be great to have these reversible pants on hand.

There're a lot of reasons I love these pants:

1. You can switch up sides to match two outfits.
2. With fall coming up, having two layers provide some warmth to the little tush.
3. With a baby like mine, who's allergic to all the artificial fabrics, this is the only way I can make her wear fancy stuff, like velour, with a cotton lining inside.
4. If you make it in contrasting colors and a little longer, you can have nice contrasting cuffs, which will later become plain pants, when your baby grown 2 inches overnight.

Do you need anymore reasons to try these out?
Lets get going then...

Supplies: Two fabrics. - half yard each for a 2 yo size
                Elastic for waistband - 1 inch wide
A good rule of thumb for determining elastic length is to measure the waist of child and subtract 3 inches.
This works for me but if you can, just pin (use safety pin) a loop at a length that seems reasonable to you. and try putting this loop on child's waist. If it is comfortable and snug then that is the ideal length.


Lay the fabrics folded into four layers lengthwise, lay fabric 1 on top of fabric 2.

cutting out reversible pants pieces
Place your pattern on fold on fabric, with straight side lining up with the fold.
free pattern for reversible pants

Trace and cut. If you want contrasting cuffs at the hem, extend the legs by one inch.
reversible pants sewing pattern

Now sew the inseams of legs on all 4 pieces.

how to sew reversible pants

Join the two fabric1 legs together. Also Join the two fabric2 legs together. So you have 2 pants, which don't have waistband or hems done, yet.

join both sides of reversible pants


Now join both pants at the hems. ( both legs right sides together)

turn out reversible pants


reversible pants sewing tutorial

Pull out both pants and now insert fabric 1 inside fabric 2, this time wrong sides together.

Now iron the fabric at the waistband, about half inch inside. Top-stitch this seam, leaving a 1.5 inch opening.

Sew another seam parallel to the top-stitch, about 1.5 inch below this one, leave no opening.

From the top seam opening, insert an elastic. Sew both the ends of elastic.

Sew the opening shut and done!

how to sew reversible pants

diy reversible pants