Showing posts with label free. Show all posts

Thursday, October 20, 2011

Bottoms Up - Part 4 - Two color pieced pants

Sewing Tutorial: Pieced Pants in two colors
 pieced pants sewing tutorial
                 
Here's the story behind the series, the second part of the series is here, third part of the series is here.                                         

1. Just take any pants pattern

cutting out a pants pattern  

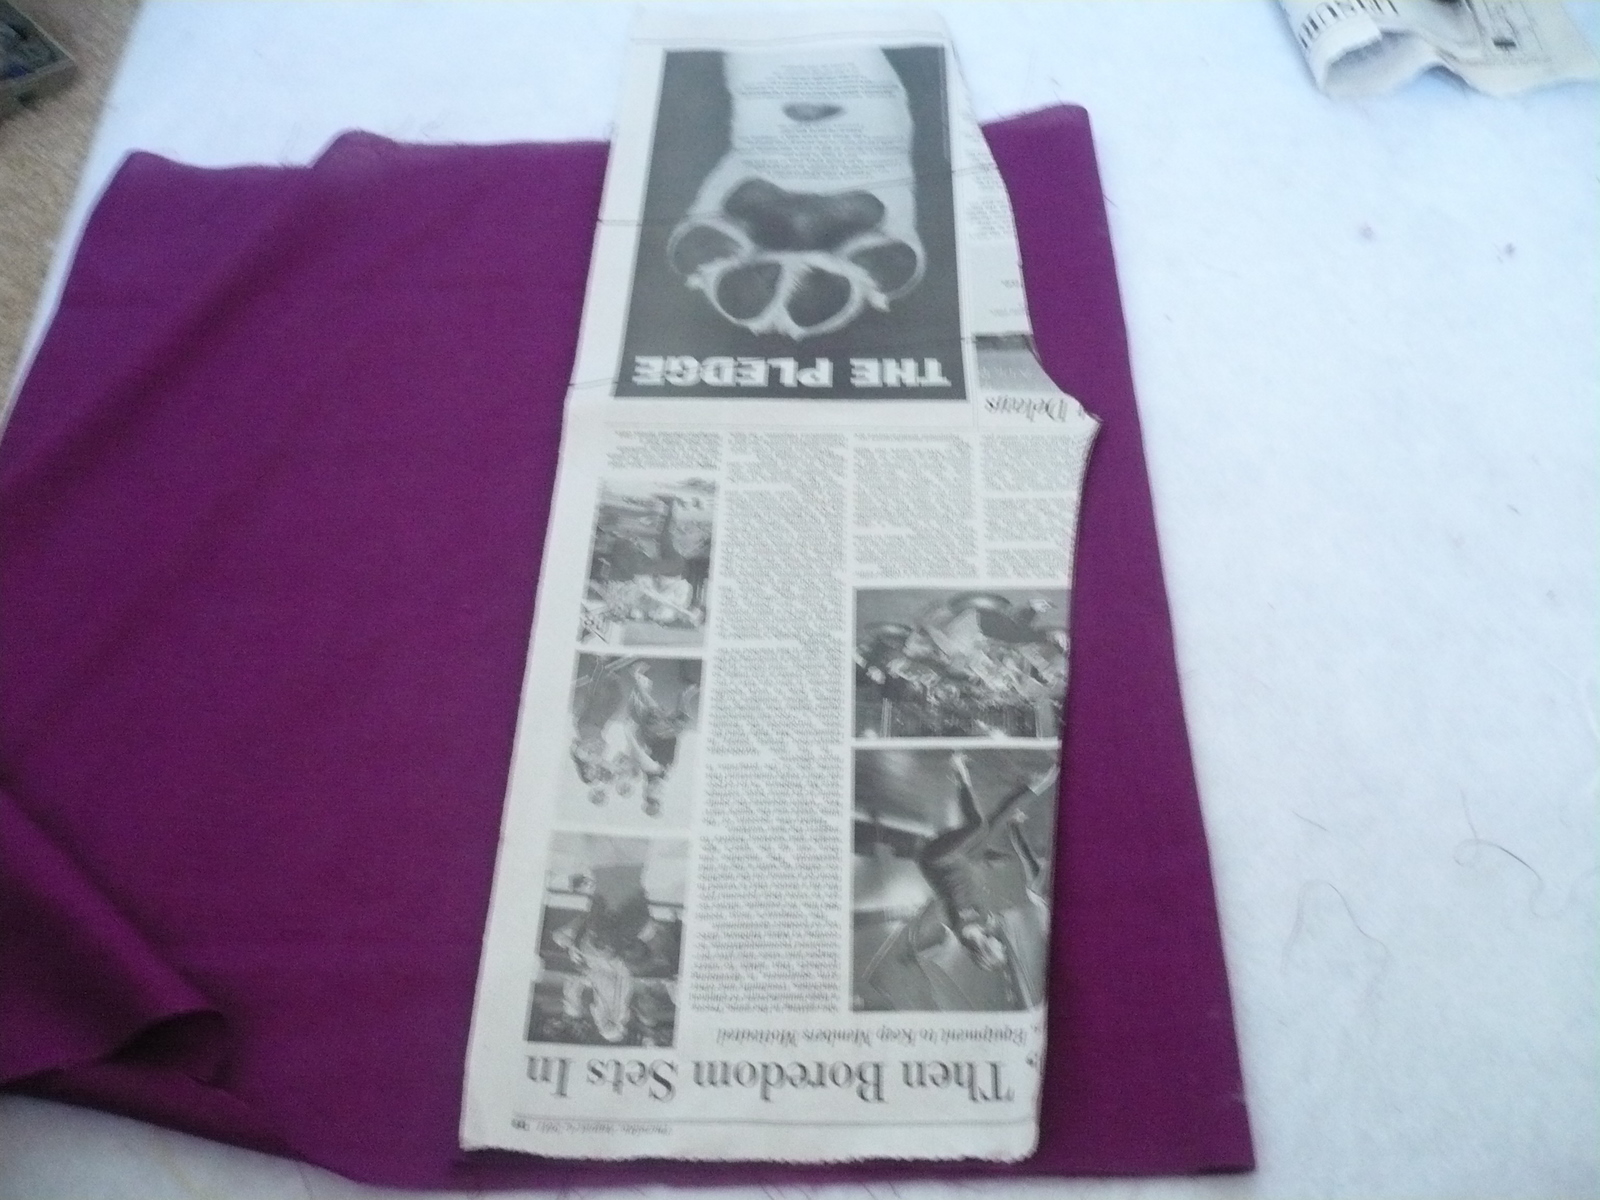
This time we're cutting 4 panels for these pants 2 for front and 2 for back, so no need to cut on fold, juts place the pattern on four layers of fabric and cut. However since we're going to piece another fabric near the bottom, leave out the last 2 inches or so from the pattern. In the above pic, the pattern is placed upside down, so if you look carefully, the bottom 2-3 inches of the pattern( top of the pic...it is upside down) are hanging outside the fabric, meaning that area will not get cut in this fabric.


2.
cutting pieced pants
Here's the pattern traced out and cut 2 inches too short.

3.
pieced pants pattern
Now using a big bowl or any circular object, cut an arc near the bottom of the pants. make sure to cut the arc such that you cut lesser near the curvy part of the pants and more from the straight art. No logical reason for that, it just looks better in my opinion.

4.
sewing tutorial for pieced pants
Now place the cut pattern on four layers of coordinating fabric, make sure two layers are placed right side up and two layers are placed wrong side up.

5.
two color pants sewing pattern

Place your pattern on top of the fabric and align properly with fabric 1.. Trace it on fabric 2, also trace the curve from fabric 1 on fabric 2 and cut.

6.
how to sew pants for kids

7.
Now lets sew the pants
First join the four Fabric 1 panels with fabric 2 panels. Make sure you line up the curves properly.
Clip some notches to help the curve sit straight.

Top-stitch at the right side.

8.
Line up front and back panels, sew at the straight line, right sides together. At this point, it will be helpful to start sewing from the point where fabric 1 and fabric 2 meet and go up first. Then start again from the meeting point of fabric 1 and fabric 2 and go down. This will ensure that the pieces are perfectly aligned. You can always trim if any of the ends have small mismatch.

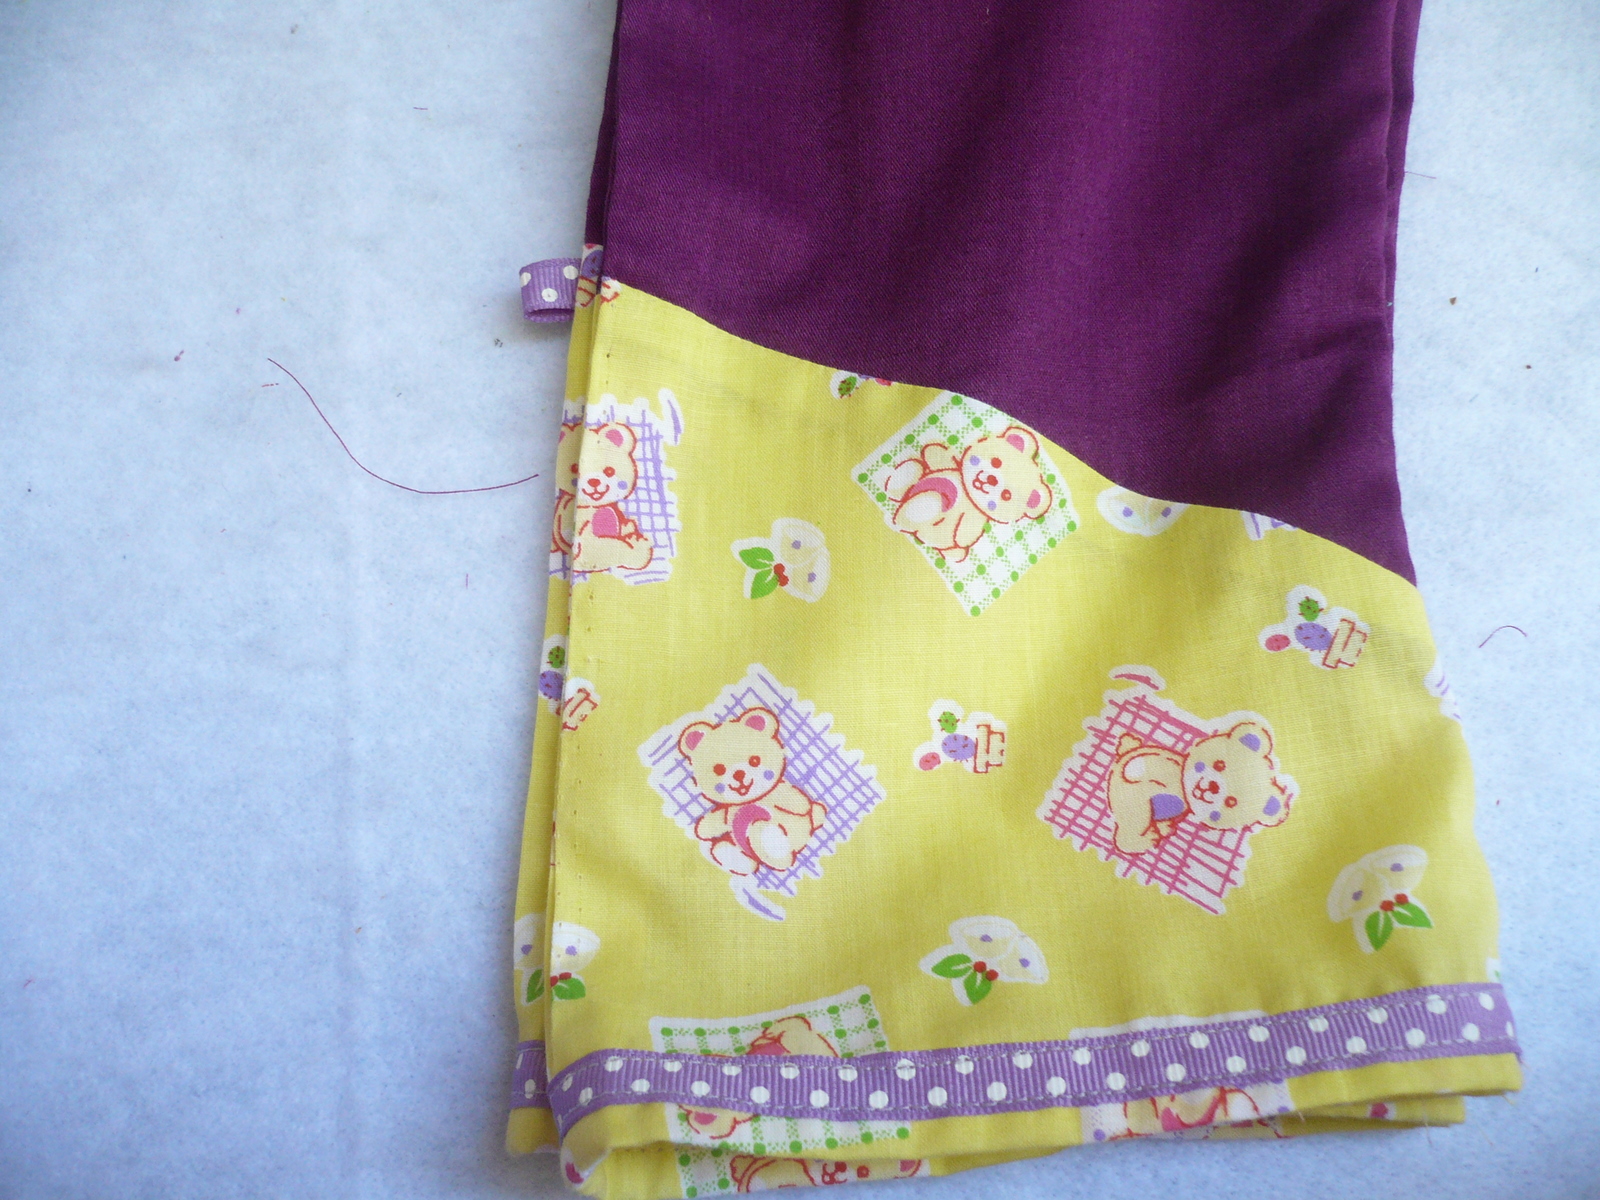
9. Now that you've got your two pieces ( right leg and left leg), just sew them like the basic pants. Don't forget to embellish with matching trims and notions.
And Done!
sewing pants tutorial


And just for fun here's another one of the Grow And Gather dress that I made to go with these pants.

halter neck dress

I think they look great together....Don't they?

pieced pants with dress

Sunday, September 25, 2011

Bottoms up part 3: Rumble Tumble Coveralls

Coveralls sewing tutorial
coveralls sewing tutorial

Here's the story behind the series, the second part of the series is here.

For this edition of Bottoms Up series, I decided to bring you these coveralls. I love coveralls - the front yoke, the shoulder straps, the elastic in the back, all make for a very cute outfit. On the practical side, they are a perfect garment for a small powerhouse, the straps make sure that the pants stay in place during all the jumping, running and other toddler adventures. The denim or corduroy fabrics wear well through the daily washes that kids cloth endure.These will also be a good choice for cooler months ahead. So without further ado, here's how you can make your own Rumble Tumble coveralls.

Supplies:

Denim or corduroy fabric: 1.5 yard
Lining Fabric: 10 inchs X 10 inches 
Closures: 2 ( buttons or snaps )


sewing pattern coveralls

We're using the simple trouser pattern( page1, page 2) for these coveralls with some changes:
1. DONT cut it on fold now, you will need 4 pant pieces for these coveralls
2. Leave top 2 inches of the pants from the pattern, because we'll be making a separate waistband here.
    (Basically just fold 2 inches from the top of the pattern and ignore that part)
Cut all 4 pieces for the trouser from the pattern.  Remember that you don't need a waistband for this pattern so the top of the pants is a little shorter than a regular trouser.

how to sew coveralls

Sew these parts like regular trousers. 
First sew the outer straight seams
Next sew the inseams of the pant legs.
Then turn one leg right side out and push into another leg and sew the crotch seam.
how to sew overalls


Now measure a rectangle of length 5 and width = circular width of the pants' top + 1inch.
Fold and cut it into half such that you get 2 strips of 2.5 X width
These pieces will serve as waistband.


sewing yoke to coveralls
For the yoke front cut an arc of 4 inches X 8 inches.

lining for the overalls yoke


Use it as a template to cut a similar sized lining piece. Sew the yoke and lining( right sides together) along the curve.


Snip some notches all around the seam to help it retain shape after turning out. Turn inside out.

turing out the yoke

Fold into half along the width, and snip a small notch to mark the center.

sewing shoulder straps for overalls

Now lets make shoulder straps:

Cut 2 strips of 4 inches width and 25 inches length. Fold into half along the length and sew along the longer side to make a long tube, turn out. Now iron these straps such that the seam is in the center of one side.

Assembling the yoke and waistband of the coverall:


Take both the 2.5X width strips we earlier cut for waistband. Mark their centers by folding them in half and snipping a notch in them.


Now align the raw edges of yoke and waistband strips such that yoke is sandwiched between right sides of the waistband strips and the notches that mark center of all three layers line up. Sew a seam along the yoke length.

Here's how it will look.


Now sew the waistband to the pant by aligning one raw edge of waistband with the raw edge of pants. Here you need to make sure that not only their right sides are together, but also, you are sewing the side that will keep the yoke right side on the front, after you turn out. You can sew a few stitches and check to see if you're doing it right.


Go all around the pants, joining waistband to the pants. When you reach close to the ends, measure how much you need to finish and use the rest of strip as sewing margins. Sew both ends together. Now finish sewing the seam to join waistband and pants.


This is how it will look at the back. Now place you shoulder straps in the back such that the seam on the straps in facing you. Place the straps 2.5 inches apart at the center of back. Now cover them with the other waistband strip such that it sandwiches both the straps in between waistband.Sew along the raw edges of waistband, making sure you are catching the straps.


Now iron half an inch of the raw side of waistband to fold on the inside.

Now lets insert the elastic in the back:
Sew along the waistband seam (ONLY IN THE BACK), as close to the seam as you can but not over it. This will ensure that you catch the folded waistband on the inside of the pant.


Once you have done this at the back, insert an elastic from one end of back, pull it out at the other end of back. Pull the elastic a bit to gather the waistband. I gathered the waistband about 2 inch lesser than its width
to make it snug in the back. Now sew it on both ends to secure it. Sew along the rest of the seam to finish attaching the waistband.


Now add some closures to the yoke and shoulder straps. You can finish the raw ends of shoulder straps by
serging them, or by pushing them inside a little and top-stitching.

how to sew coveralls

At this point I highly recommend trying these on the baby to determine exact length desired. Mark the appropriate length and use the rest of the length to finish the hems by folding twice and sewing.

rumble tumble coveralls tutorial

Rumble Tumble coverall is ready to accompany your toddler in all her adventures.

Wednesday, September 14, 2011

Knotted baby hat tutorial

Sewing for baby: Knotted hat tutorial
I did this guest post over at Whip Up a few weeks ago. Since then, I have modified the pattern a bit, so the final product looks more finished. Posting it here in case you missed it over at Whip Up and also adding the revised steps (in blue).


With the birth of my niece last month, newborn gifts are on my mind these days...Here's a tutorial for making a knotted hat for newborns. I love making and gifting these hats....because they are useful and practical?....naah...because seriously, what's cuter than a teeny-tiny hat on a teeny tiny head. The fact that hats are particularly pricey and difficult to find in ready-to-wear clothes doesn't hurt either. So without further ado...here's how to make one:

Supplies:

Knit fabrics: Take 2 pieces of same fabric or two different fabric. 

This is a great project to use up those scraps that are too big to throw away but too irregular to make into a dress, top etc.

1. Print out the pattern, tape the two pages as shown and cut both pieces of pattern ( total 3 cuts). Piece 1 spans both the pages whereas Piece 2 is only on Page 1.
Once you cut out all the three pieces, tape both parts of Piece 1 by overlapping the small part over the bigger part, up to the dash (-) mark.


2. 

Fold each fabric in two layers, then fold one more time. Place each pattern piece on fold and cut. So now you have two pieces of 1 and two pieces of 2.

3.

 Sew together pieces of 1 along the conical side, right sides together. Sew together pieces of 2 along the semi-circular side, right sides together. 

Note: Leave  a 2 inch opening while sewing piece 2 ( lining). This is an improvement from earlier version where I leave the opening at the joining seam in step 4.

4. 

Now join 1 and 2 by sewing along the raw edge, right sides together. Leave about 2 inch opening.
Note: It was only after sewing a couple of these hats, that I realized I should have left the opening in inner lining piece instead of the seam joining the two pieces. It was one of those "Duh...I'm so stupid" moment.

5. 

Using the opening, turn the whole thing inside out. Use a pencil or point turner to poke the cone out on fabric 1. 
Note: Slip-stitch the opening in fabric 2 shut. I missed this step when I wrote the guest post. 

Push the fabric 2 inside fabric 1. 

6.

Tie a knot with the cone of fabric 1. 
If the hat is a little big, you can turn some of the bottom out to fit the head of the baby. The best part is that these hats don't have a any inside seams to bother the baby skin. Enjoy your little munchkin...hats and all.

Tuesday, September 6, 2011

Sew Easy - Part 9 - Rosita Layered Skirt


Layered skirt sewing tutorial

You can read the story behind this series and the first part here. Click here to read the second, third, fourth, fifth, sixth, seventh and eighth edition of this series.
 

Here's a skirt that I made this week. I think its a great fit for Sew Easy series because it takes just 4 straight seams to finish the basic structure of the skirt, and the resulting garment looks really good. These are also a good staple for back to school wardrobe.

Supplies: 
2 Adult size Tshirts of co-ordinating colors
Elastic - 1 inch elastic
Embellishments:
Narrow satin Ribbon - 20 inches
Felt piece of matching color - 2X2 inches


Measurements:
Measure the length you want the skirt to be, add half inch. Lets call it L1
Measure the desired length of the smaller layer, a 3-5 inch smaller layer should work L2.
Measure a comfortable elastic length by tying it around the child's waist.If you can't measure the child,
a good rule of thumb is 3 inches less than waist measurement.


Instructions:


1.
sew a skirt with two tshirts


Lay the Tshirt1 flat and cut length L1 from the bottom.
Lay Tshirt2 flat and cut length L2 from the bottom.


You will get two tubes, one of length L2 and another length L2.


Note: In most cases it would be ok to cut through the entire width of TShirt, A good rule of thumb is that
the Tshirt should be at least 7 inch wider and at most twice the waist of child. If it is too narrow, the skirt
would be tight at the butt and even though Tshirt material is stretchy and it will stretch, it wouldn't look good.
If it is too wide, it will gather too much at the waist and look odd. If your Tshirt width doesn't look right, consider cutting off a portion of it and sewing it on one side with right sides together, or piecing it with another Tshirt.

2.


sewing layers together


Now place L2 tube inside L1 tube, with L2 right side together with L1 wrong side.


3.
rosita layered skirt pattern


Sew along the raw edge.


4.
insert elastic in a skirt


Turn L2 out. Top-stitch as close to the edge as possible.


Now sew another seam 1.5 inches below the top-stitching, leave a 1.5 inch opening.


Now insert an elastic through this opening. Join both ends of elastic. Sew the opening shut.


5.
sewing a rossette on a skirt


Make a fabric flower with Tshirt1 fabric. I made a rolled fabric rosette with a felt circle underneath. Hand-sew it to the skirt, near the elastic casing. If you need instructions on making flowers, this post has a bunch of pointers to make different kinds of flowers.
Cut  the ribbon into 2 strips of 10 inches. Fold the strips into two and hand-sew near the flower.


7.
rosita skirt with headband tutorial


While you're making the flowers, make a couple more with both Tshirt1 and Tshirt2. You can make a nifty coordinated hairband with them.
Rosita Layered skirt tutorial


Your skirt is ready.

Thursday, August 11, 2011

Sweetheart Shrug Mini Tutorial

Sweetheart shrug sewing tutorial


Here's the tutorial for making your own sweetheart shrug. This project is very similar to Butterfly Shrug (tutorial here), so I have just highlighted the differences from there. I highly recommend reading the butterfly shrug tutorial first and then coming back to this to better understand it.


Cut the back of the shrug using another shrug for sizing.

For a quick comparison, here's what butterfly shrug front looked like.

Notice that the width is less than the back, neck is higher and it ends with a small straight line, whereas the sweetheart shrug ends with a point.

Here's the shape that I cut the front halves into. Each half is equal to back in width, so together they are twice the width of the back. Notice that compared to butterfly shrug, I kept the neckline much lower in this shrug.


Gather the neck line of front halves. Join with the back at the shoulders.

Now cut a 2 inches wide strip of fabric equal to neckline in length.Sew it along the neckline at the inside ( wrong side of shrug)


Now turn it outside and top-stitch. You will have raw end of the strip showing on the outside. This is ok. We'll take care of it later on.

Add the sleeves ( refer tutorial here). I also cut the cuffs of the sleeves slanted instead of straight, I thought it went well with the heart shaped hemline.
You may go with either slanted or straight sleeves.

Cut scallops on the raw edge of the strip at the neck-line. This will help it sit evenly at the neck. Don't worry about making these perfect, they are going to get covered later on.

Cut a 3 inches wide strip, the length should be twice the neckline. Sew two seams in the center of this strip ( do not back-stitch ) and gently pull the bobbin threads to ruffle it.
Sew it along the neckline. Tuck the ends inside. Sew a pretty Ribbon at both ends of neckline. Add some fray check to the raw ends of the ribbon, or keep it over a flame for few seconds to melt the ends. This will keep the ribbon from fraying.
Finish the hems with rolled hem.