Today I'm guest-posting over at The DIY Mommy. I'm sharing the pattern and tutorial for these boutique style, double ruffle leggings. Check out! And while you are there don't forget to look around for some amazing DIY stuff by Christina.
Wednesday, August 29, 2012
Double Ruffled Leggings Pattern and Tutorial
Today I'm guest-posting over at The DIY Mommy. I'm sharing the pattern and tutorial for these boutique style, double ruffle leggings. Check out! And while you are there don't forget to look around for some amazing DIY stuff by Christina.
Monday, August 27, 2012
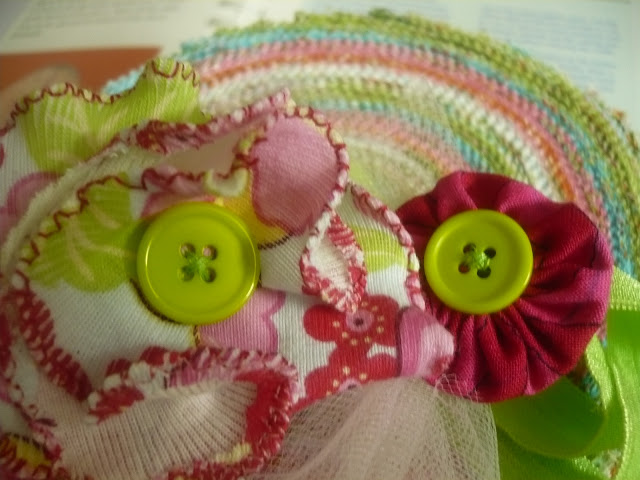
Rolled hem fabric flowers
Supplies:
Knit scraps single color or multiple coordinating colors ( This is a great scrap buster project)
Button - 1 (optional )
Approximate Time: 10 minutes
Construction:
2. Sew rolled hems along the periphery of these circles. It will be difficult to sew the smaller circles so don't try to be perfect again just the best effort. Here's a very good tutorial on rolled hems.
3. Once you have made rolled hem on all the circles layer them one over the other, starting with the largest. Do not try to layer them perfectly, place each layer slightly off center for a more realistic flowery look. snip any loose threads.
4. Once you are happy with the look, hand-sew it on anything your would like to embellish. A couple of stitches just the way you would sew a button would be enough to make it stay. Or if its safe for your child, sew a button in the center.
5. No reason to stop. Make many many more!
6. Of many, many kinds!
Friday, August 24, 2012
Dainty Floral Dress Pattern and tutorial
I had been meaning to sew a very girly dress for a long time. Recently Clothworks sent me this beautiful floral collection called Suzette ( from Sue Zipkin) and it seemed perfect for a dainty girly dress.
Here's the tutorial for the dainty floral dress ( Clothworks blog).
Monday, August 20, 2012
Colorblocked Twirly Jumper Tutorial - Sew Easy Part 15
You can read the story behind this series and the first part here. Click here to read the second, third, fourth, fifth, sixth, seventh, eighth, ninth, tenth, eleventh and twelfth , thirteenth and fourteenth edition of this series.
I have made a gypsy skirt with a pattern quite similar to this. But this style is so easy to make and offers so many possibilities that I wanted to try it again in some other form. Then I saw these two Tshirts in my stash with really bright and cheerful colors and I just had to try a color-blocked jumper. I really love the way it turned out and I also like that its so easy to sew. Here's a tutorial if you want to make one your little bean.
Supplies:
- Knit fabrics in 2 coordinating colors - Since the pattern is cut in circular strips it uses a lot more fabric than regular skirts. I used up 2 XL sized tank tops to make this jumper in 2-3T size. I recommend doubling whatever amount of fabric you use for a regular jumper.
- Coordinating buttons - 2
- Fusible interfacing like Wonder Under by Pellon
Pattern:
Here's the pdf pattern for sewing the jumper in 18-24 months size. Cut 10 pieces ( 5 in each color), use the line that is shown as 'Flush' while cutting your pattern. Ignore the 'Spike' line.
Drafting the pattern:
You could also draft your own pattern for other sizes. It is pretty easy to do it.
First you need to measure the required length of the skirt. This is the length of where you want the jumper to end minus the length of bodice and shoulder straps. Lets call it L1. Now calculate L=L1-0.5 inch
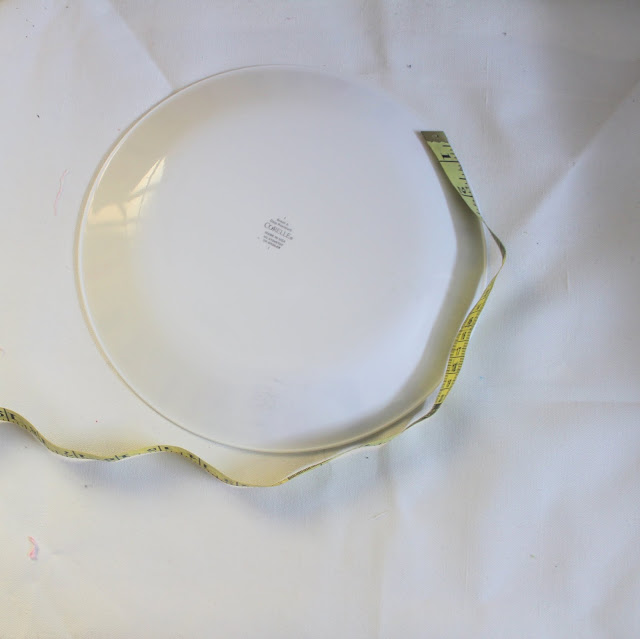
Now take a big bowl or plate and measure L along its circumference. Mark the begin and end points of L. Now take a big paper and draw along the circumference of the bowl, between the points you have marked.
Now draw a 3 inch line starting at the top of the curve you made in step 3.
At the other end of the horizontal line, again place the bowl and draw the curve between the two points. The only thing to remember is that the skirt has to flare from top to bottom, so make sure the bowl is not placed in the same curve as the first one, but makes a curve away from the first one.
Join both the end points. This will become the hemline of jumper.
If you're making a gypsy skirt with uneven hem, draw another line perpendicular to the second curve. Extend the first curve to meet the line we just drew. Lets call this line "SPIKE" and the one we drew earlier "FLUSH". We are going to use "FLUSH" line for this jumper.
Now calculating the number of pieces making the skirt.
First measure the waist and add 2 inches to it - lets call it W
Now lets assume a half inch sewing margin for simplicity. So divide W by 2 inches. The 'quotient' is the number of pieces you will need to finish this skirt. Cut half of the pieces from one color and the other half of them in another color. If the number of pieces is odd then add one more piece to make both the colors equal. It will adjust when we add the waistband by gathering the skirt slightly.
Construction:
Assembling the skirt:
This part is really easy. Basically place convex side of one strip with the concave side of the other strip in different colors and sew with right sides together. Just make sure to keep the top of the strip at the top.
Sewing Shoulder Straps:
Sew both the strips for outer bodice together along the 19 inch side (right sides together). This would make a single bi-colored strip of 6 inch X 19 inch. Fold it in half along the 19 inch side and sew the shorter ends (rights sides together).
Fold the inner strip in half along the 19 inch side and sew the shorter ends ( right sides together)
Sandwich the shoulder straps between the two layers such that its raw side lines up with the raw side of bodice pieces and the strap seam is facing the inner bodice.
Keep the straps 2-3 inches apart with the center falling at the short seam on the bodice pieces. Sew a seam along the 19 inch edge making sure to sew over all the layers including both bodice layers and shoulder straps.
Note: The photo doesn't show that the shoulder straps are only 2-3 inches apart but that's how it should be.
Turn out. The bodice is now ready to be joined to the skirt
Peel the paper backing and fuse with the other fabric on the back. cut out 1.5 inches squares as shown above. Make diagonal slits that stop a little before the center.
Fold alternate corners of each petal towards the center to make a pinwheel. Hand-sew it onto the jumper on the seam joining bodice and skirt.
Repeat with other pinwheels.
Sew on two buttons on each of the shoulder straps. Make buttonholes on the bodice. you may need to use stabilizer if the fabric you're using is not sturdy enough to make buttonholes.
While I was busy taking pictures, a tiny cloud found its way near the jumper and showered a colorful bunch of droplets. Not that I'm complaining.
Friday, August 17, 2012
Personalized Canvas giveaway winner
We have a winner for the personalized canvas print giveaway sponsored by Easy Canvas Prints.
After deleting all the invalid entries ( the ones without an email id), I was left with 8 valid entries. Randomizer at random.org picked #4 which is:
RebeccaJuly 31, 2012 3:46 PM
I would put a pic of my 8 month old son!
Congratulations Rebecca! hope you enjoy your canvas. Watch out for an email from me first and then from Easy Canvas Prints giving you the details on how to claim your prize.
Also a big thanks to Easy Canvas Prints for sponsoring the giveaway.
Thursday, August 16, 2012
Mr. Chef Little Boys Apron Tutorial
Sewing for boys really pushes me out of my comfort zone. But this Gourmet Feathers collection from Clothworks is so cute and boyish. A boyish apron just had to be made. So I made the apron, the pattern and tutorial to go along with it.
See these faux collars and bow-tie. Aren't they just perfect for little Mr. Chef.
And how about a little patch pocket for his tools of the trade?
I'm so in love. Get the Mr. Chef apron pattern and tutorial over at Clothworks Blog.
Wednesday, August 15, 2012
Picnic Pals Organic Cotton Giveaway
Great news! Clothworks is doing a giveaway of their Picnic Pals Organic Fabric bundle and three of Penguin and Fish Patterns on their blog. Go here to enter.
The jungle Dress
These days I'm working on some projects with Clothworks fabrics company. They recently sent me a bunch of fabrics from their Safari Sweet and Picnic Pals line of Organic Cotton Wovens. They're such a cute collection of prints, even little missy fell in love with the animal prints and quickly designated it to be her dress. And you all know that we can't say no when the kids ask us to make them something.
So the dress it is. I'm calling it The Jungle dress.
If it reminds you of something, you're right, because I have made this pattern before here, here and here. I have made these dresses based on this super cute pattern by Kelly of Sewing In No Mans Land.
However, I did modify the pattern to have a really fun surprise for you. For the details, wait for the tutorial. Coming soon!
Thursday, August 9, 2012
Fix your neckline - Guest post at Prudent Baby
I'm guest posting over at Prudent Baby today. There I show you how to fix a plunging neckline. Never pass up on beautiful dresses or tops just because the neckline is a wee bit too low.
Here's another very easy way to fix the neckline on tank tops from our archives.
Monday, August 6, 2012
Color blocked Dress
Every once in a while you come across an awesome sewing tutorial in the blogosphere. It is usually a) Super cute and b) Super Easy.
When that happens I just can't help but raid my stash and whip it up to check it out myself.
The color-blocked dress above is a result of one such gem of a sewing tutorial. Shared by Abby of Sew Much Ado over at Family Ever After. Check it out! Really cool.
Now I just need to embellish the dress a bit and then it will be ready to join all the other clothes waiting to meet my niece. I'm planning to try something really new for embellishing this...lets see how that goes. Will keep you posted, ok.
Wednesday, August 1, 2012
Poppy Fields Maxi Dress Sewing Tutorial
I made this maxi dress for myself a few weeks back and have been wondering why I didn't make more of these ever since. This is just so comfortable ( like PJs), and feels so stylish and trendy ( unlike PJS). So I have been wearing this often and really enjoying it. Since it was refashioned from three ready-to-wear clothes from my stash, I guess there's no point giving the exact tutorial - because you may/may not have the exact pieces in your stash. Instead, I have decided to write some basic construction notes, so you can create a maxi dress with whatever you have on hand, or sew one from scratch. Going by the fact that I have updated almost every thing in the clothes I used, it won't be too hard to sew one from scratch.
Supplies:
One Tshirt - your size or upto two size larger than you.
One Tiered Dress - Your size or larger
co-ordinating knit fabric - I used the flutter sleeves and body of a top.
Construction:
This is the spaghetti dress I started out with. It was two sizes too big, but the jersey fabric and the tiered skirt seemed so comfortable. So I cut off the bodice part of the dress and used the skirt.
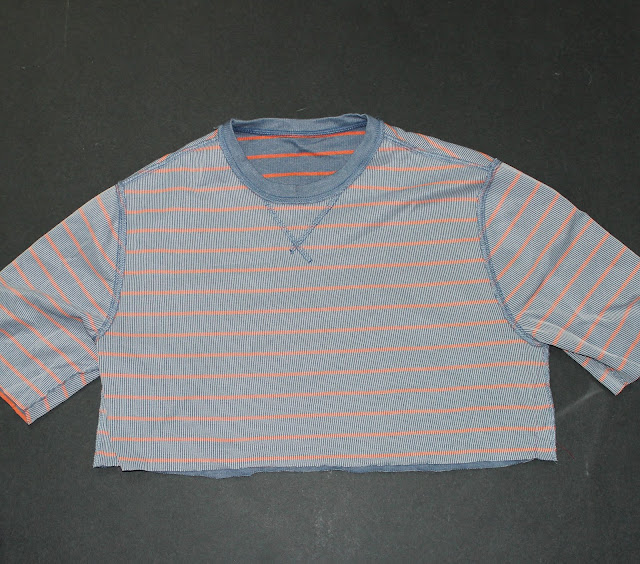
I cut off the bottom of another two sizes big Tshirt so that it sat just below my bust. I also chopped off the sleeves to make it half sleeved. I also took in about an inch from both sides to get the fit better on my chest.
Gather the top of the skirt such that it becomes equal to the bottom of the shirt. Sew with right sides together.
1. The neck was looking too..well..tshirty. I needed to perk it up a bit.
2. The sleeves were too long and looking matronly
3. Needed a better fit at the waistline too.
Cut the neck off to make it V-shaped and get rid of the Tshirty feel.
To finish the neckline. I sewed along these flutter sleeves from another top. These double layered sleeves had a beautiful trim. I think they are the one detail that really made the dress.Sew them along the neckline ( wrong side of neck with right side of sleeves), when one sleeve ended, I just overlapped the other one a bit and kept going. Once the neckline was done, I kept sewing the sleeves( now collar) on the bodice to give a faux kimono bodice look.
Turned the collar outside, topstitched close to the edge. I was actually going for a kimono bodice look, but the final neckline looks like I have wrapped a scarf around..but I like it even more this way. A very cool and laid back vibe. Very me, I think.
To help define the waistline better, I added a grosgrain ribbon at the front. I sewed along the upper and lower edges of the ribbon only in the front. And left a good amount of it at the back to be used as waist ties.
Also hemmed the sleeves, they are now about as short as they can be without making the dress sleeveless.
Tried the dress, one more time. Fit was great, The new neckline - check! The only issue. The upper and lower patterns were too distinct, they looked like they had nothing to do with each other - which they actually didn't until a few hours ago - but we can't let that knowledge become public, right? Right!
So I added a cheerful wide orange polka dot ribbon at the hem.
There! Much better! but needs just a little more cheer. Nothing that a bouquet of blazing, blooming poppies can't fix. Here's how I made these fabric flowers
I tacked on some big, bold fabric flowers. Tried the thing on one more time. And oh! its perfect.
Poppy Fields Maxi Dress. Done!
Subscribe to:
Comments (Atom)


