Thursday, August 18, 2011
Wednesday, August 17, 2011
Military and Lace Dress
I have been alive and kicking, and sewing. But blogging? not so much. There has been a birthday celebration, a festival celebration and some plain simple lounging around and in all that flurry of activity ( and inactivity), blogging took a back-seat. I should have warned you about not posting "Sew-Easy edition" last week. I didn't do it only because I thought, I would be able to slip-in something under the wire at the last moment. Which obviously didn't happen. If my lack of posting and not keeping my word on Sew-Easy series disappointed you, I'm sorry, I really am.
I thought I would become this super-woman and juggle everything at once, but I finally realized that I'm not a super-woman after all. So I just cooked, and laughed around with friends, and listened to the music and watched some movies, and showered little one with kisses and hugs, and oh! did some sewing.
In short I cut myself some slack...wouldn't you do the same...please.
Now that I'm kind of recharged, I'm getting ready to share all that sewing with you and I have some pretty exciting line-up for you. I hope it will more than make-up for my absence. The tutorials and other things ( wink, wink) will start sometime over the weekend. But for now, here's a sneak peek of what to expect...
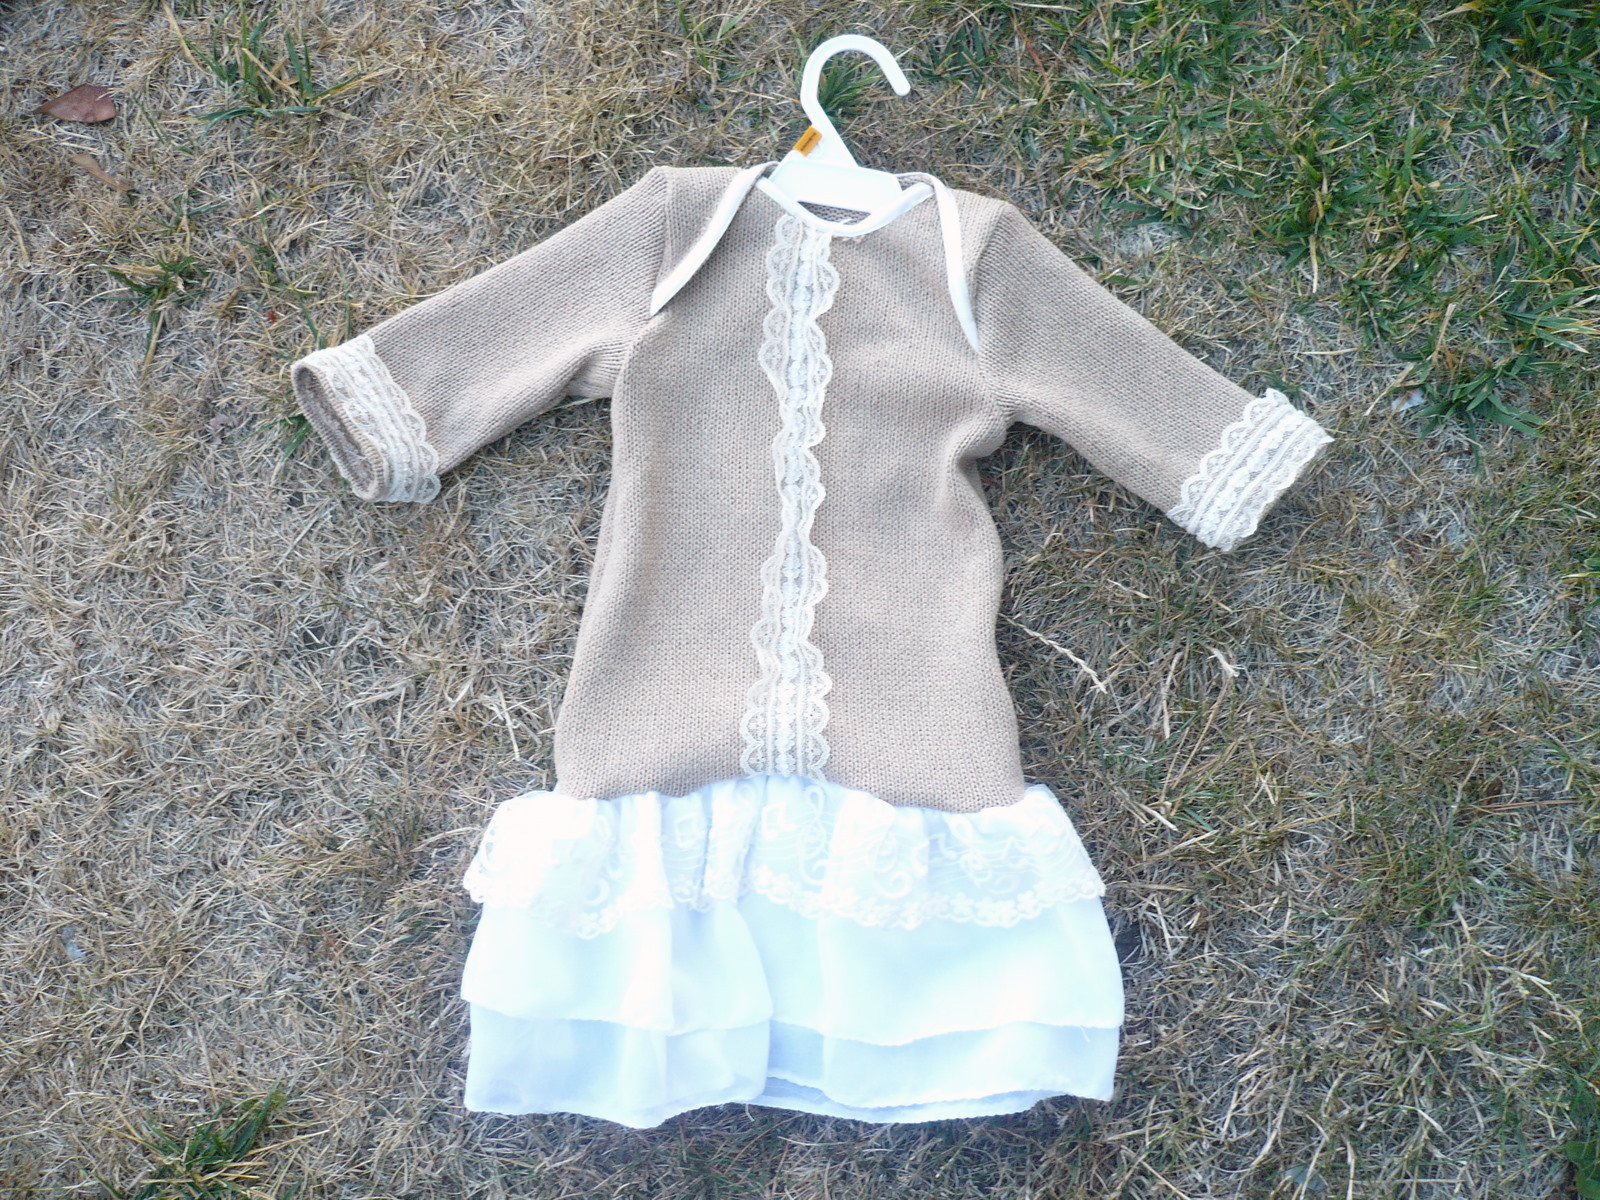
Shown above is a Military and Lace Dress made with a knit woolen fabric and Georgette and of course, lace, lots of it.
Yes the tutorial is coming soon.
Thursday, August 11, 2011
Sweetheart Shrug Mini Tutorial
Here's the tutorial for making your own sweetheart shrug. This project is very similar to Butterfly Shrug (tutorial here), so I have just highlighted the differences from there. I highly recommend reading the butterfly shrug tutorial first and then coming back to this to better understand it.
For a quick comparison, here's what butterfly shrug front looked like.
Notice that the width is less than the back, neck is higher and it ends with a small straight line, whereas the sweetheart shrug ends with a point.
Gather the neck line of front halves. Join with the back at the shoulders.
Now cut a 2 inches wide strip of fabric equal to neckline in length.Sew it along the neckline at the inside ( wrong side of shrug)
Now turn it outside and top-stitch. You will have raw end of the strip showing on the outside. This is ok. We'll take care of it later on.
Add the sleeves ( refer tutorial here). I also cut the cuffs of the sleeves slanted instead of straight, I thought it went well with the heart shaped hemline.
You may go with either slanted or straight sleeves.
Cut scallops on the raw edge of the strip at the neck-line. This will help it sit evenly at the neck. Don't worry about making these perfect, they are going to get covered later on.
Cut a 3 inches wide strip, the length should be twice the neckline. Sew two seams in the center of this strip ( do not back-stitch ) and gently pull the bobbin threads to ruffle it.
Sew it along the neckline. Tuck the ends inside. Sew a pretty Ribbon at both ends of neckline. Add some fray check to the raw ends of the ribbon, or keep it over a flame for few seconds to melt the ends. This will keep the ribbon from fraying.
Finish the hems with rolled hem.
Labels:
DIY,
free,
free pattern,
instructions,
shrug,
Tutorial
Wednesday, August 10, 2011
Link Love this week
Image courtsey Sullivan via MorgueFile
Last week's tutorials have been featured at a lots of places this week as well. It just goes on to show that people are interested in sewing and crafting, its just that they are looking for some quick and easy projects to begin with.
Sew Easy - Part 5( Strawberry Vanilla Dress) was featured at One Pretty Thing. It was also featured at Delicate Construction.
Sew Easy - Part 6(Reversible Zen Dress) was featured at One Pretty Thing.
Knit Rossette Dress was also featured at Craft Gossip and One Pretty Thing.
Summer Spring Necklace had been featured by One Pretty Thing.
Thanks a lot and welcome to the readers stopping by from Craftgossip, One Pretty Thing and Delicate Construction . Hope you have fun here. Don't forget to take a look at some of the popular posts listed on the sidebar. I also have a tutorials page now, listing all the free tutorials at one place. Check it out. Happy sewing.

Tuesday, August 9, 2011
Peek a Boo: Strawberry Vanilla Dress - with toppings
The strawberry Vanilla Dress I made last week. I wanted to gift it to a little girl who is celebrating her birthday this week, but I felt that it was lacking something.
There was nothing to tie the pretty print on the bottom to the red on the bodice. I took a stock of the trims and notions I had. One sew on butterfly and one red polka dot trim later...I was done.
I think it looks complete now - ready to go to the little one it was destined for.
Monday, August 8, 2011
Fit for a princess
Once upon a time, there was a teeny-tiny princess. She was beautiful and always dressed impeccably. She knew what to wear when, and whatever she wore it always looked good.
One day princess had to throw a party, she chose a beautiful pink dress for the occasion, and beautiful pink shoes. She had just the right crown to go with them.
But when it came to gloves, princess was lost...where did she keep them? In the closet? In the dresser? On the nightstand? Where, Oh where could my gloves be? She looked everywhere, but couldn't find them.
Princess was perplexed, how could she go to the party without her gloves, but how will she find them? Then she remembered she knew a seamstress, who could just make them for her. She asked the seamstress, seamstress laughed - who misses the chance to dress a princess. Sure she would make them, after all, nobody says no to a princess.
So the seamstress got to work and delivered the gloves, just in time for the party. Princess put on her gloves, and smiled. Her outfit was complete!
Does your princess need gloves too?
I took about a fat quarter of Lace for main fabric and a fat quarter of flannel for the lining to make these gloves for a 3 year old.
I didn't have the child to measure but if you have the wearer with you, its always better to measure. From the back of the middle finger (at the point where finger is attached to the hand), measure how long you want the gloves to be. Add 1 inch for seam allowance. Lets call it L1.
Also measure the length from back of middle finger to just below the wrist. Around the place where a watch would sit. Lets call this L2.
Measure around the wrist. Add 1.5 inches for seam allowances. Lets call it W1.
Measure arm around the end point of glove. Add 1.5 inches for seam allowances. Lets call it W2.
Now lets draft the pattern with these measurements:
At one edge of paper measure L1. Lets call the end points A and B.
At the end of L1 draw a perpendicular line W2/2. Lets call its end point C.
From the begininng of L1, measure L2. At point L2 draw a perpendicular line W1/2. Lets call it D.
Join the ends of the two perpendicular lines ( C and D)
Join D to the beginning of L1 - making a triangle at the top. Use this diagonal line as a guide to draw a curve from L1 start point to point B.
In the above diagram line between C and D is looking much more slanted. In reality its almost straight. So don't get confused if your pattern doesn't look exactly like the diagram above, just go with you measurements.
This is your pattern, cut it out.
Now cut two pieces of main fabric on the fold. Cut two pieces of lining on the fold.
Mark point D on all four pieces ( 8 layers).
Now place Lining and main fabric right sides together and sew along the curved Line from point D n one side to the other side point D. When you're close to the peak of the glove, insert a small elastic loop between the two layers, sew over it 3-4 times to secure in place.
Cut small notches along the curved seam, taking care not to cut into the seams. Now open at the seam you just sewed and join sides of the lining right sides together continue when you reach the seam to sew main fabric right sides together.
Now turn the whole thing inside out. Push lining back into the main fabric.
Make sure the all the edges have been turned out properly. Now tuck the raw edges in, by sandwiching them between main fabric and lining at the bottom of the glove. Top-stitch.
Repeat for the other glove.
Embellish if you want.
Put on your princess.
Admire!
Saturday, August 6, 2011
Sew Easy - Part 6: Reversible Zen Dress
This week lets make an A-line reversible dress. When I thought about doing this tutorial, I was surprised at why didn't this idea came to me earlier. This dress has very simple cutting, and very simple sewing and yet the finished garment looks something that would take a lot of effort. A perfect sew easy.
Not only is this easy to sew, its also very easy to put on the child and take off. And if she spills some sauce on one side just put it on from the other side. No wonder the first name that came to my mind was Zen Dress.
So lets get started.
Supplies:
Two coordinating fabrics half yard each
Two set of closures of some kind ( snaps, Velcro, buttons etc)
For measurement: An A line dress that fits the child.
Cutting:
Lets lay out the fabrics first ( lets call fabric 1 - F1, fabric 2 - F2 )
Fold F1 lengthwise in half.
Fold it again lengthwise in half.
Fold F2 similarly and place it over the F1. Also fold the dress in half lengthwise and place it on fold.
Mark the neck front.
Draw an outline around the dress with some margins at the side seams for seams. I have kept the margins more because I wanted the dress to be wider than the original.
When you reach shoulders just extend the neck and armhole such that it extends 2.5 to 3 inches above shoulders and then round it towards the end.
Cut across all the layers.
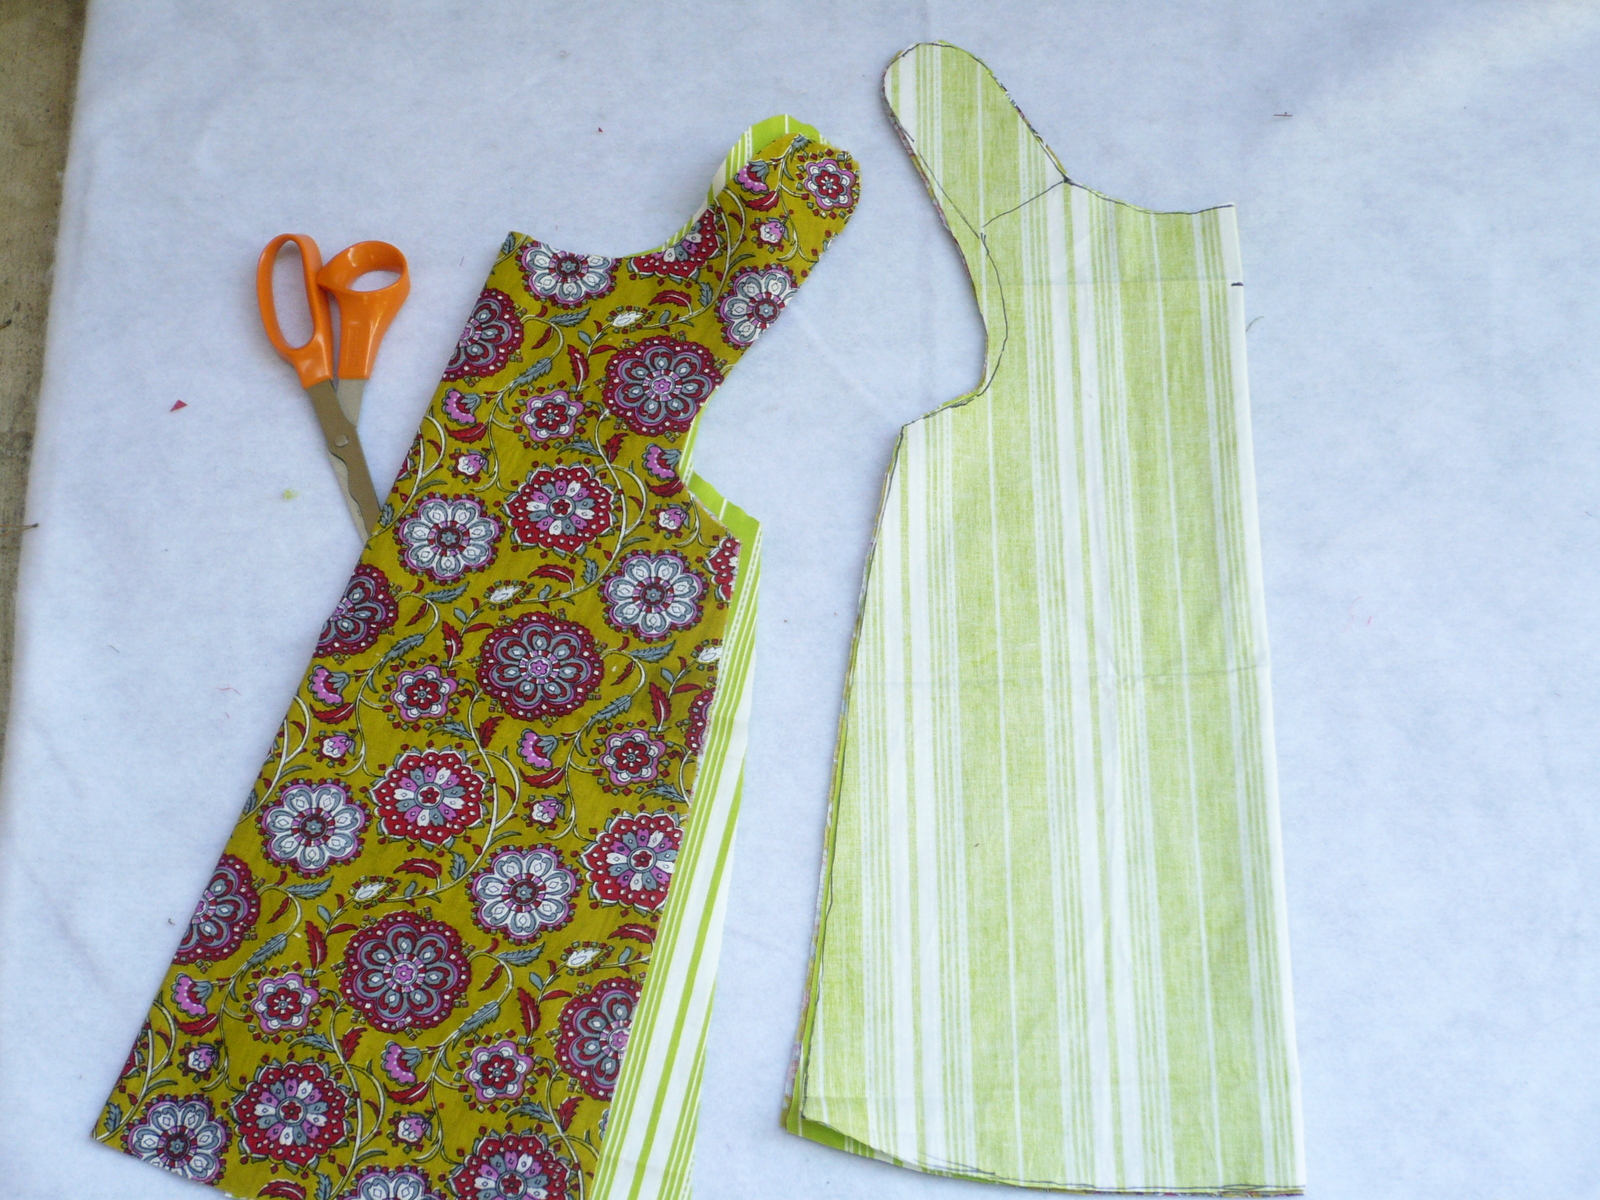
Pull out one layer of F1 and one layer of F2. This is the back of the dress.
To cut the front, draw a curve between the points that we had marked earlier, between the front neck and shoulder.
Also draw a line 1 inch above the shoulder as shown in the pic above.
Cut the deeper front neck and the line above the shoulder that we just marked. In the above pic the back pieces are on the left and the front pieces are on the right.
Now take both F1 pieces and place one on top of other right sides together. Similarly take both F2 pieces and place one on top of other right sides together. Make sure both pieces are aligned at the sides.
Sew the side seams. The seams are not visible in the above pic so I have marked the seams with a blue line. Its still a little hard to see though.
Turn F2 inside out.
Slide the whole dress inside F1 such that F1 and F2 right sides are together.
Now sew joining F1 and F2 starting at front of neckline
and continue on shoulder, armholes, back shoulders, neckline etc until you are back at the starting point. Go easy and take your time aligning F1 and F2. This is a very simple dress with just 4-5 seams total, but if you mess up the alignment of the two fabrics, you will be left with a wonky garment where one fabric will be doing a peek-a-boo on the other side.
Cut small notches throughout the seam you have just sewn. Don't forget to snip the corners of squares at the front shoulders. These notches make it easy to turn out curvy seams and help fabric lie smoothly. Just take care of not cutting into the seams while making these notches.
Turn the dress inside out. Use a pencil to turn out all the corners of the dress.
Iron the dress to smooth out any misalignment while turning. Also iron the hemline inside about half inch on both F1 and F2 as shown above. Make sure that the hemlines are exactly equal for F1 and F2 and iron them well so that they don't show on the other side.
Top-stitch the hemline with both F1 and F2 together.
I also recommend top-stitching the neckline ( which here means neckline, shoulder, armholes) though its not necessary.
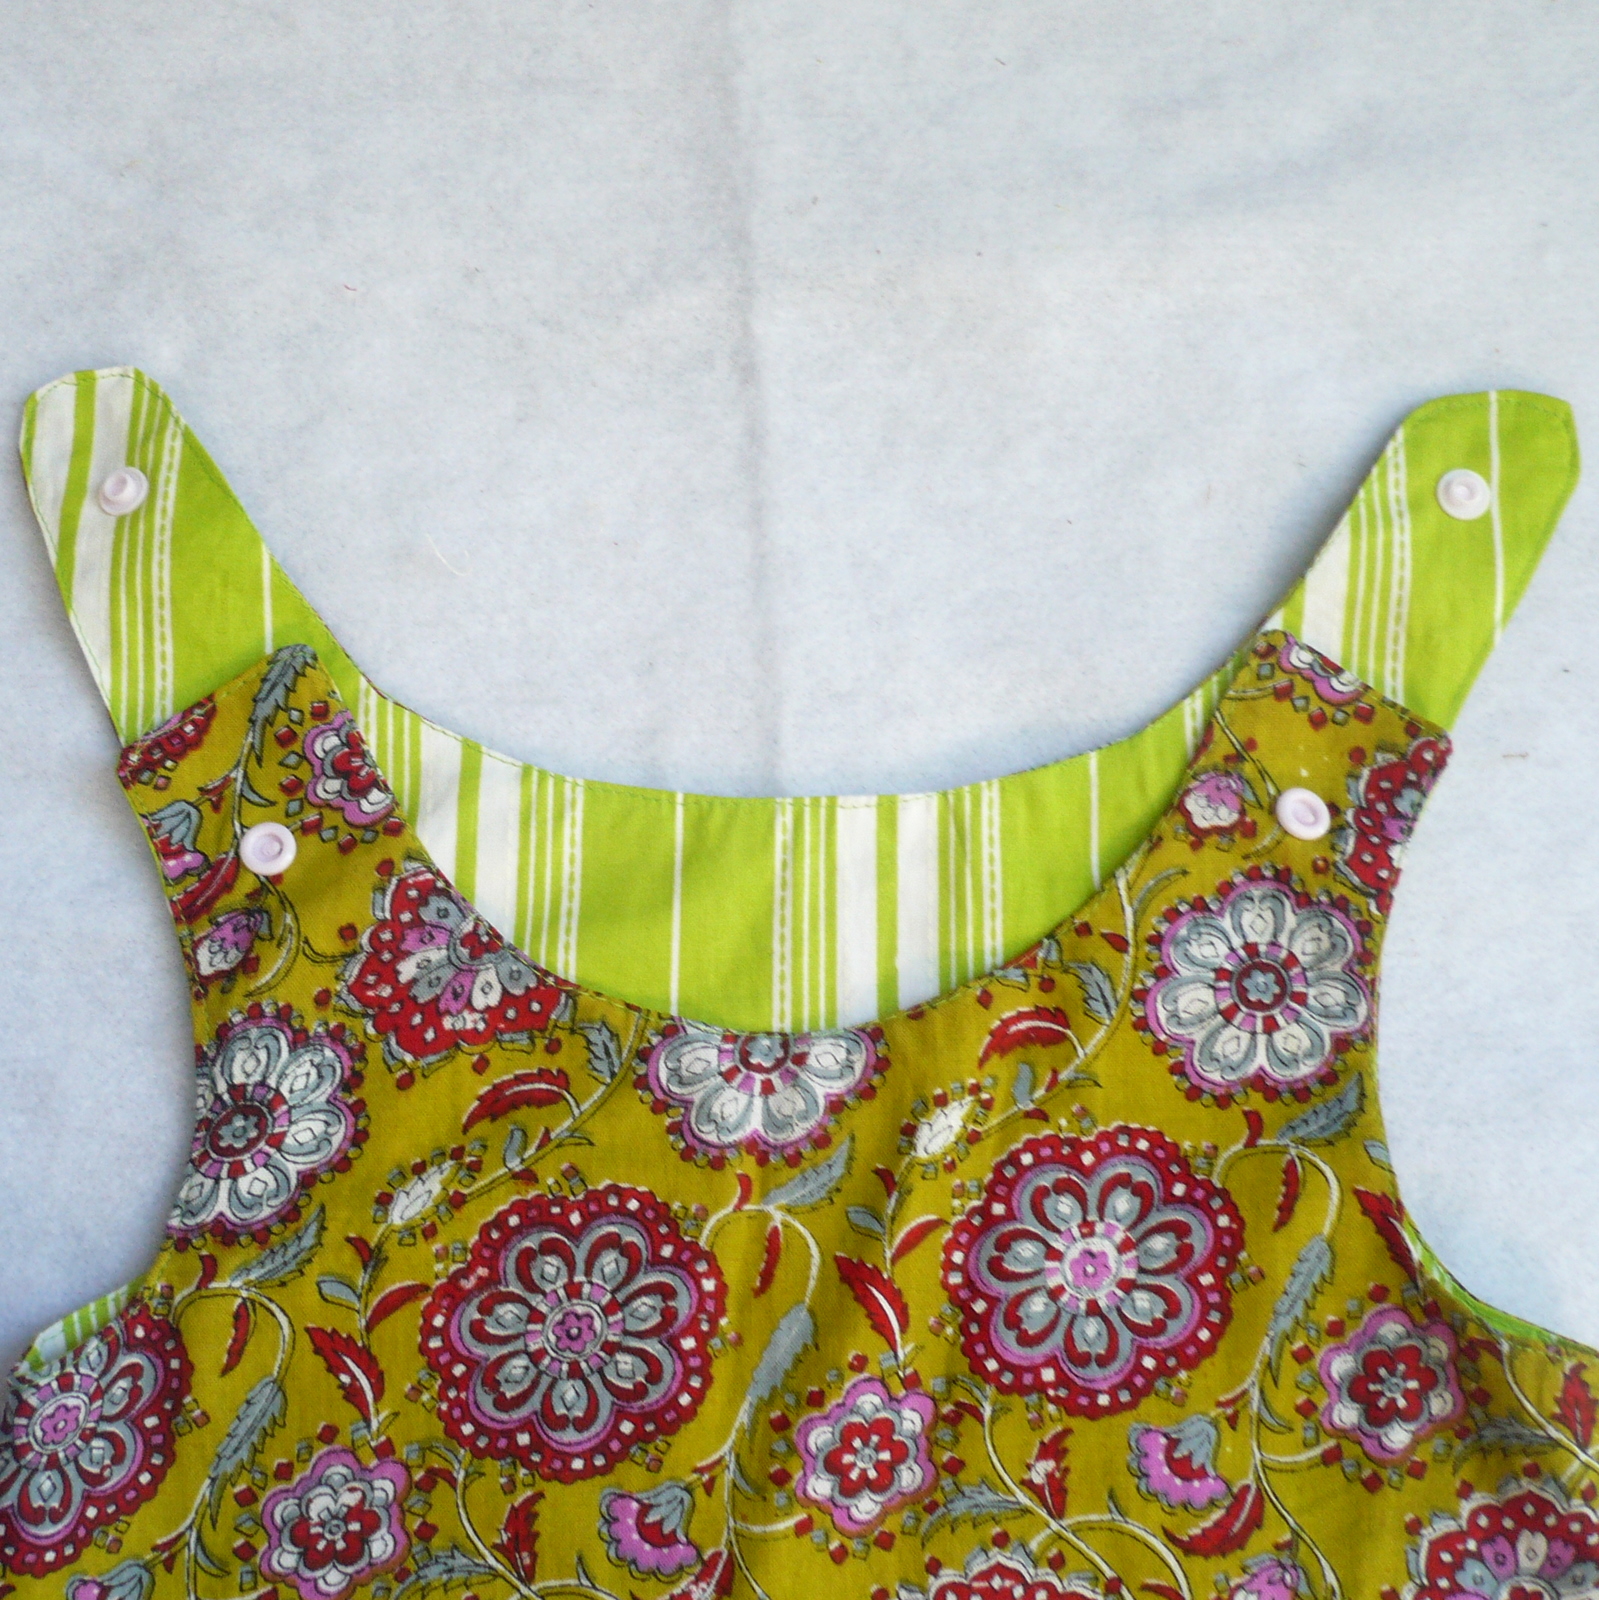
Add closures on both shoulders. I have used snaps because I had the snap pliers and they take the least amount of time. But you can add velcro or buttons as well.
And Done! Enjoy the dress, Right side..
.
Or Wrong!
Here are the links to more editions of the Sew Easy sewing tutorials.
Sew Easy Part 7: Knotted Fringe Dress Sewing Tutorial
Sew Easy Part 8: Circular Bodice Dress Sewing Pattern
Sew Easy Part 9: Layered Knit Skirt Sewing Tutorial
Sew Easy Part 10: Striped Knit Jumper Dress Sewing Tutorial
Sew Easy Part 11: Nordic Prince Tuxedo Tshirt Tutorial
Sew Easy Part 12: Layered Skirt with pickups sewing tutorial
Sew Easy Part 13: Box Pleated Skirt Sewing Tutorial
Sew Easy Part 14: Nautical Dress Sewing Pattern
Subscribe to:
Posts (Atom)